How to Activate an eSIM: iPhone & Android Step-by-Step
Activating a travel eSIM takes three things: install the plan on your phone, switch it on, and turn on data roaming so it connects abroad.
The whole process happens on your screen in a few minutes, with no card to insert and nothing to collect. It is the easiest way to get online abroad without swapping SIM cards or paying roaming fees. Below you will find the exact steps for both iPhone and Android, plus the two settings that trip most travellers up.
Trusted by 750,000+ travellers across Europe · Set up in minutes · 24/7 support
How to Set Up Your eSIM on iOS
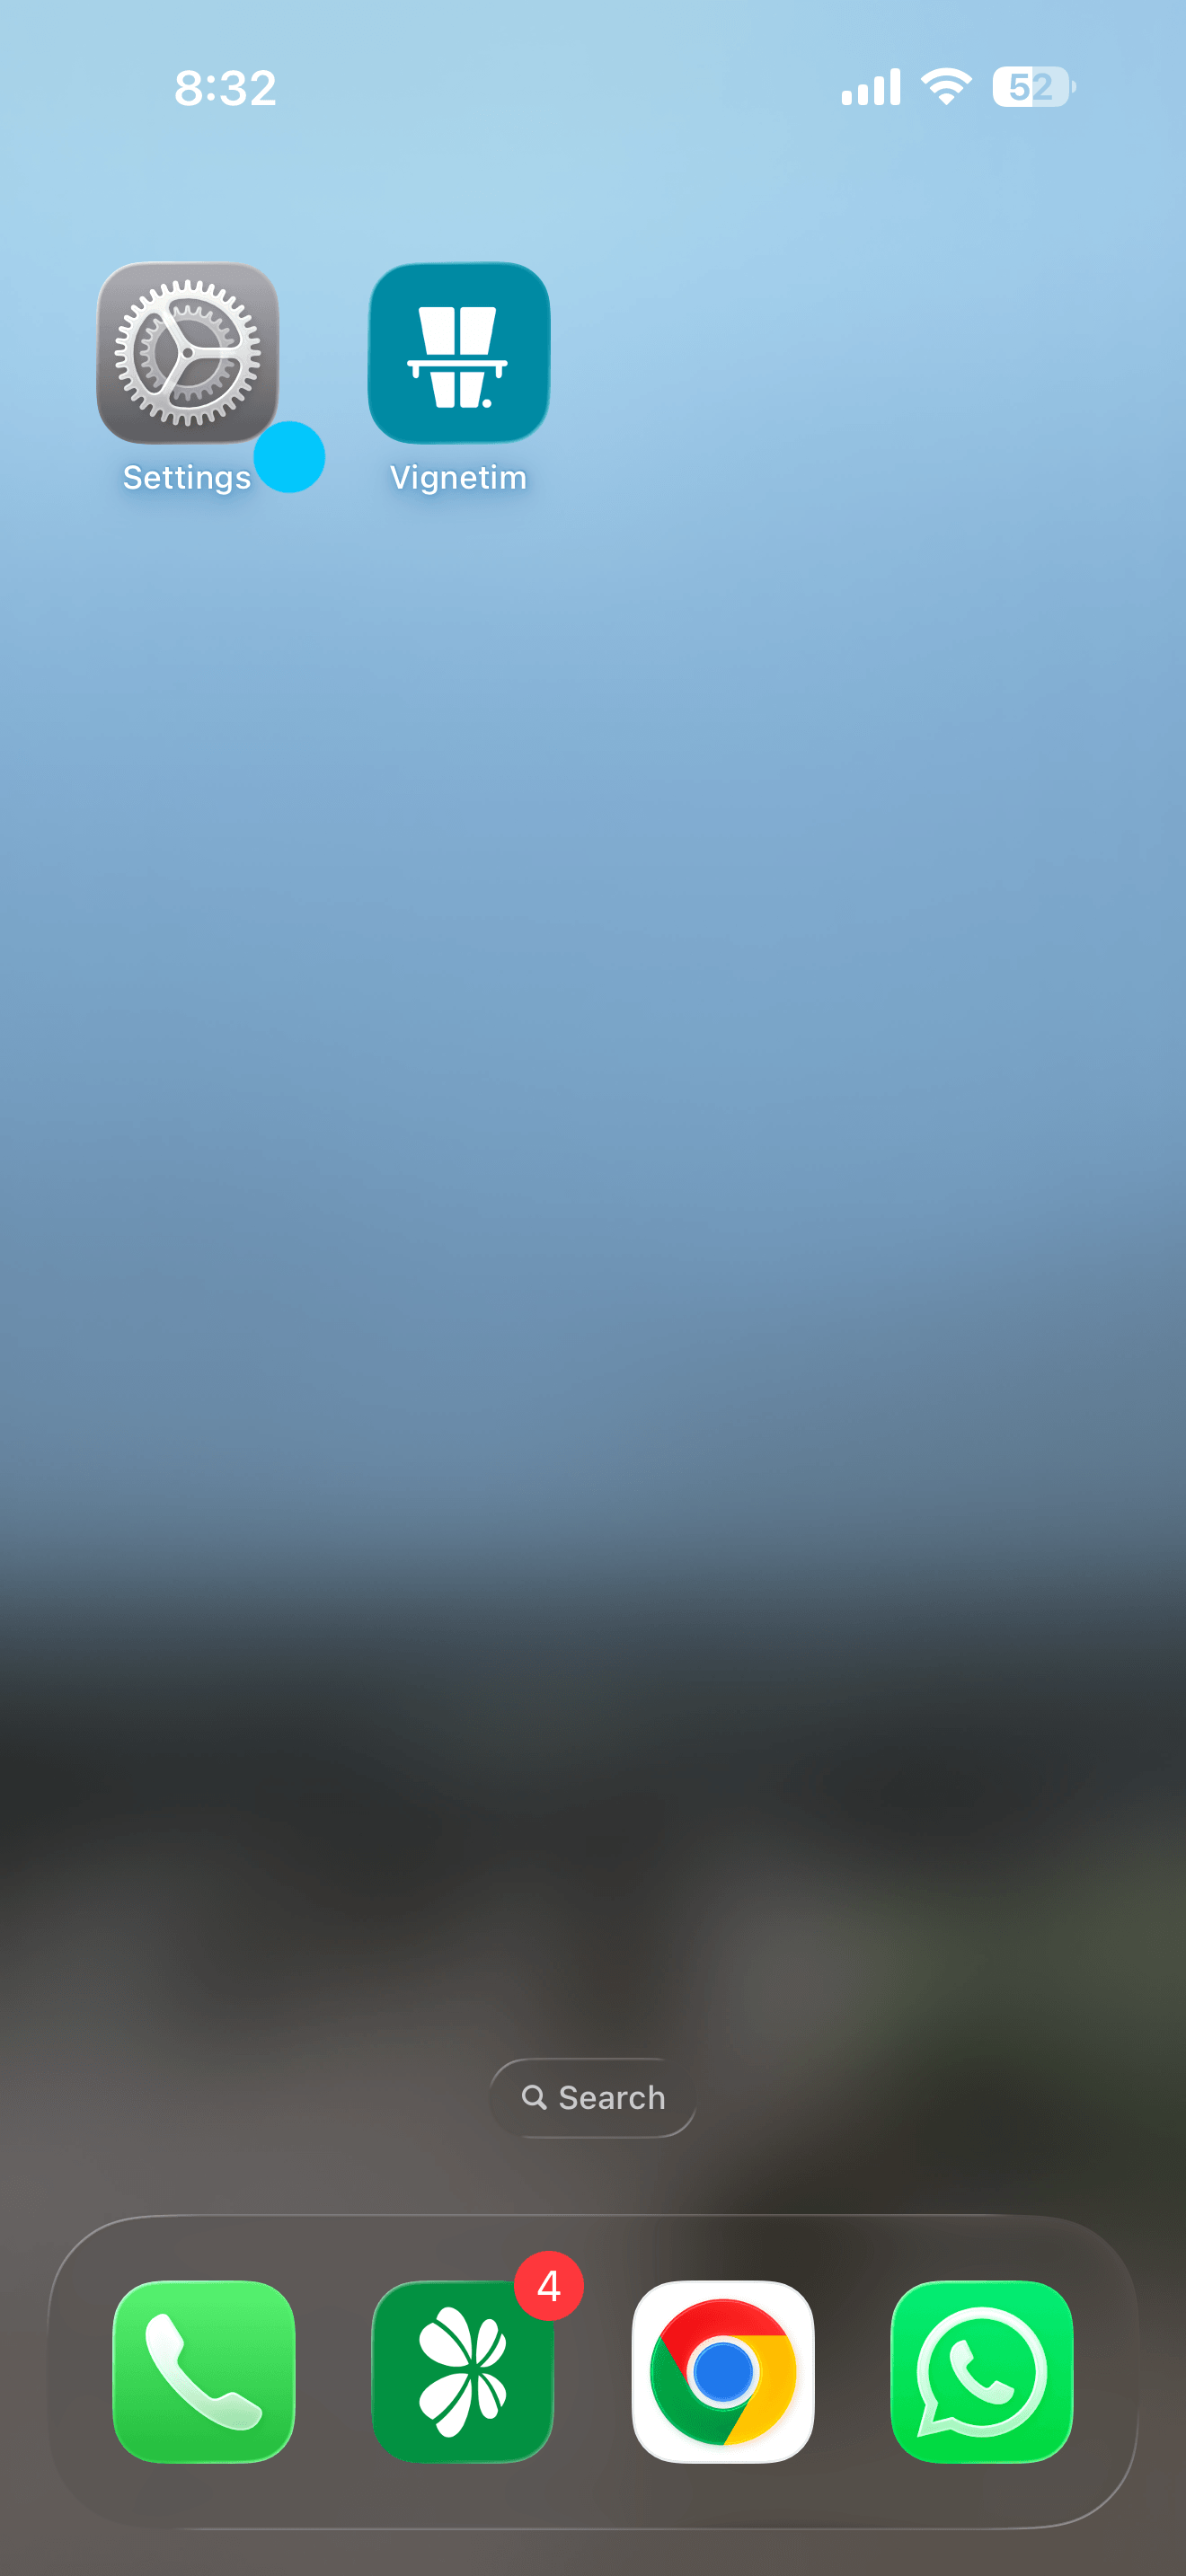
Step 1
Go to your home screen and open Settings.
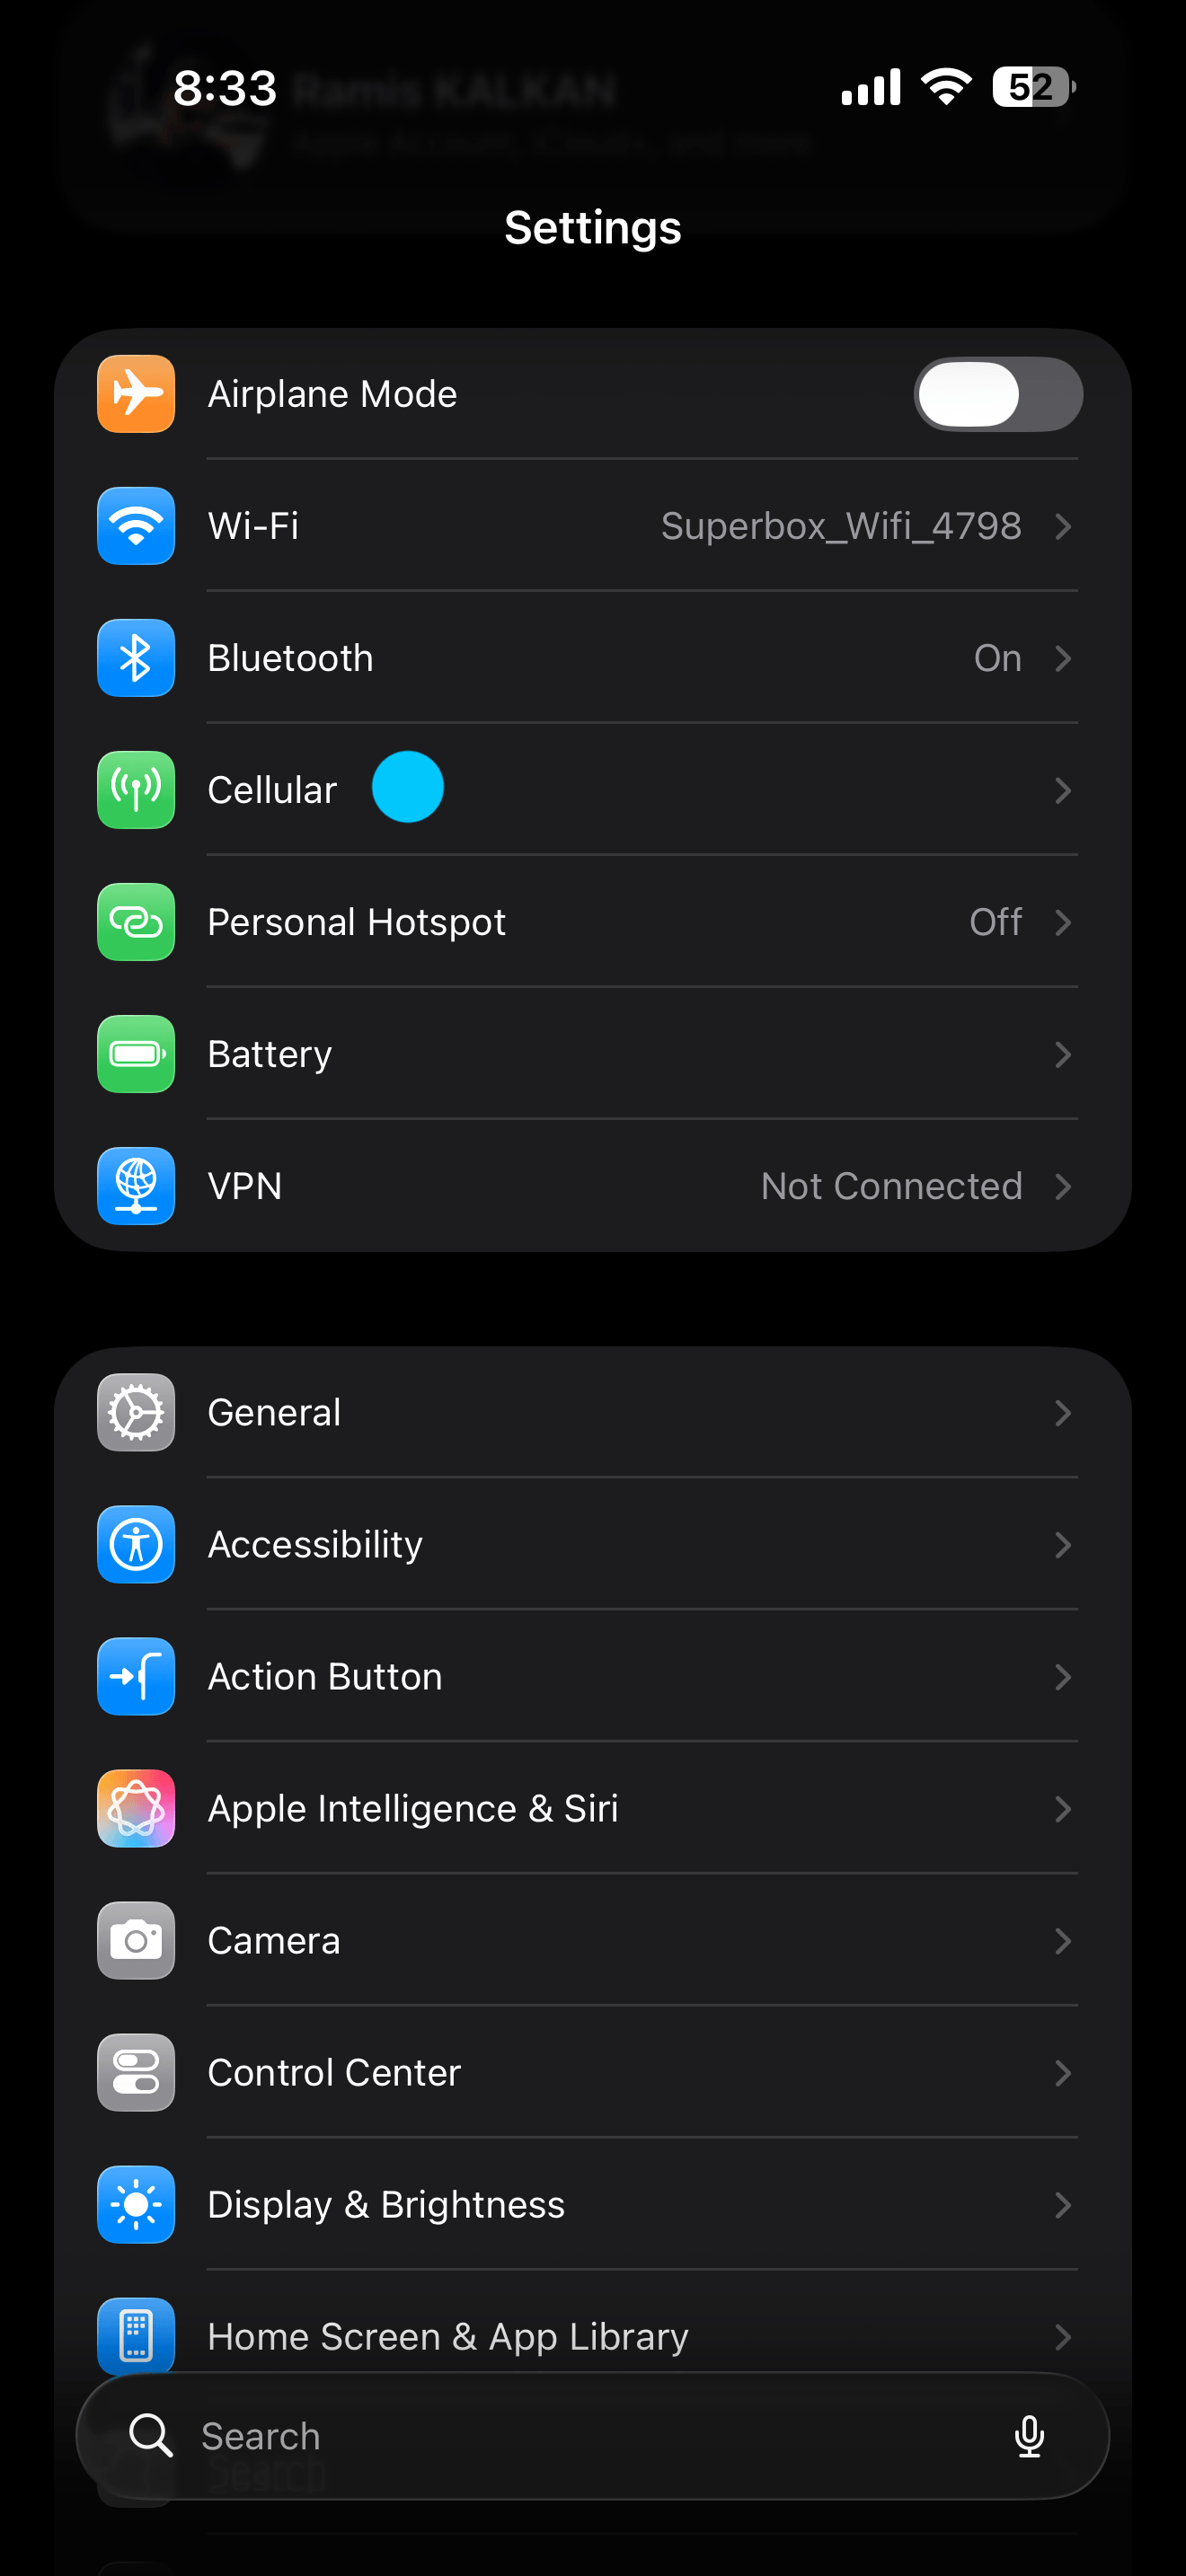
Step 2
Scroll down and tap Cellular.
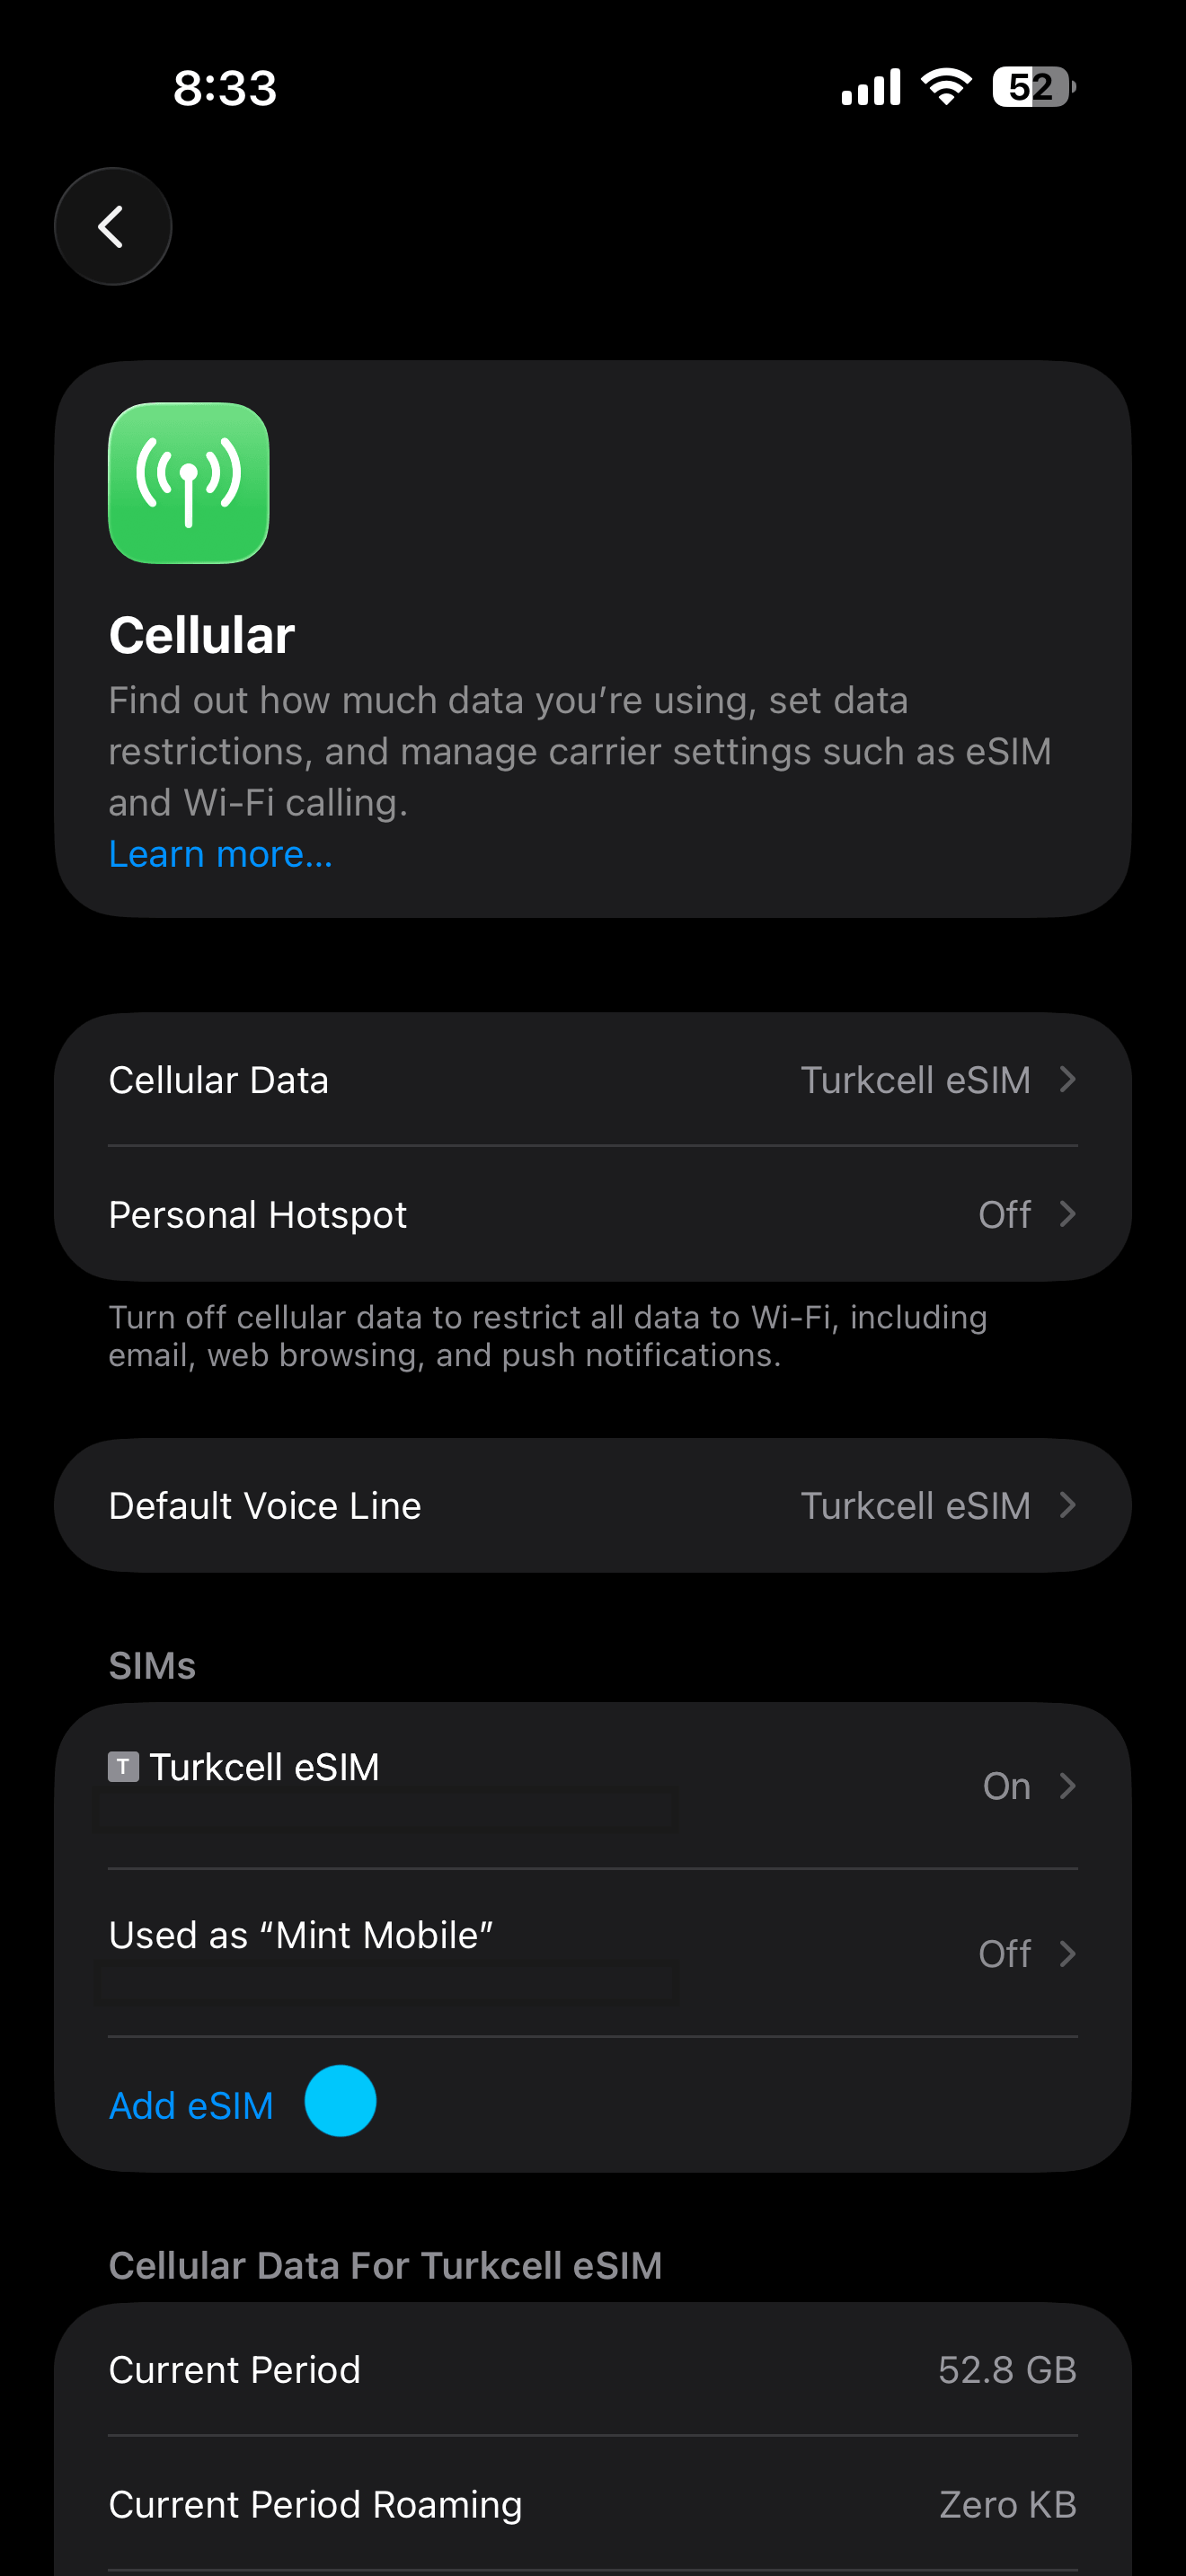
Step 3
Tap Add eSIM.
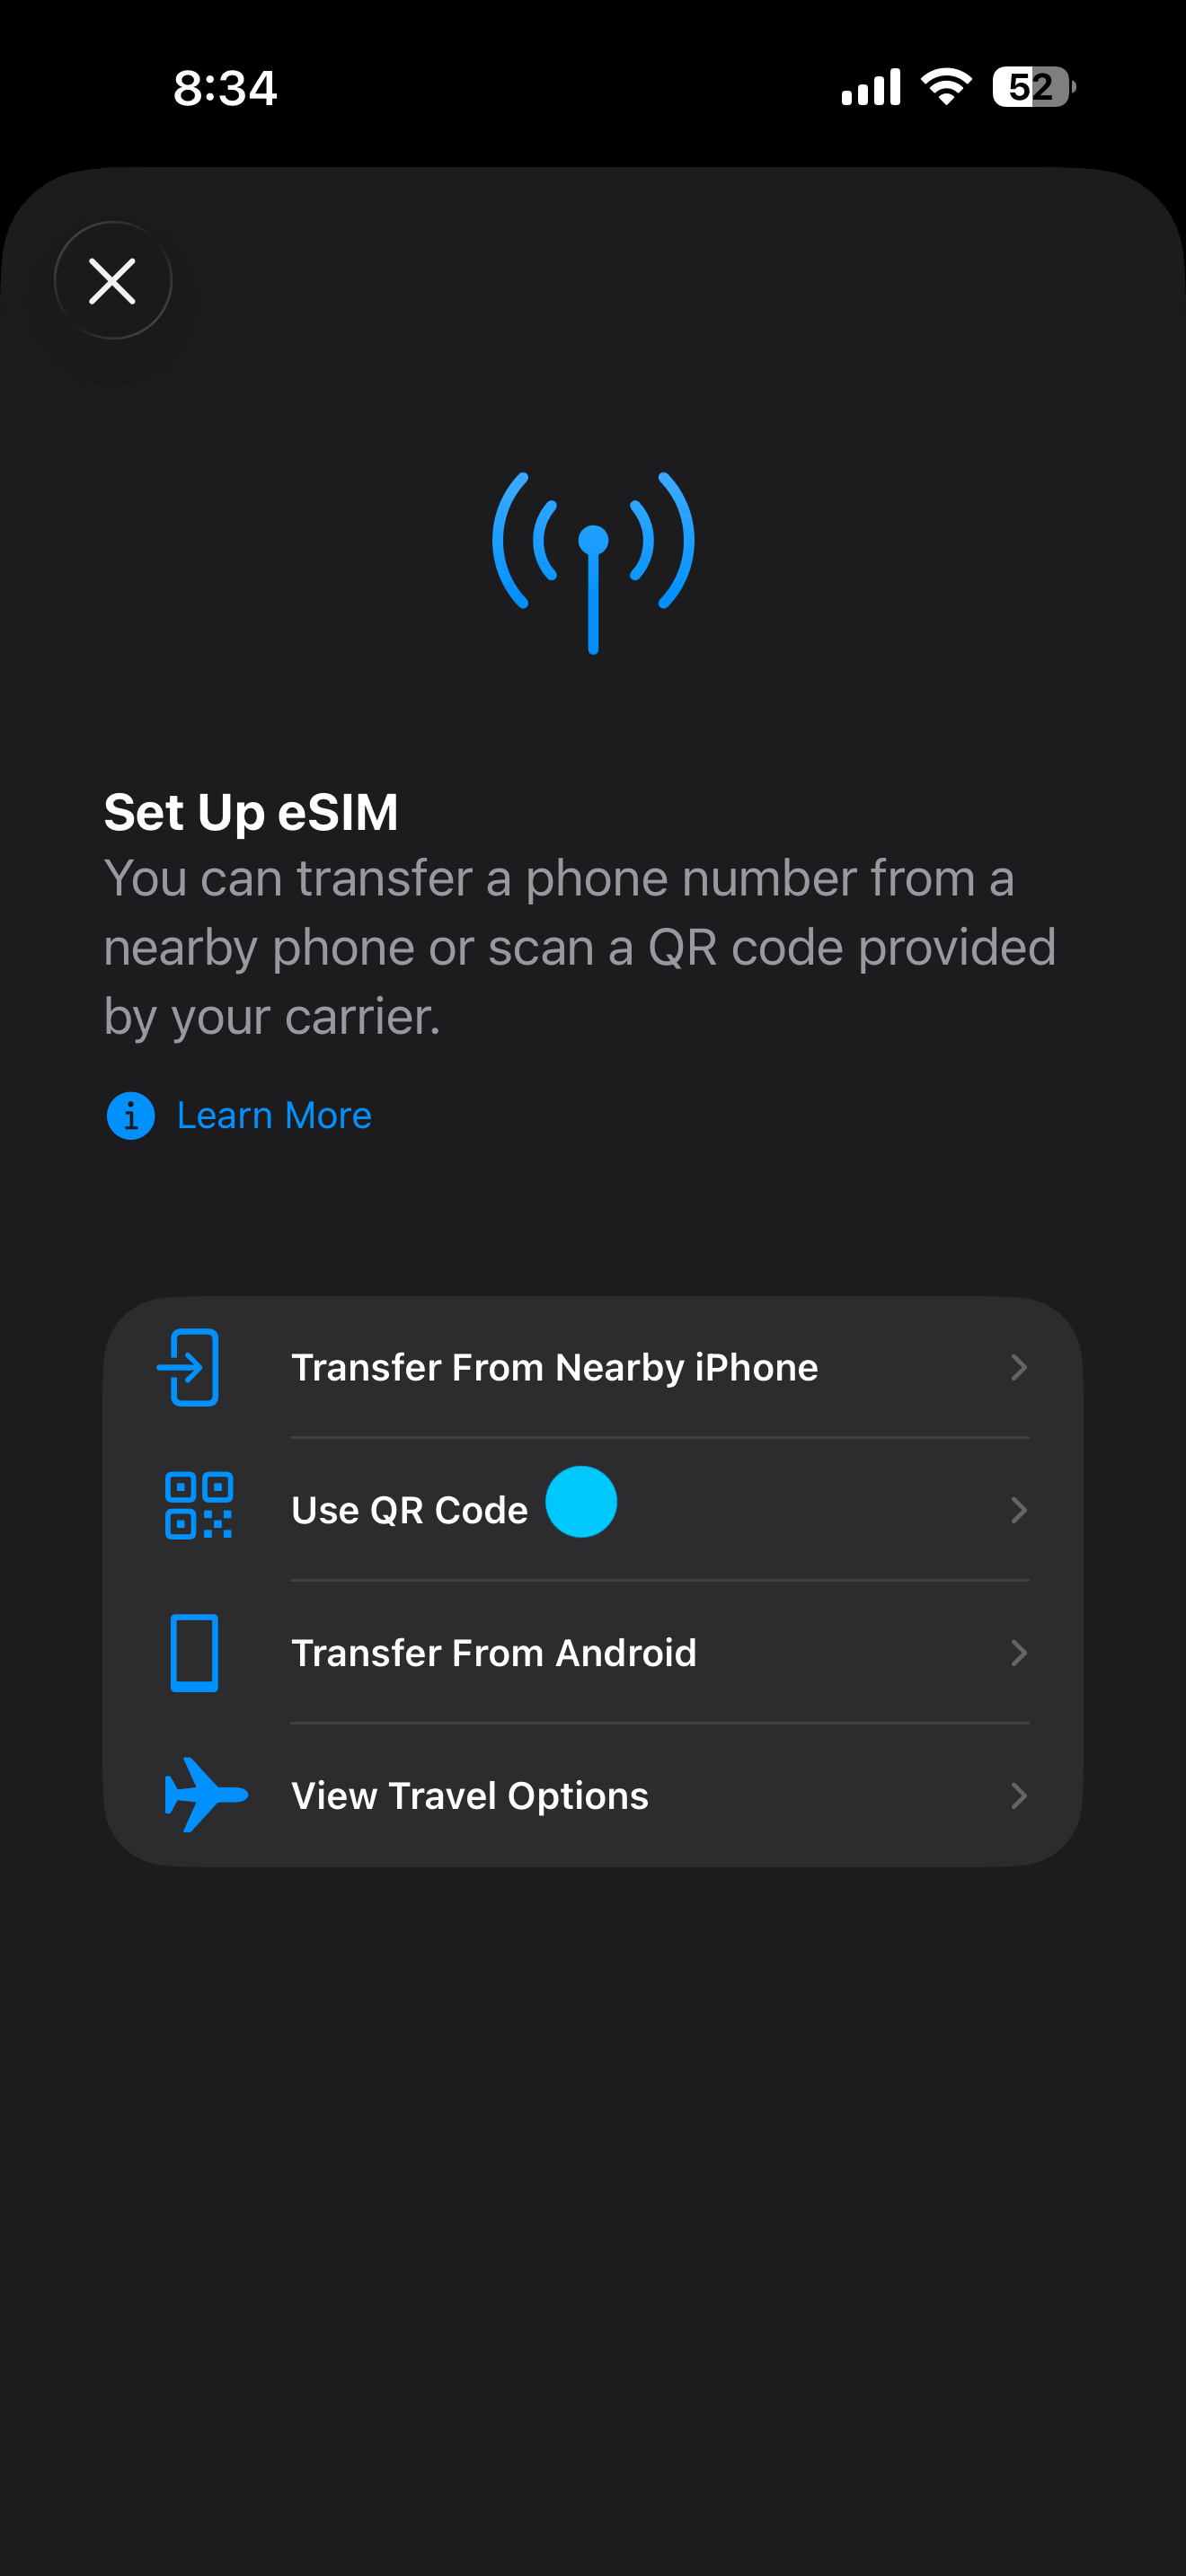
Step 4
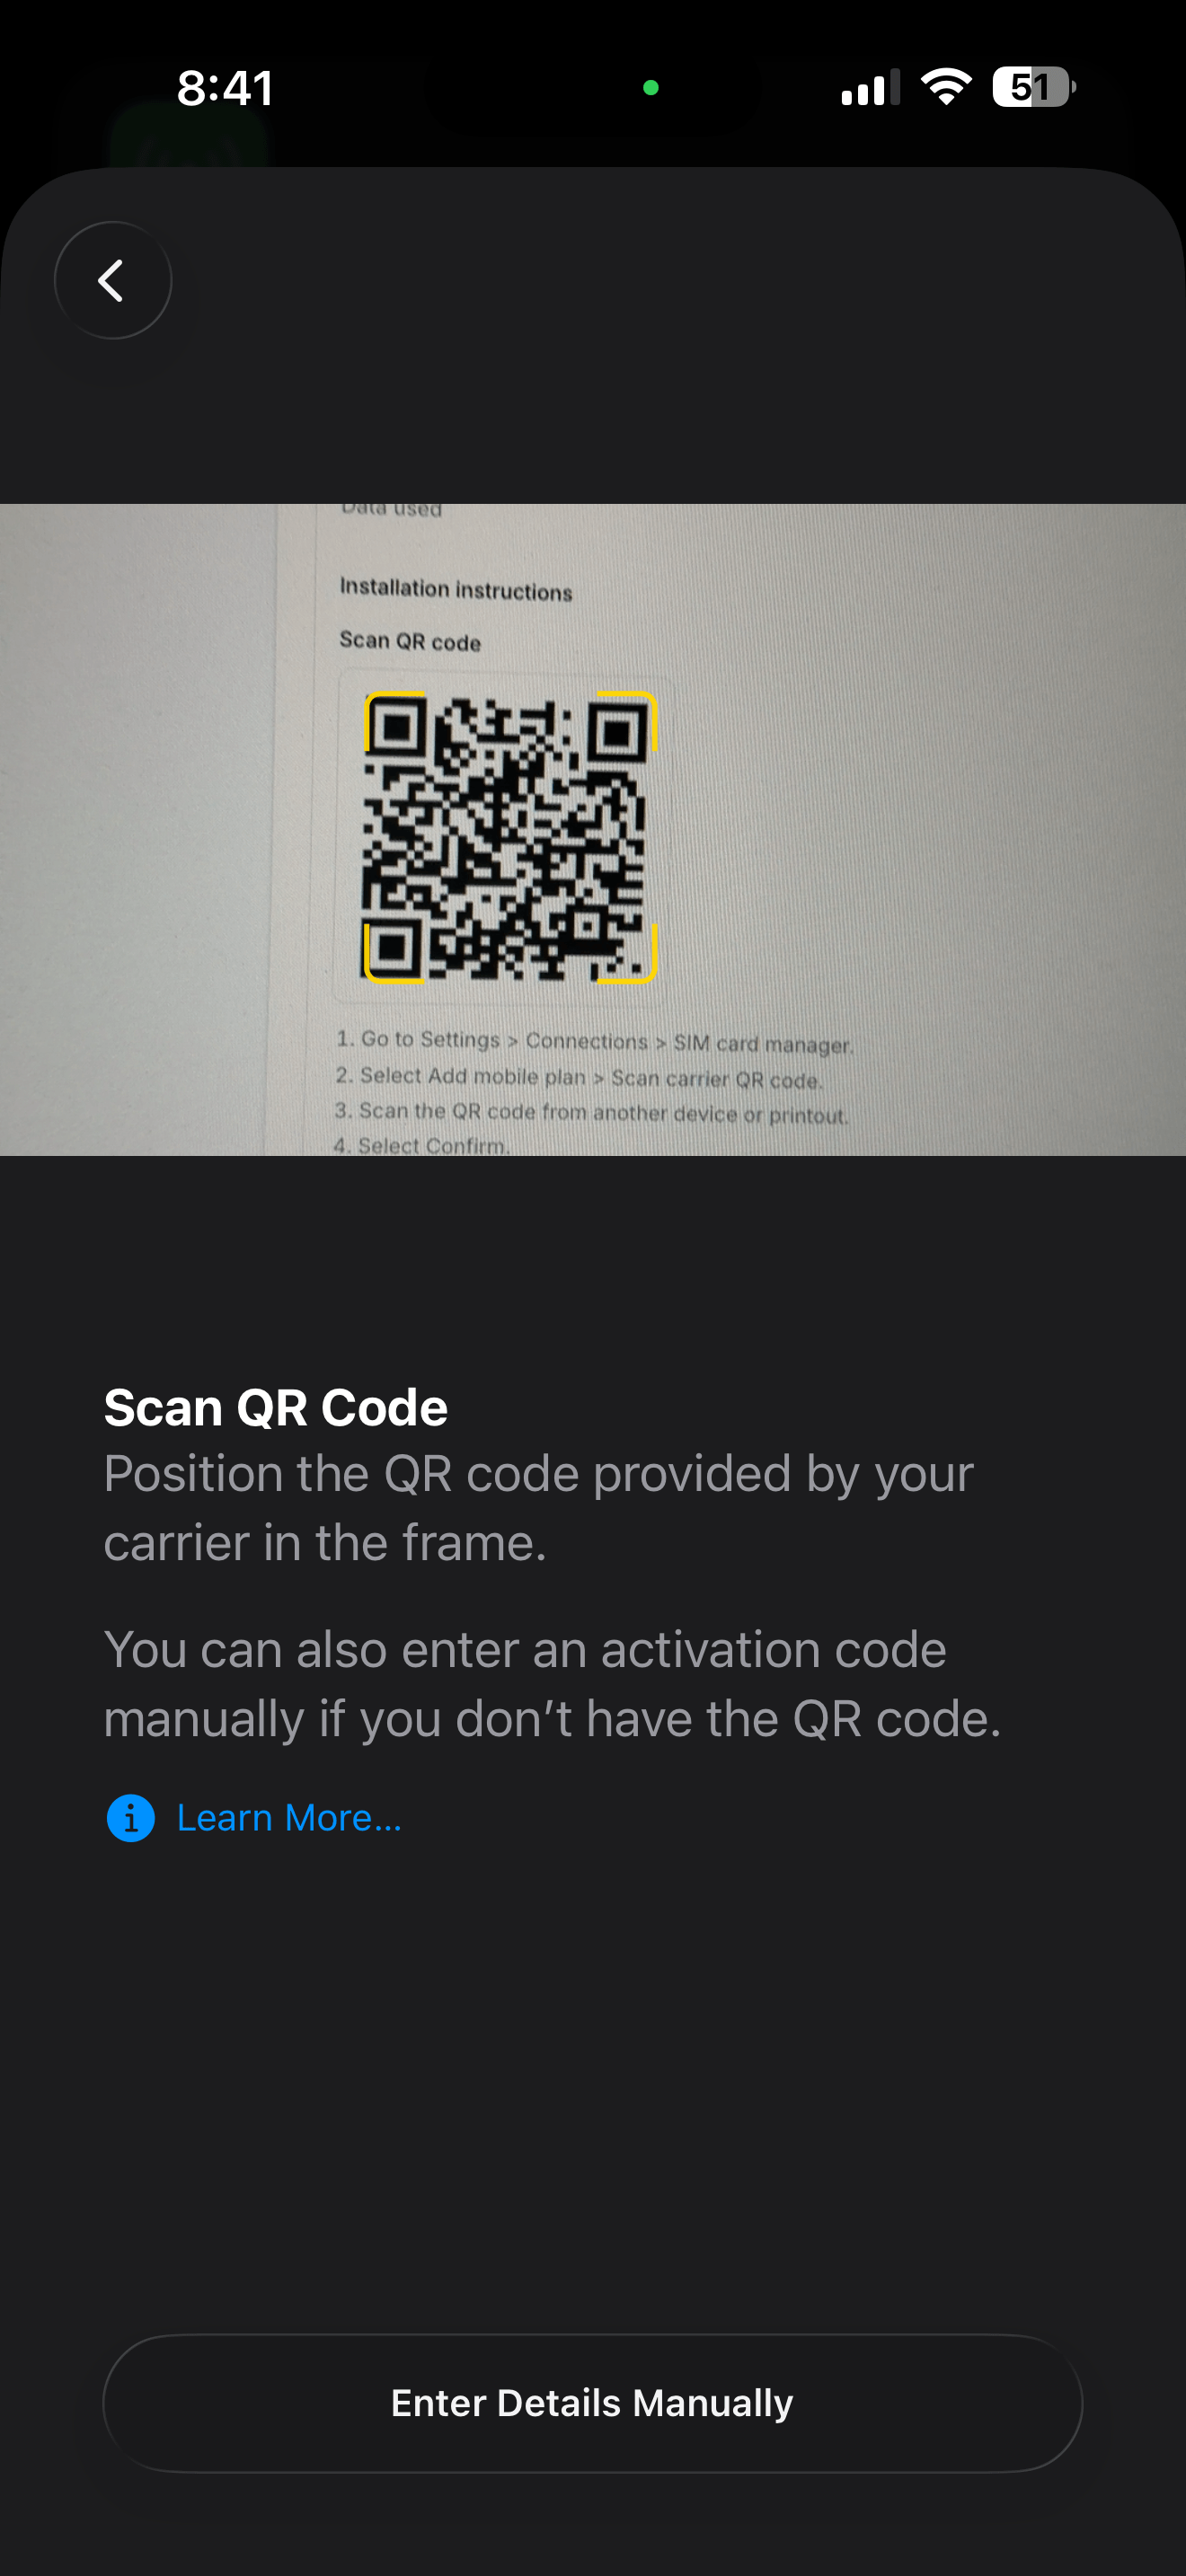
Tap Use QR Code.
Step 5
Scan the QR code from the email we sent you, or open it in the Vignetim app.
Step 6
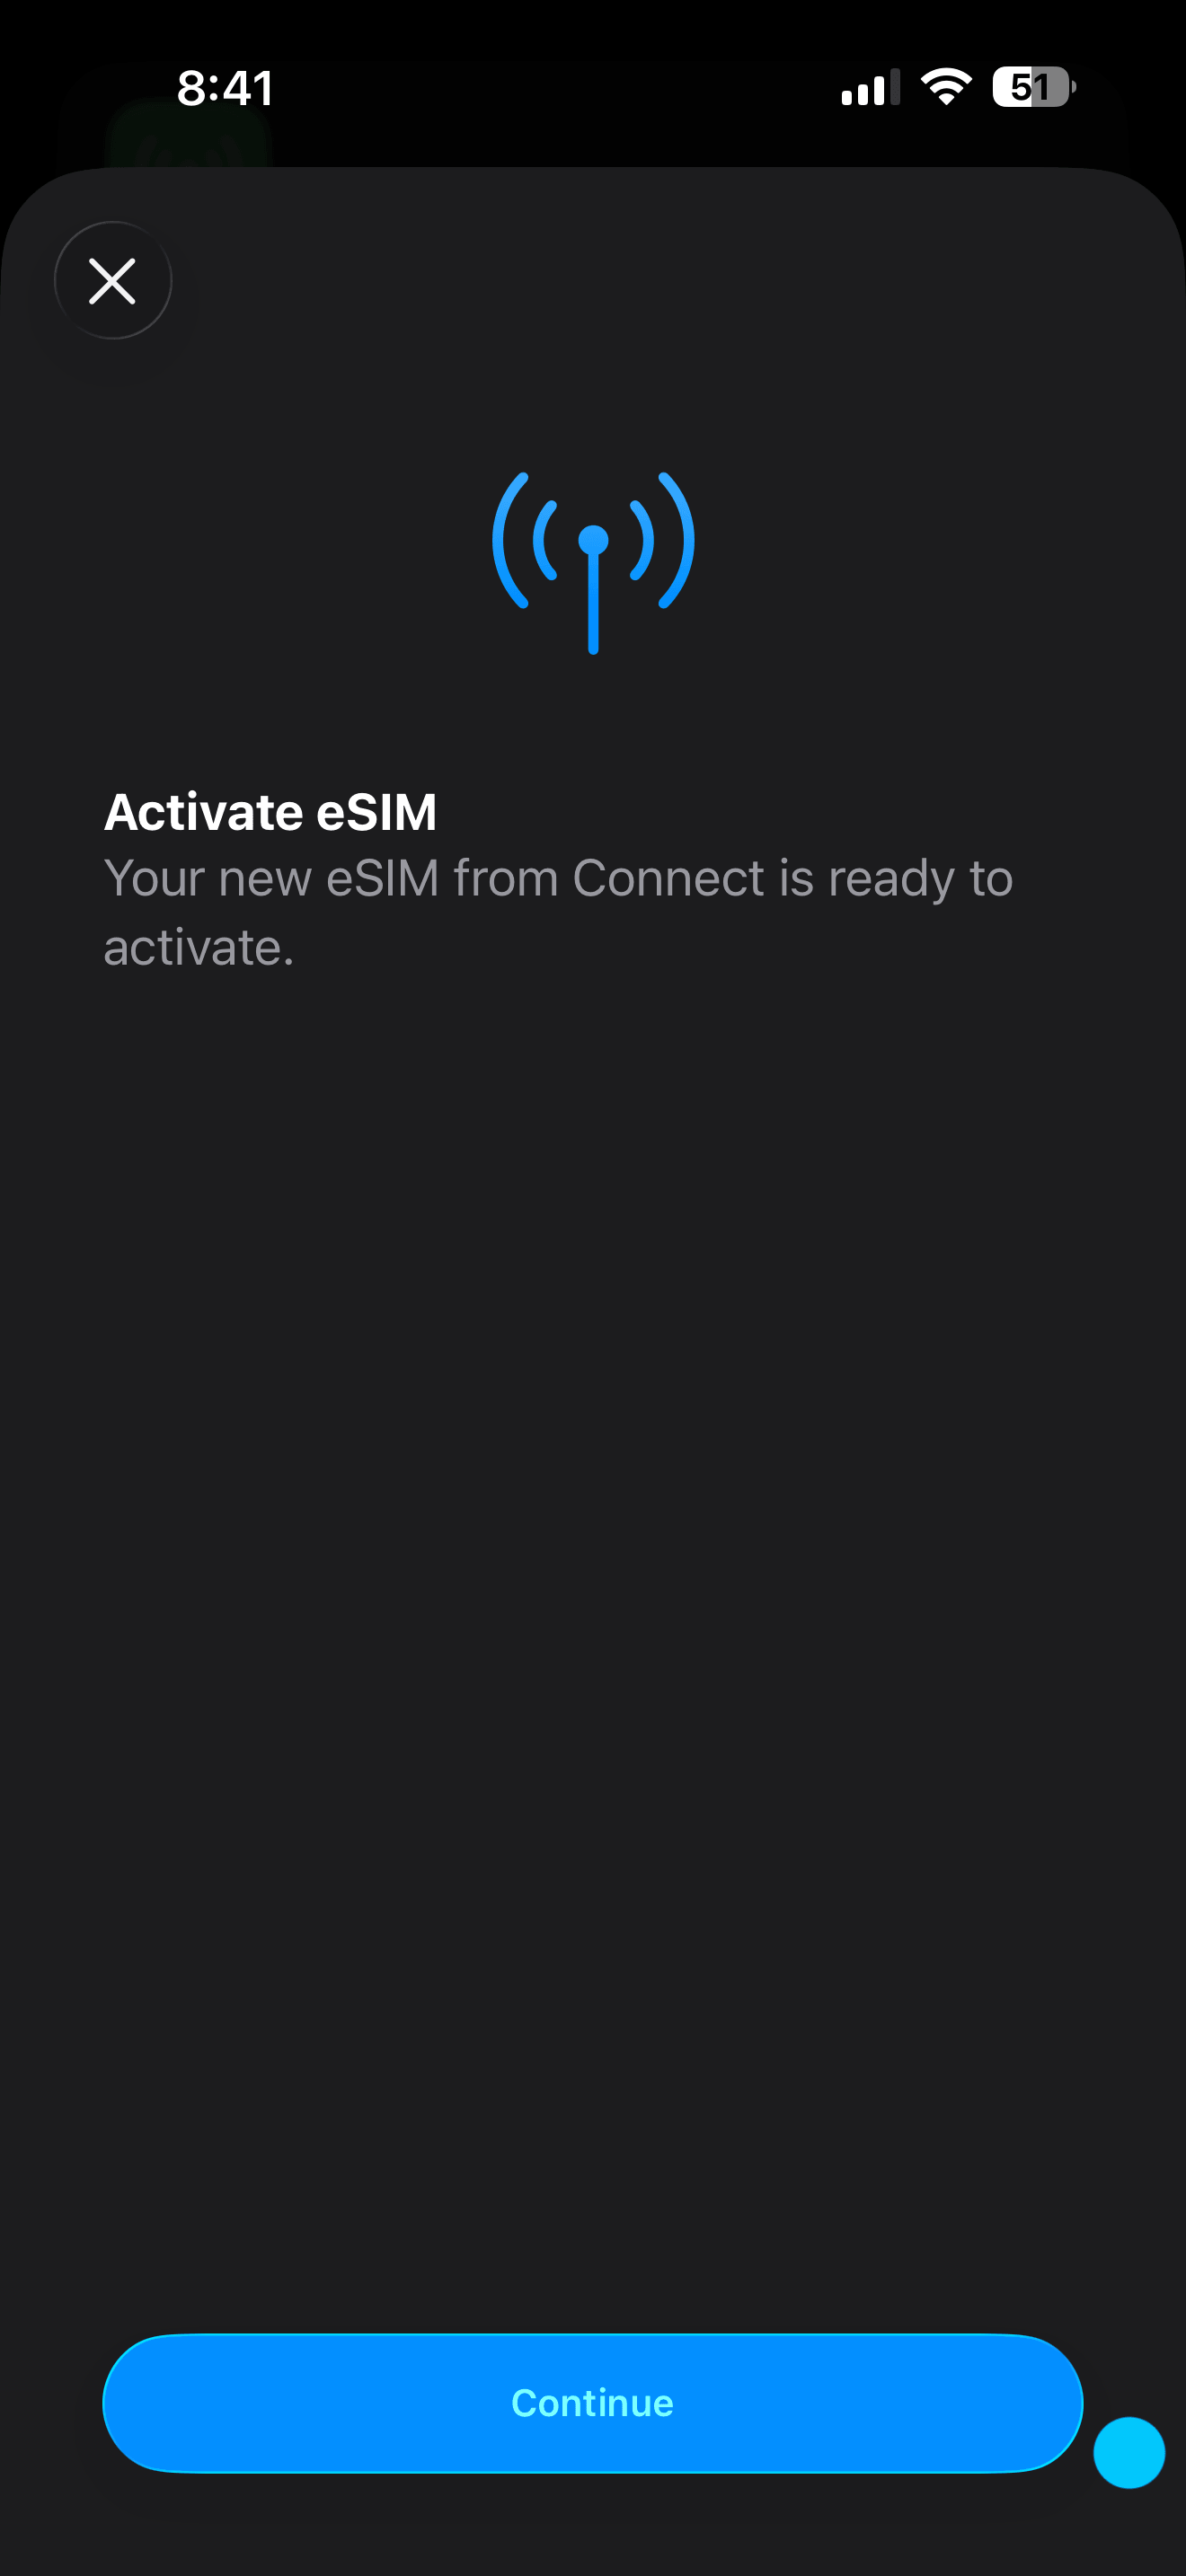
Tap Continue to activate the eSIM on your phone.
Step 7
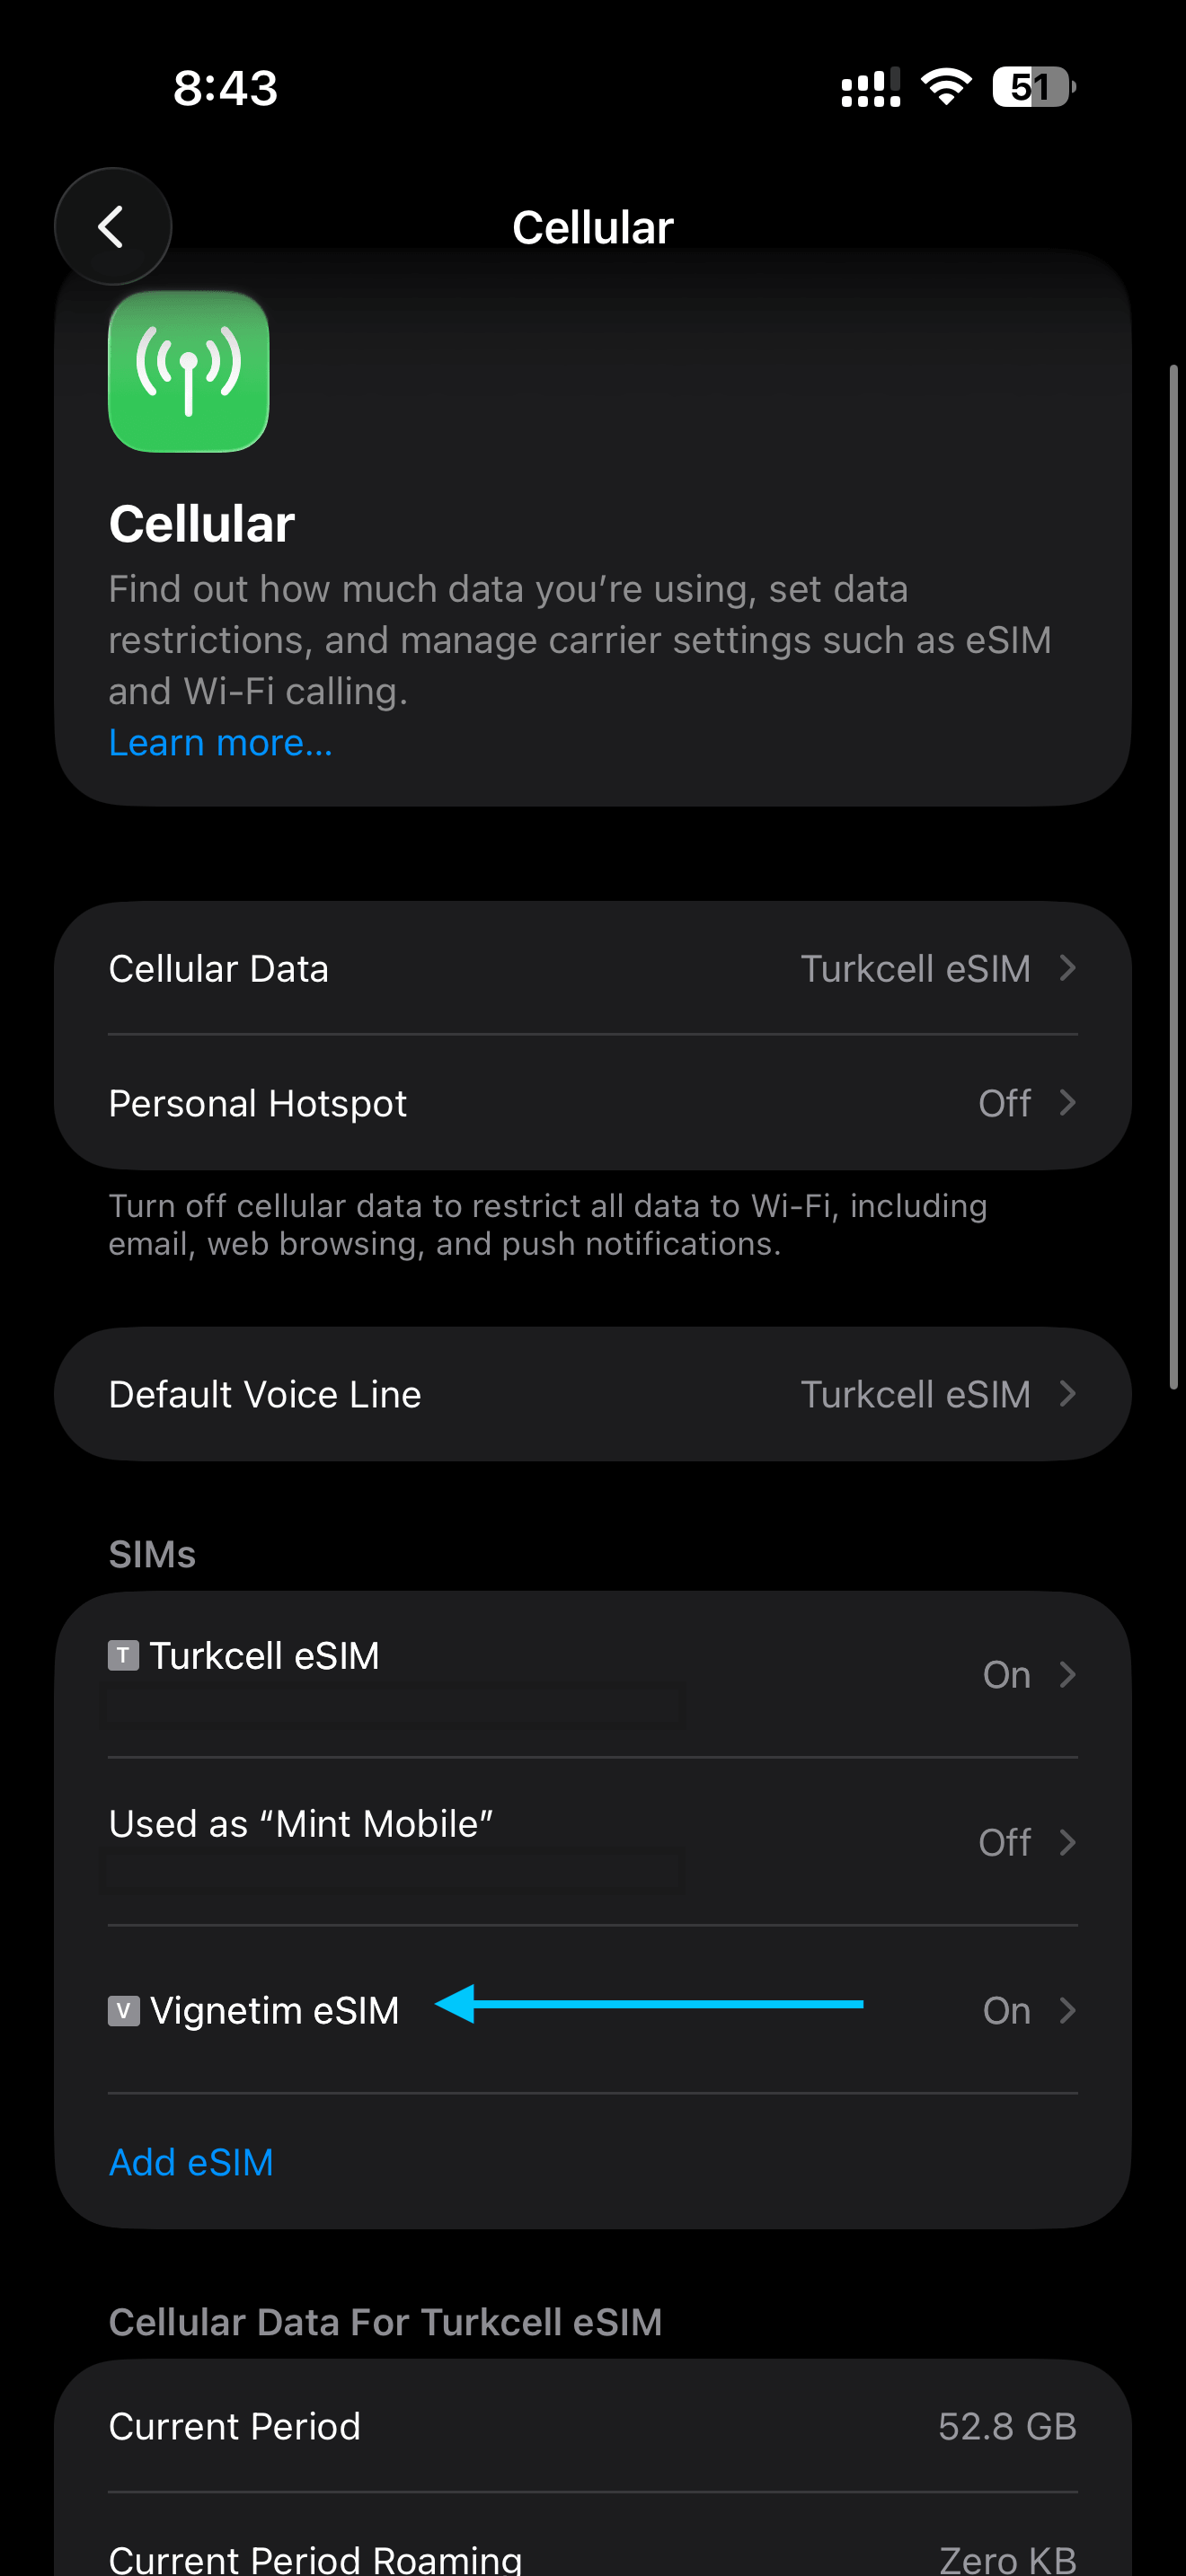
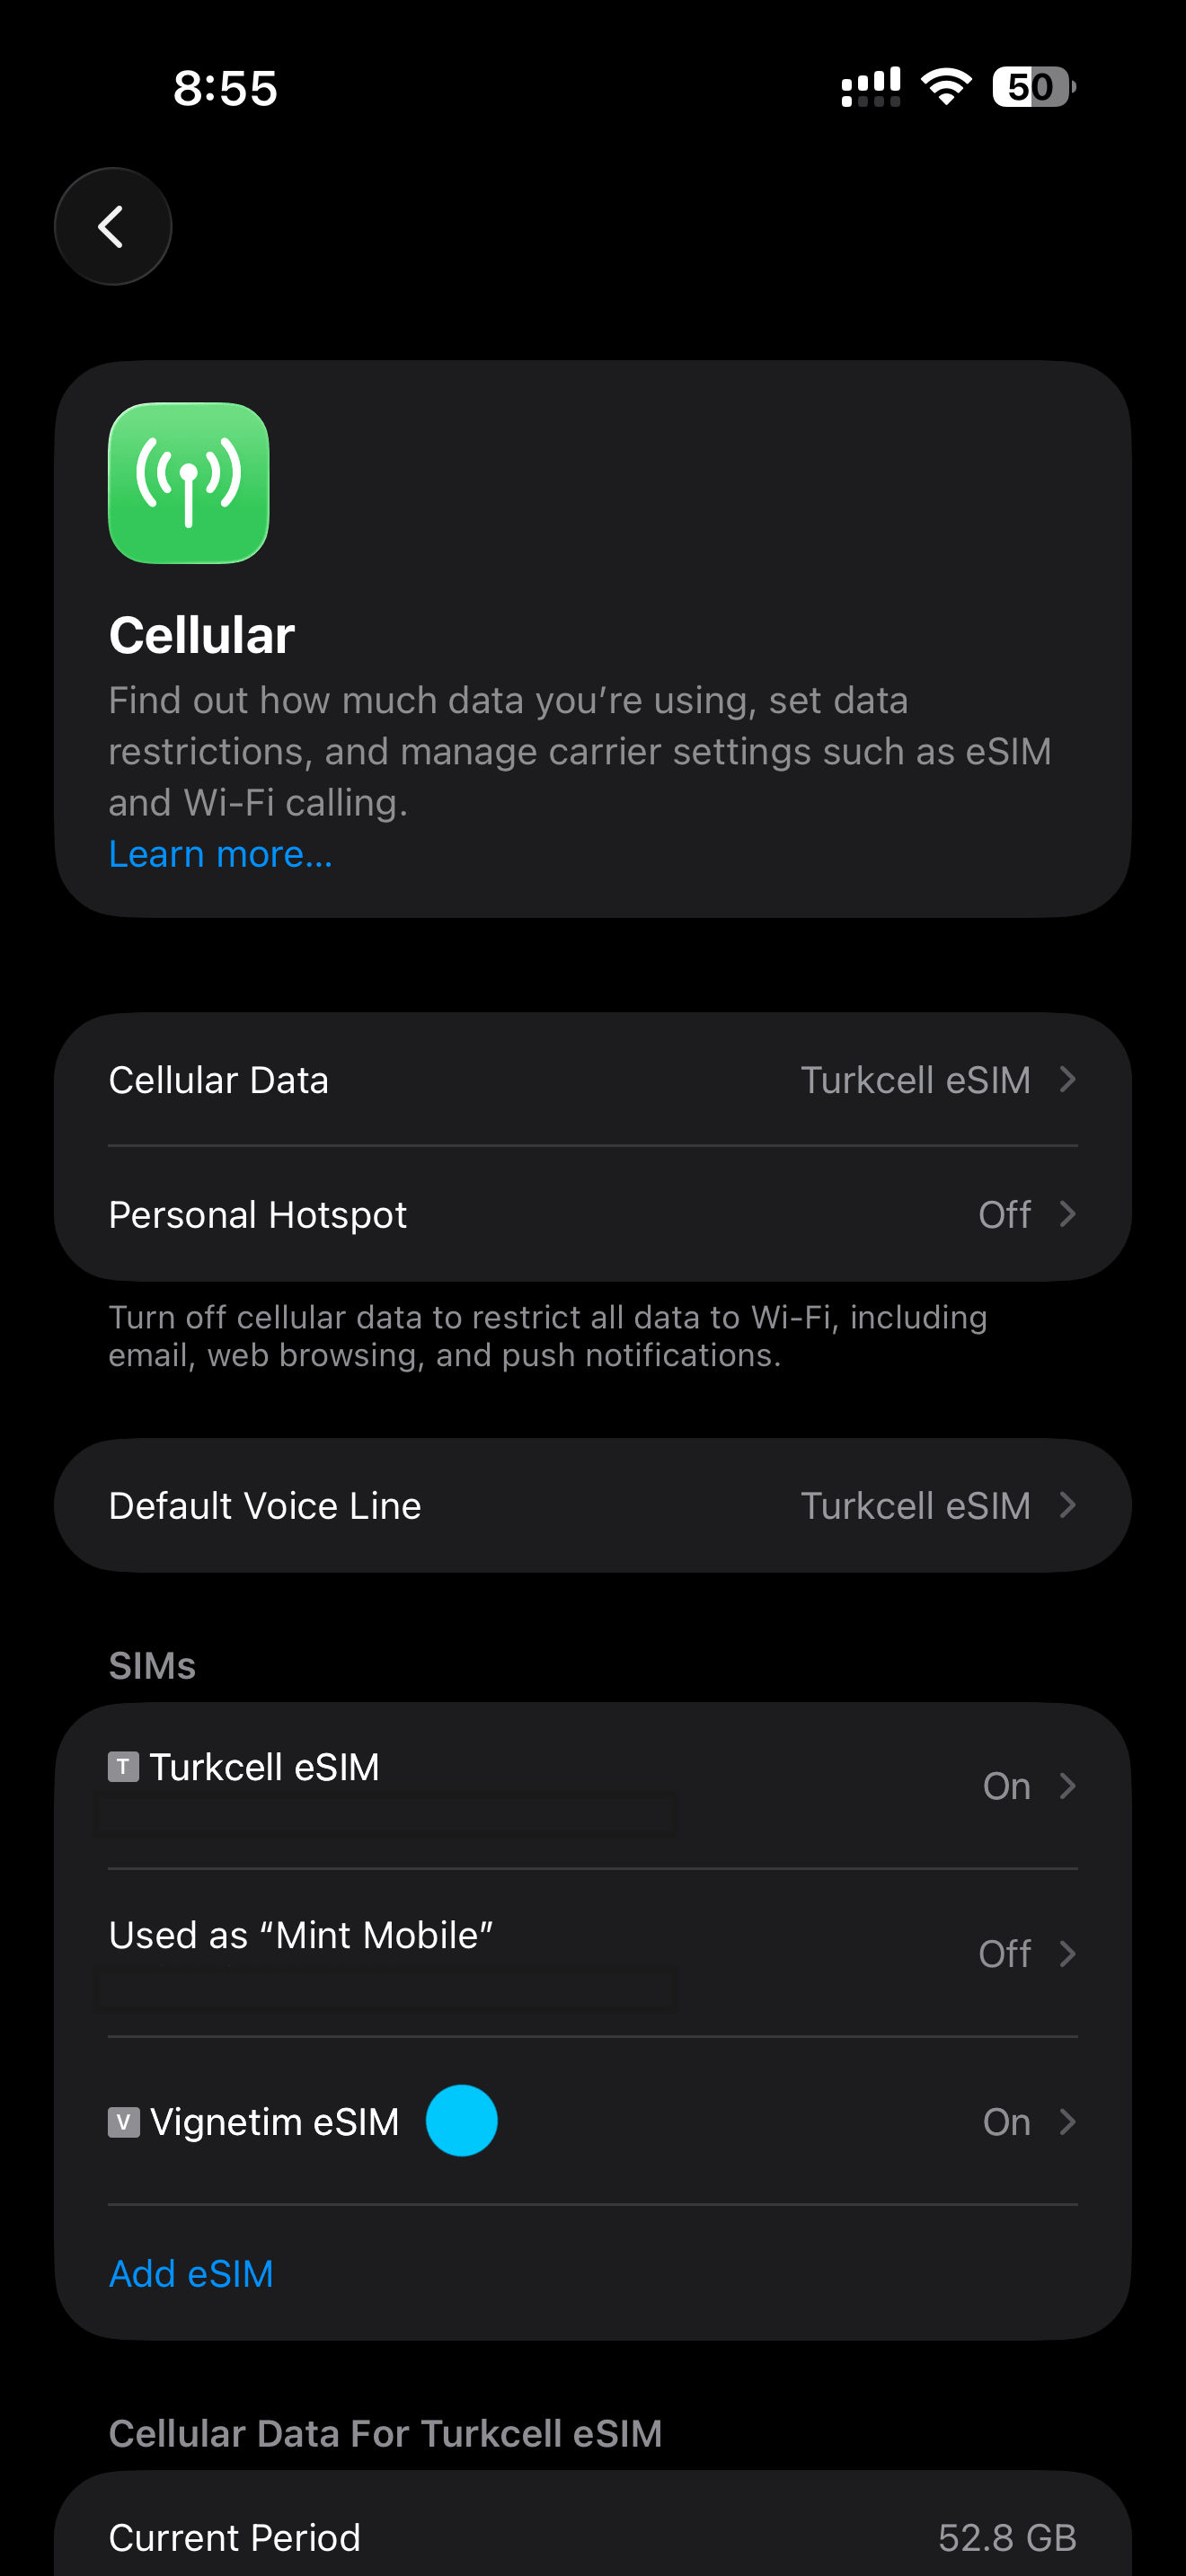
Your new Vignetim eSIM now appears under SIMs. Make sure it is turned on.
Step 8
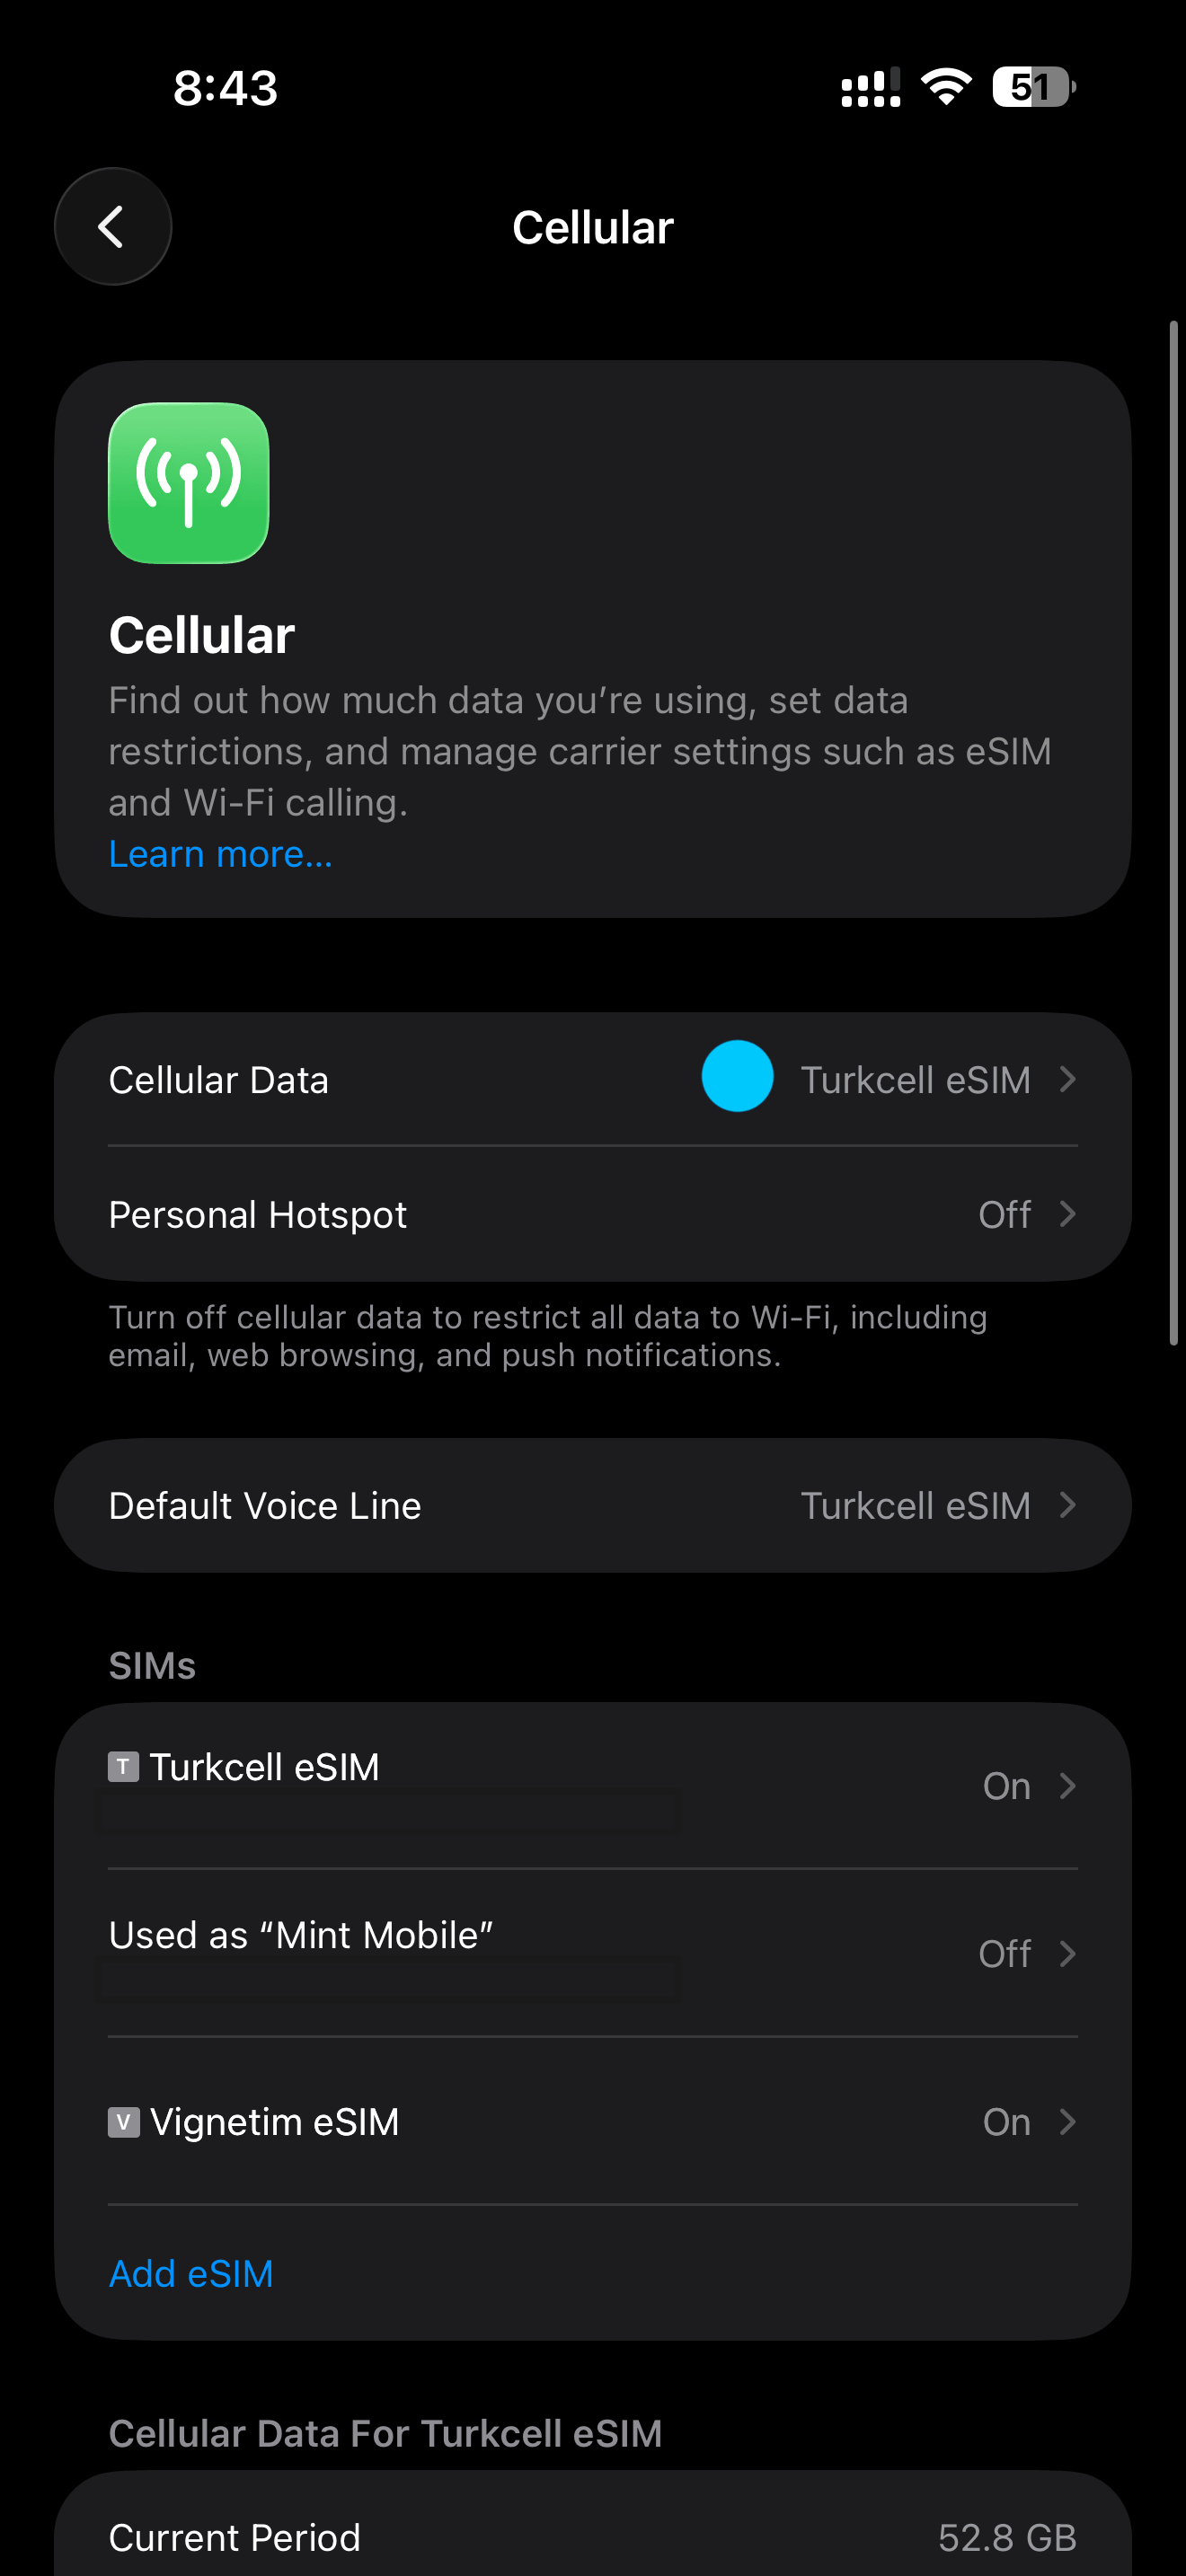
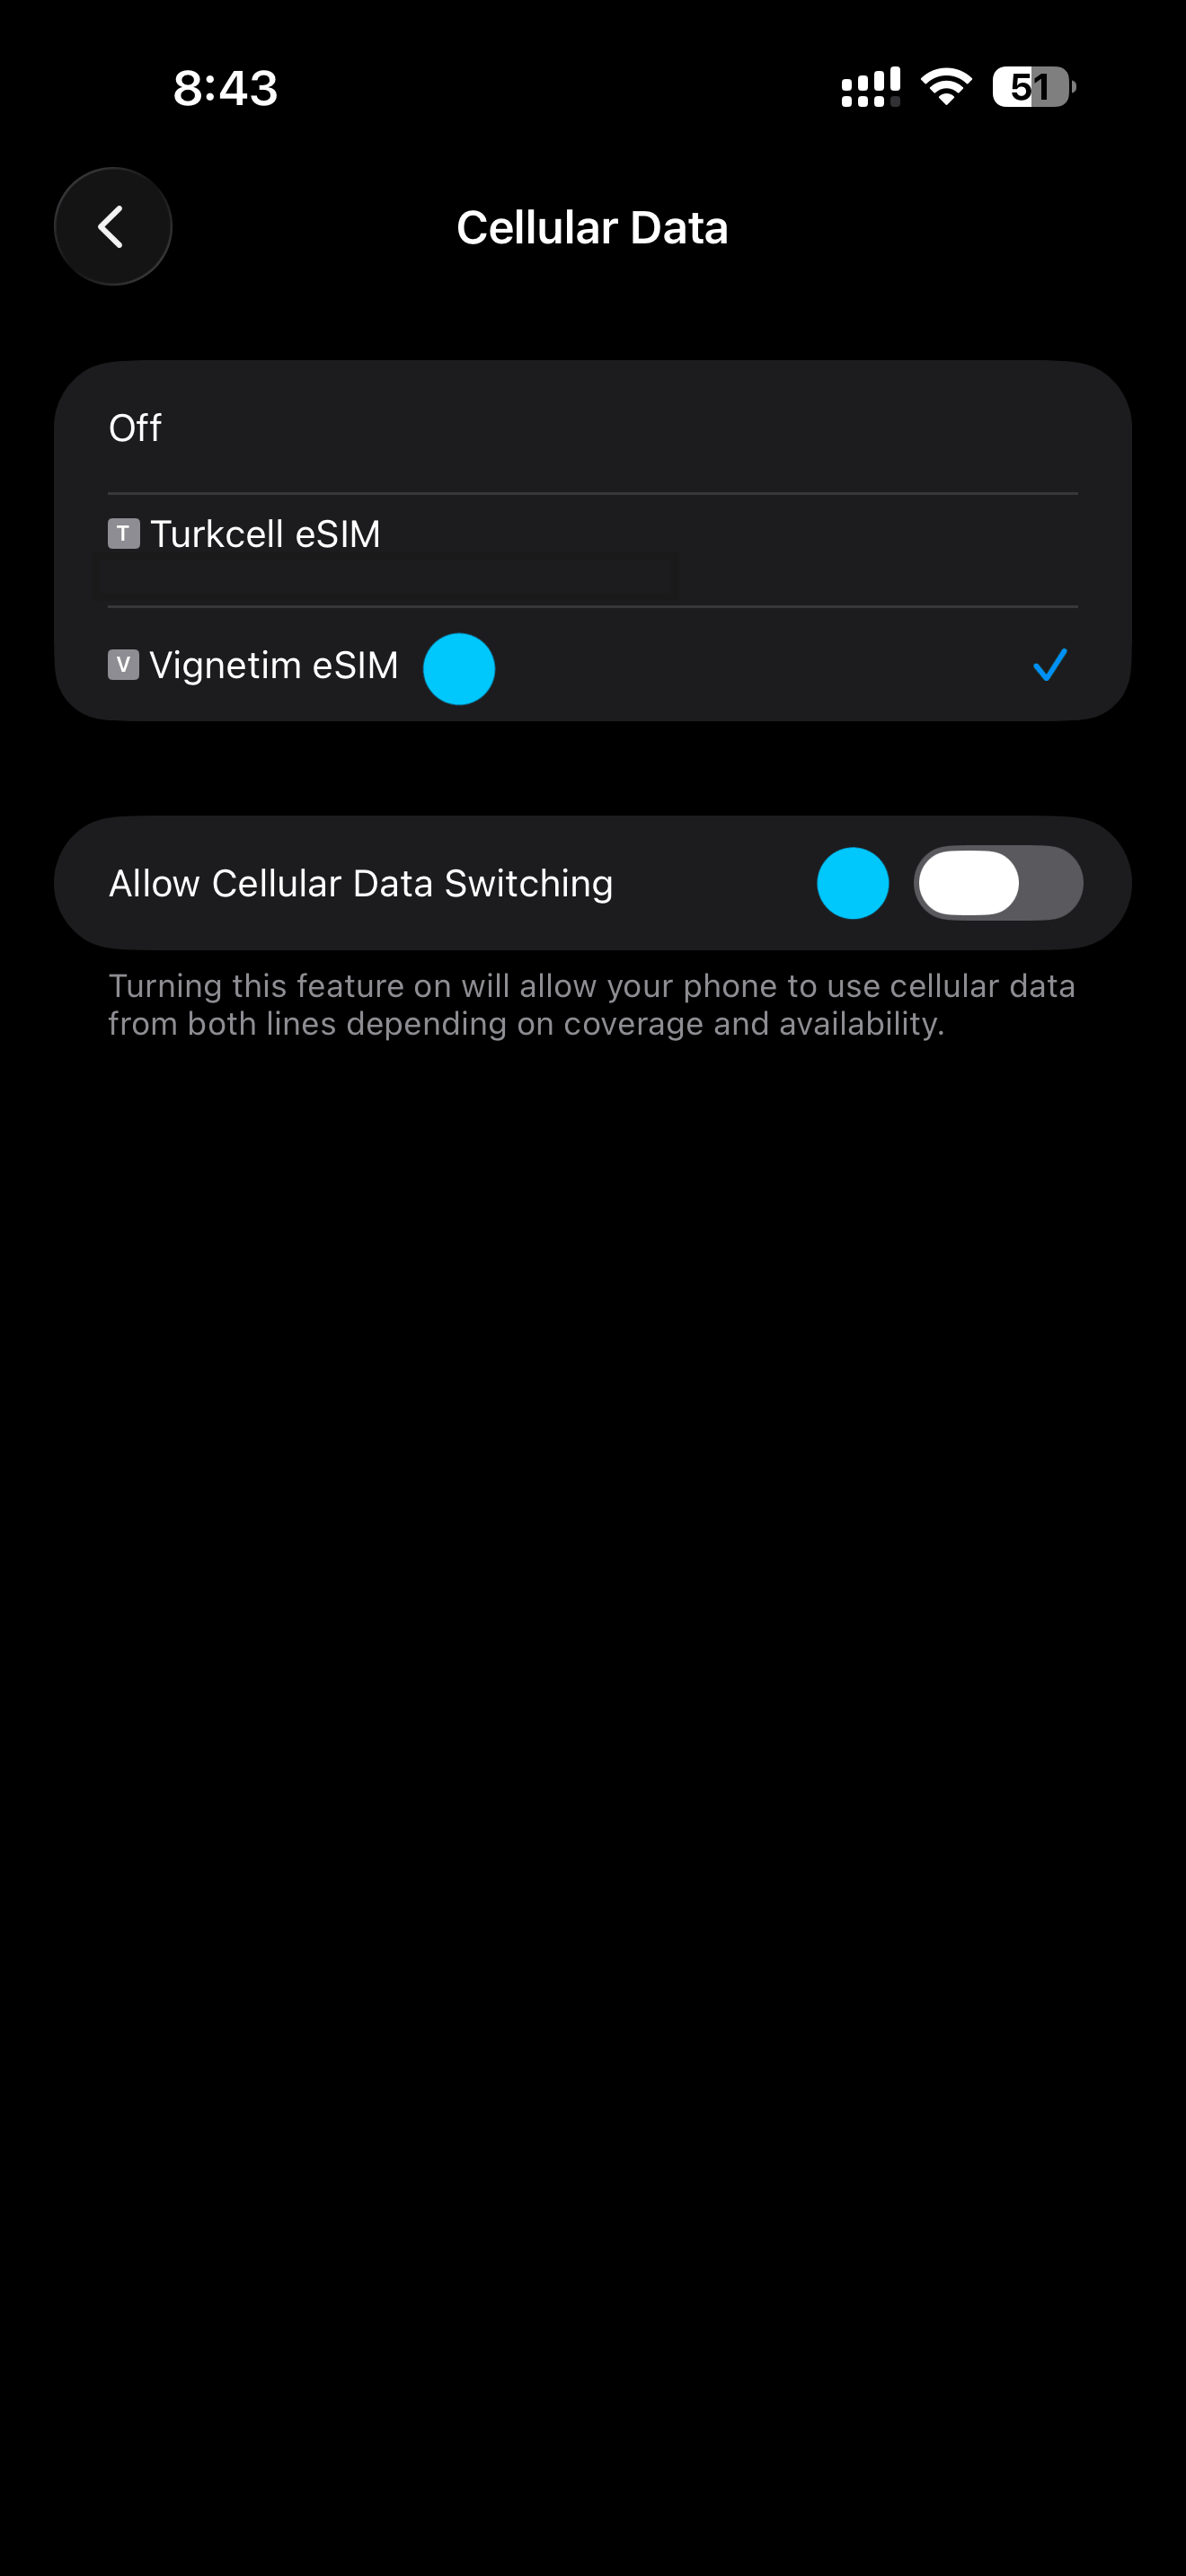
Tap Cellular Data to choose which line provides your internet.
Step 9
Select your Vignetim eSIM (Secondary) for cellular data and switch off Allow Cellular Data Switching.
Step 10
Under SIMs, select your Vignetim eSIM (Secondary).
Step 11
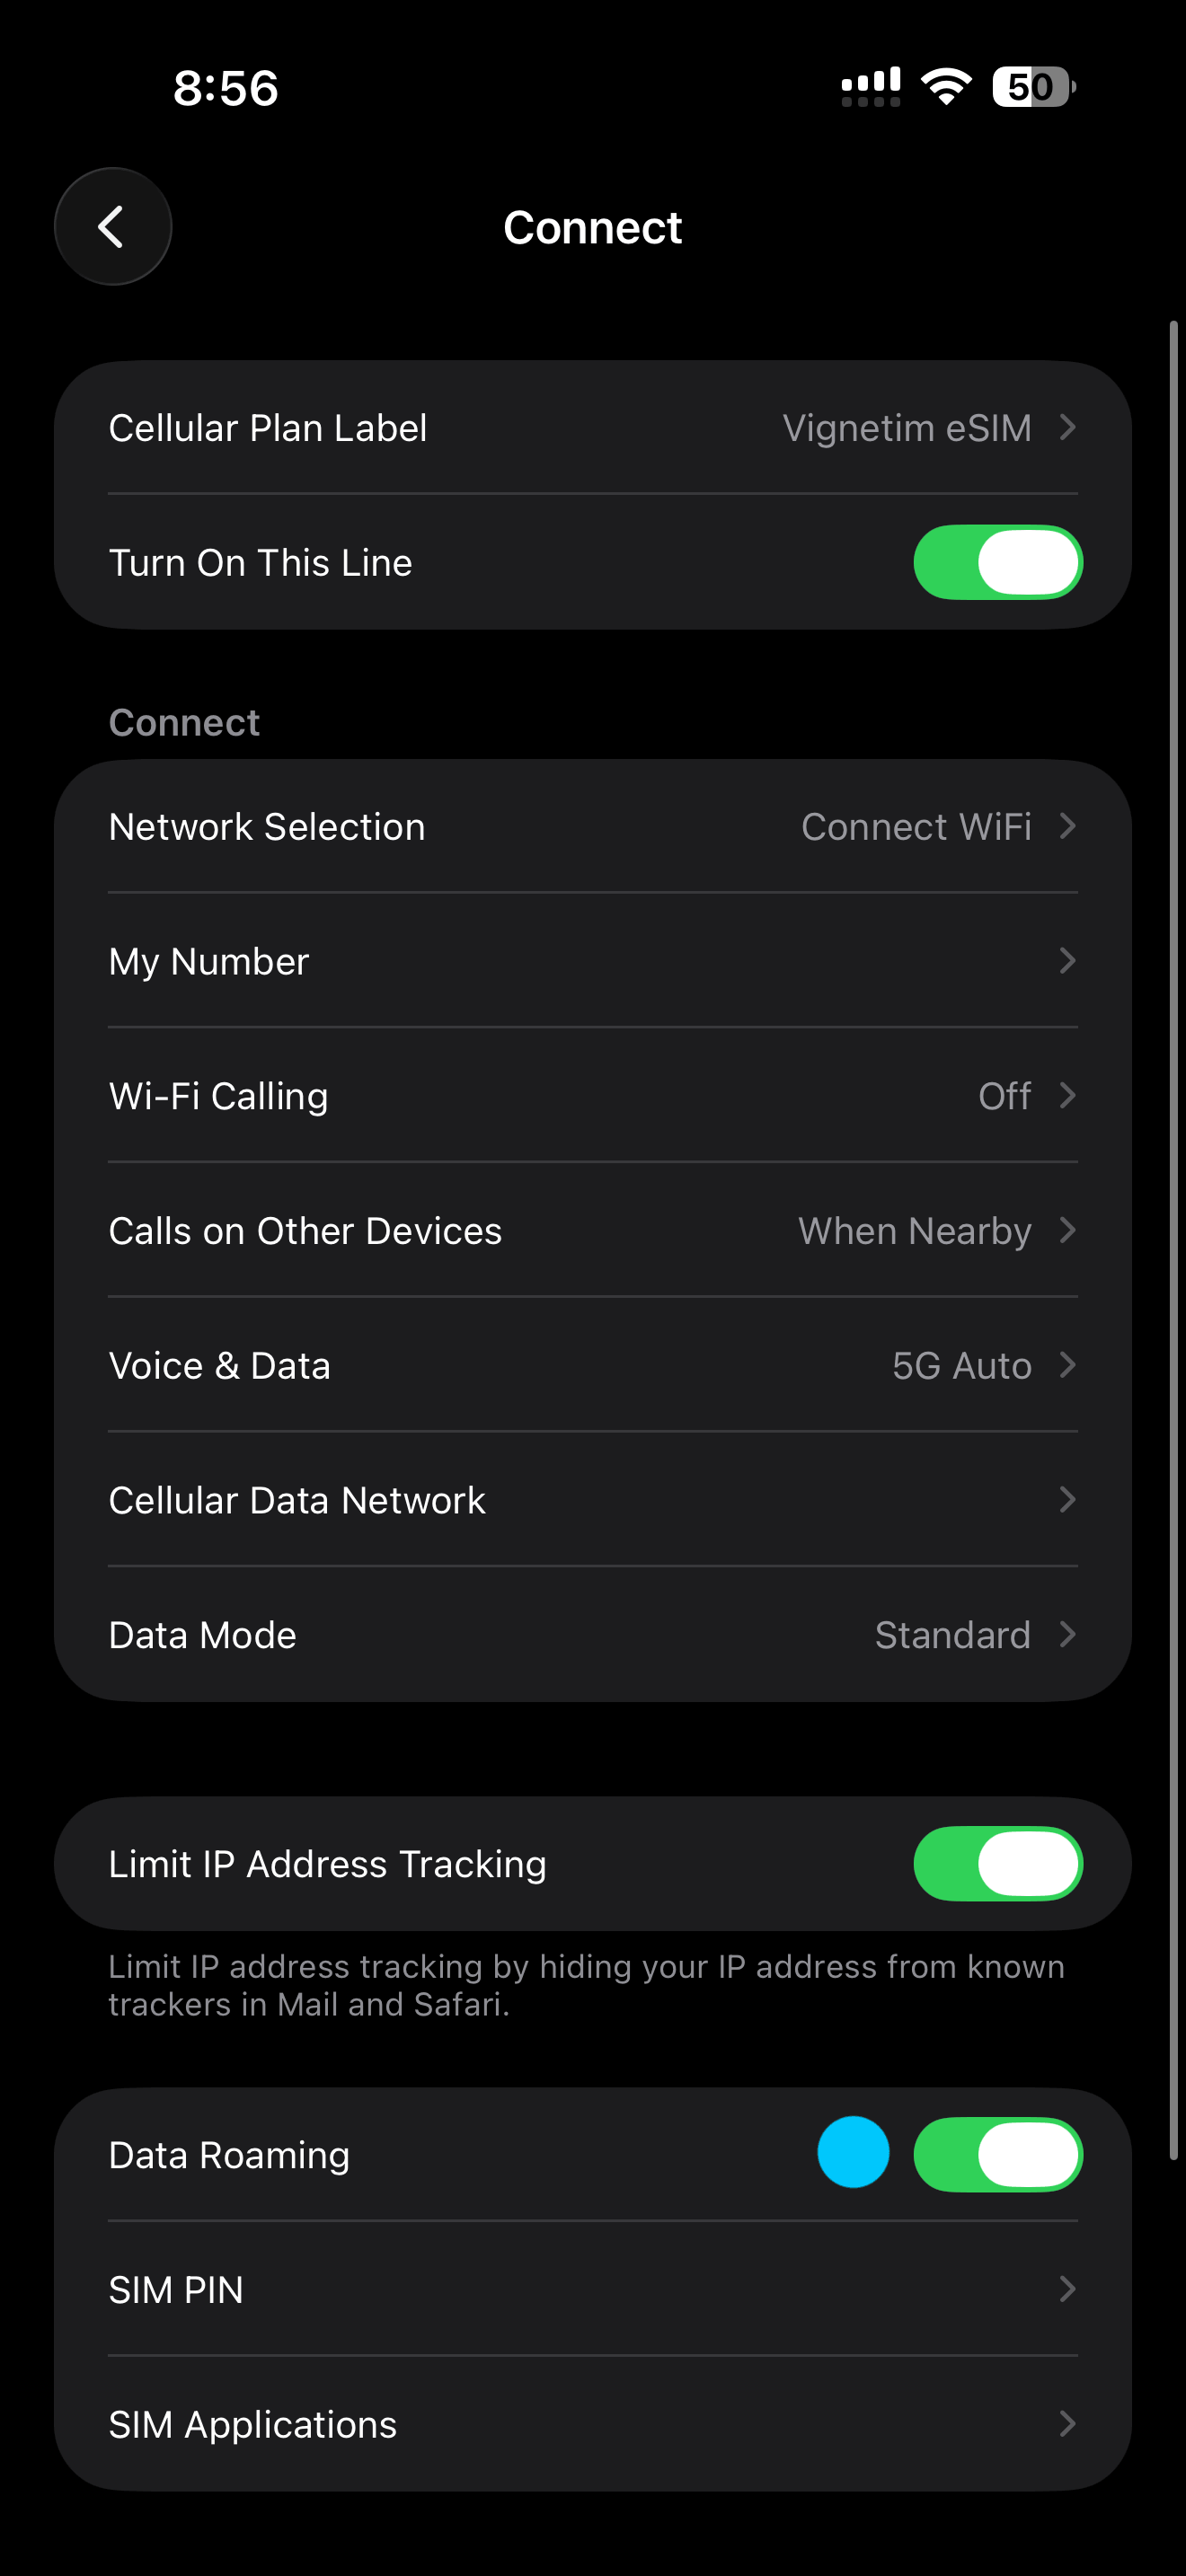
Switch on Data Roaming.
1 / 11
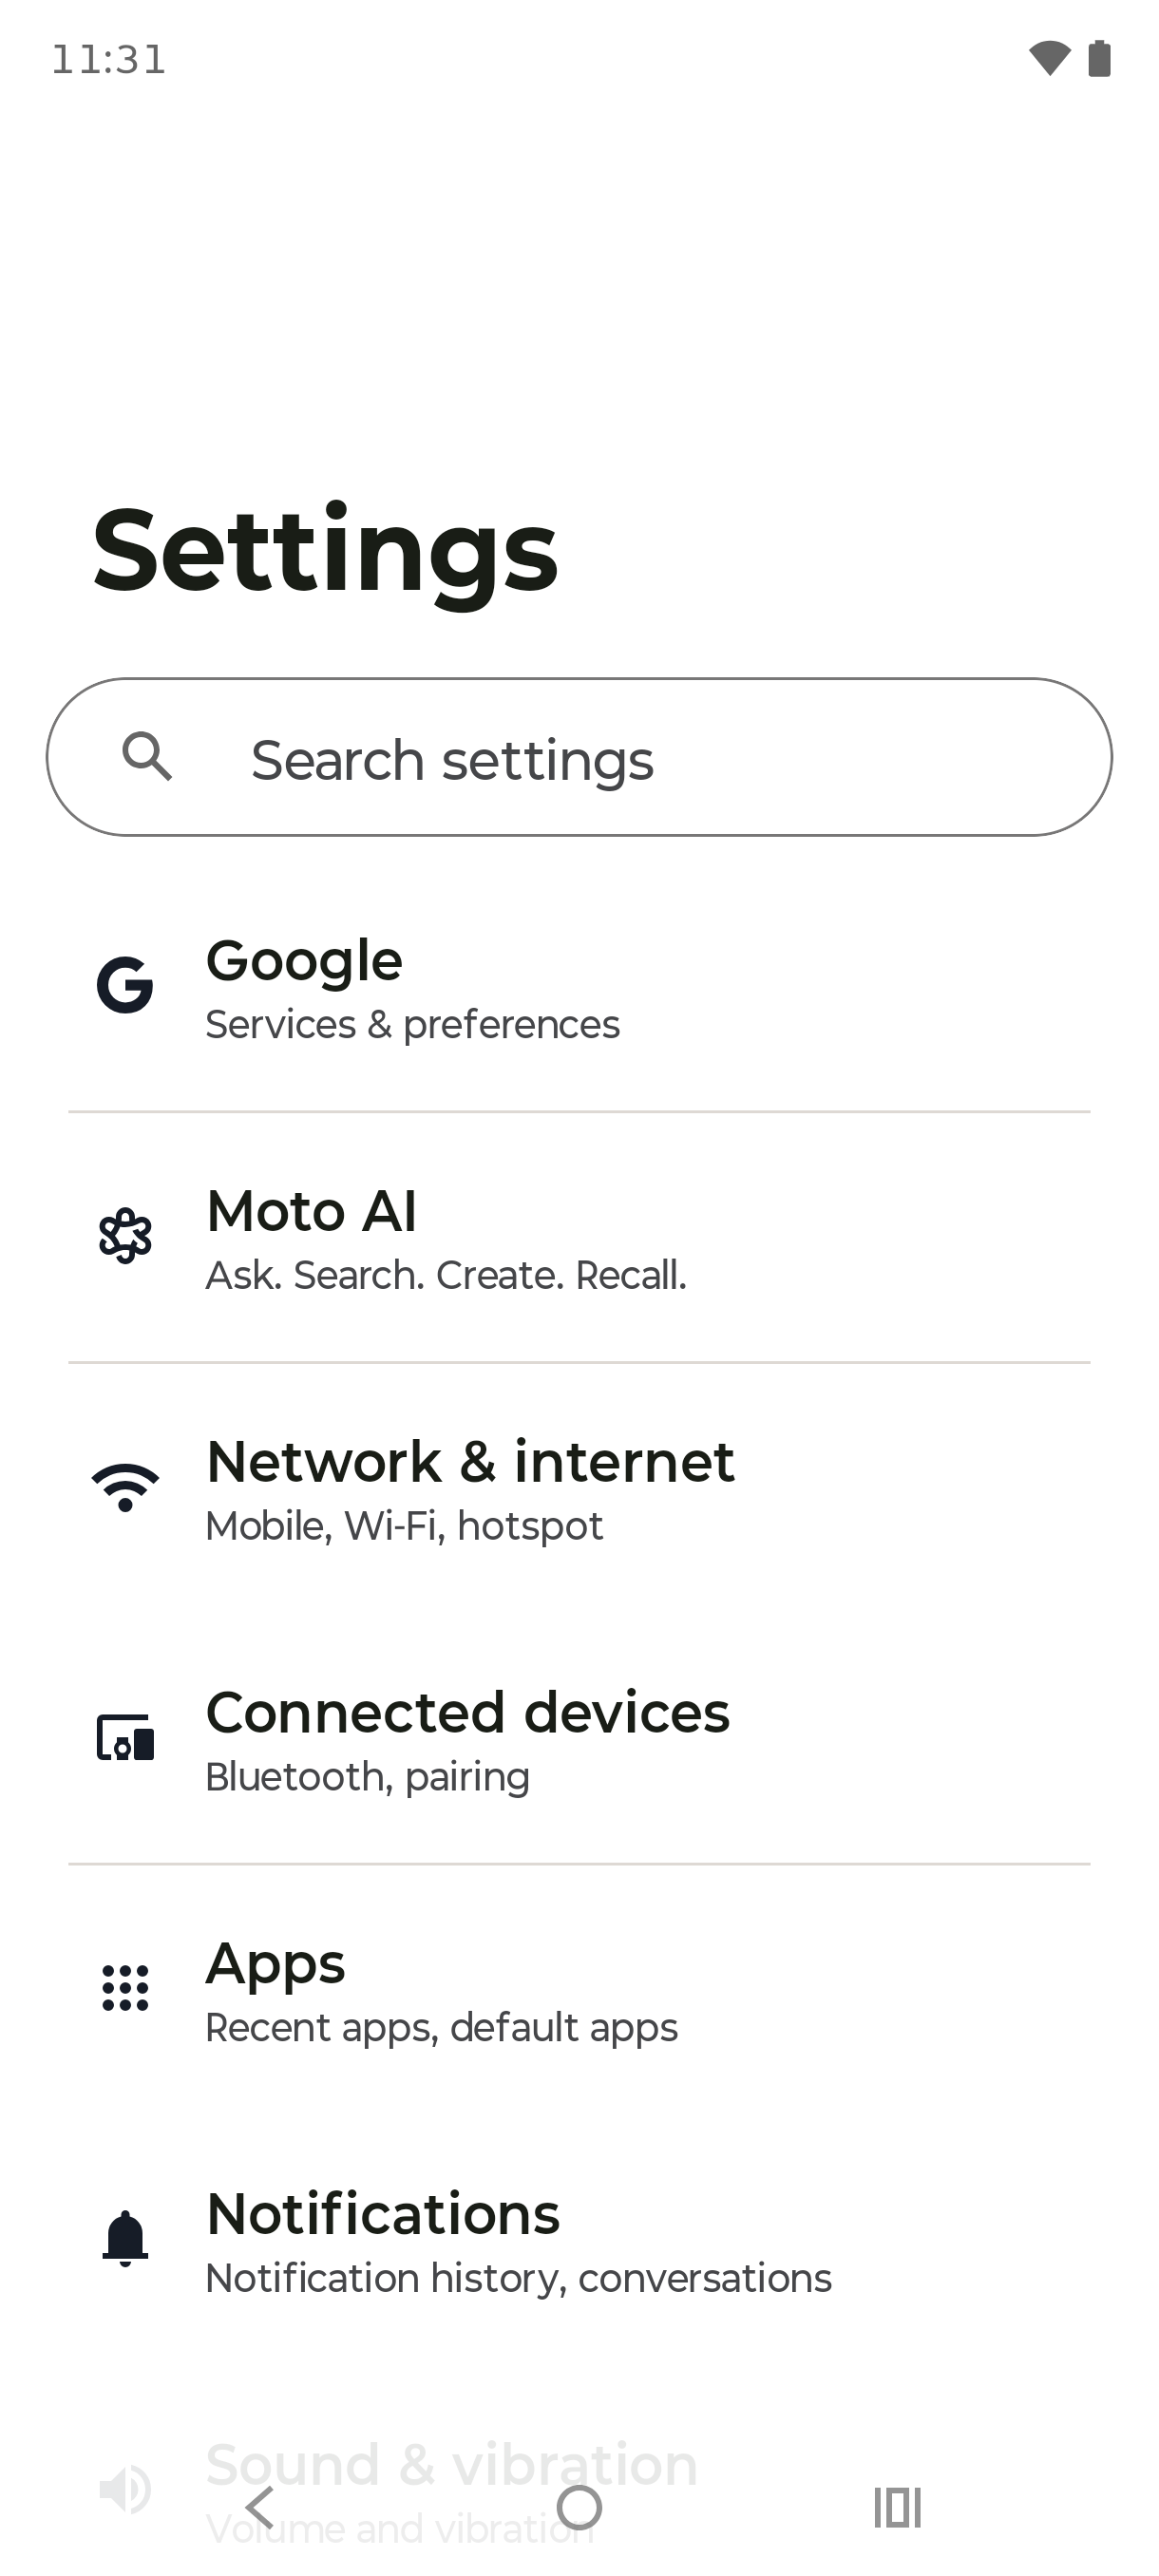
How to Set Up Your eSIM on Android
Step 1
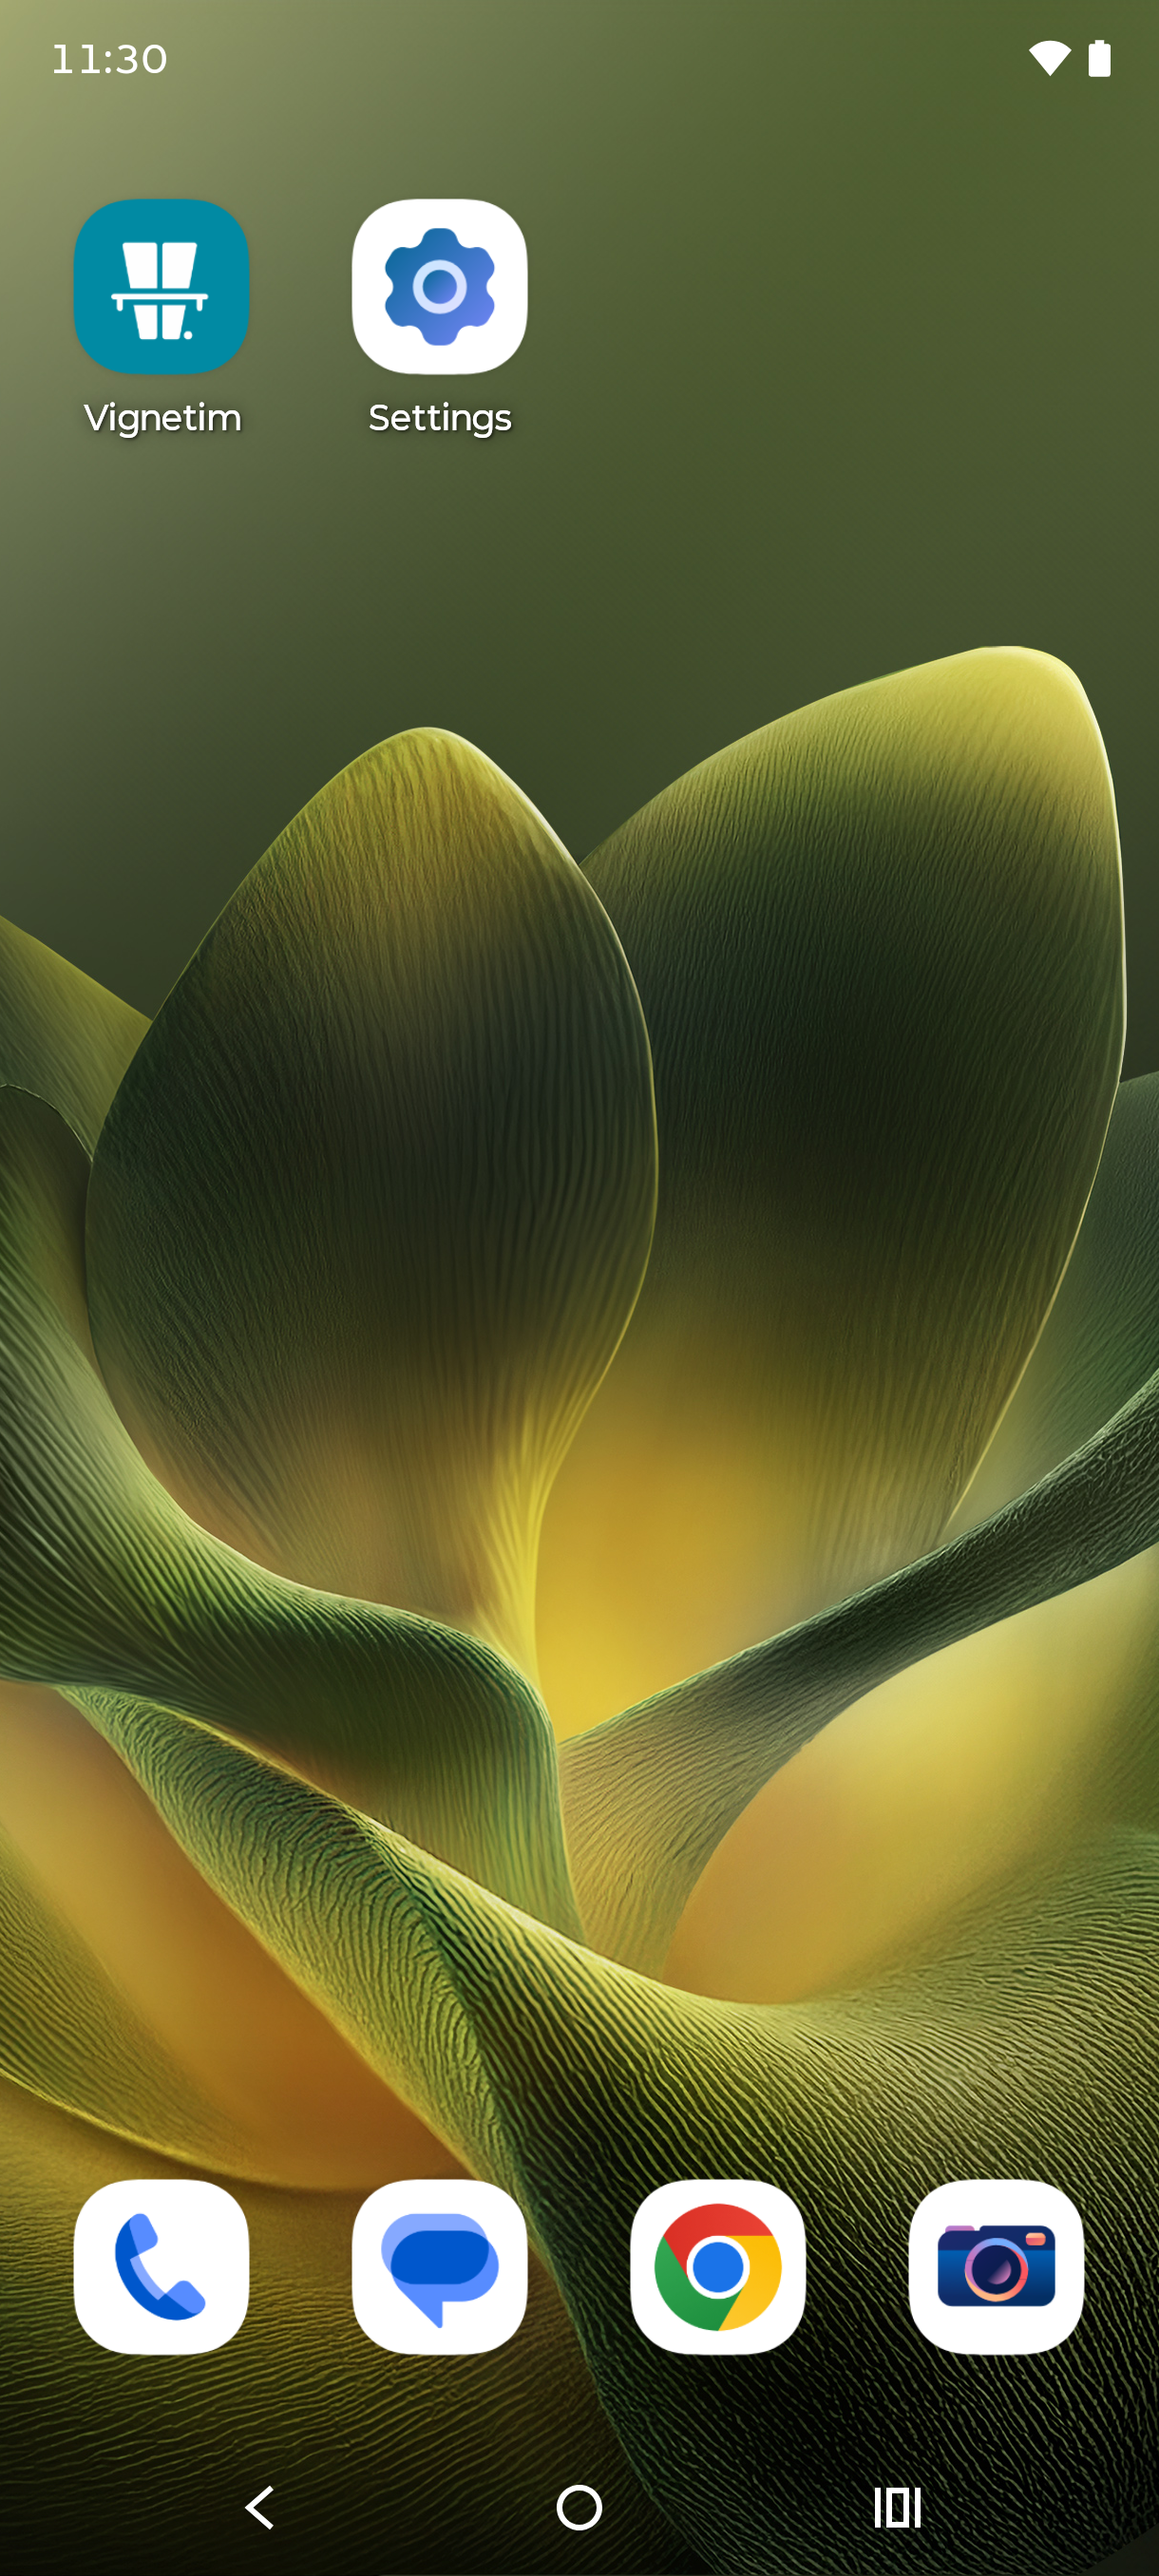
Go to your home screen and open Settings.
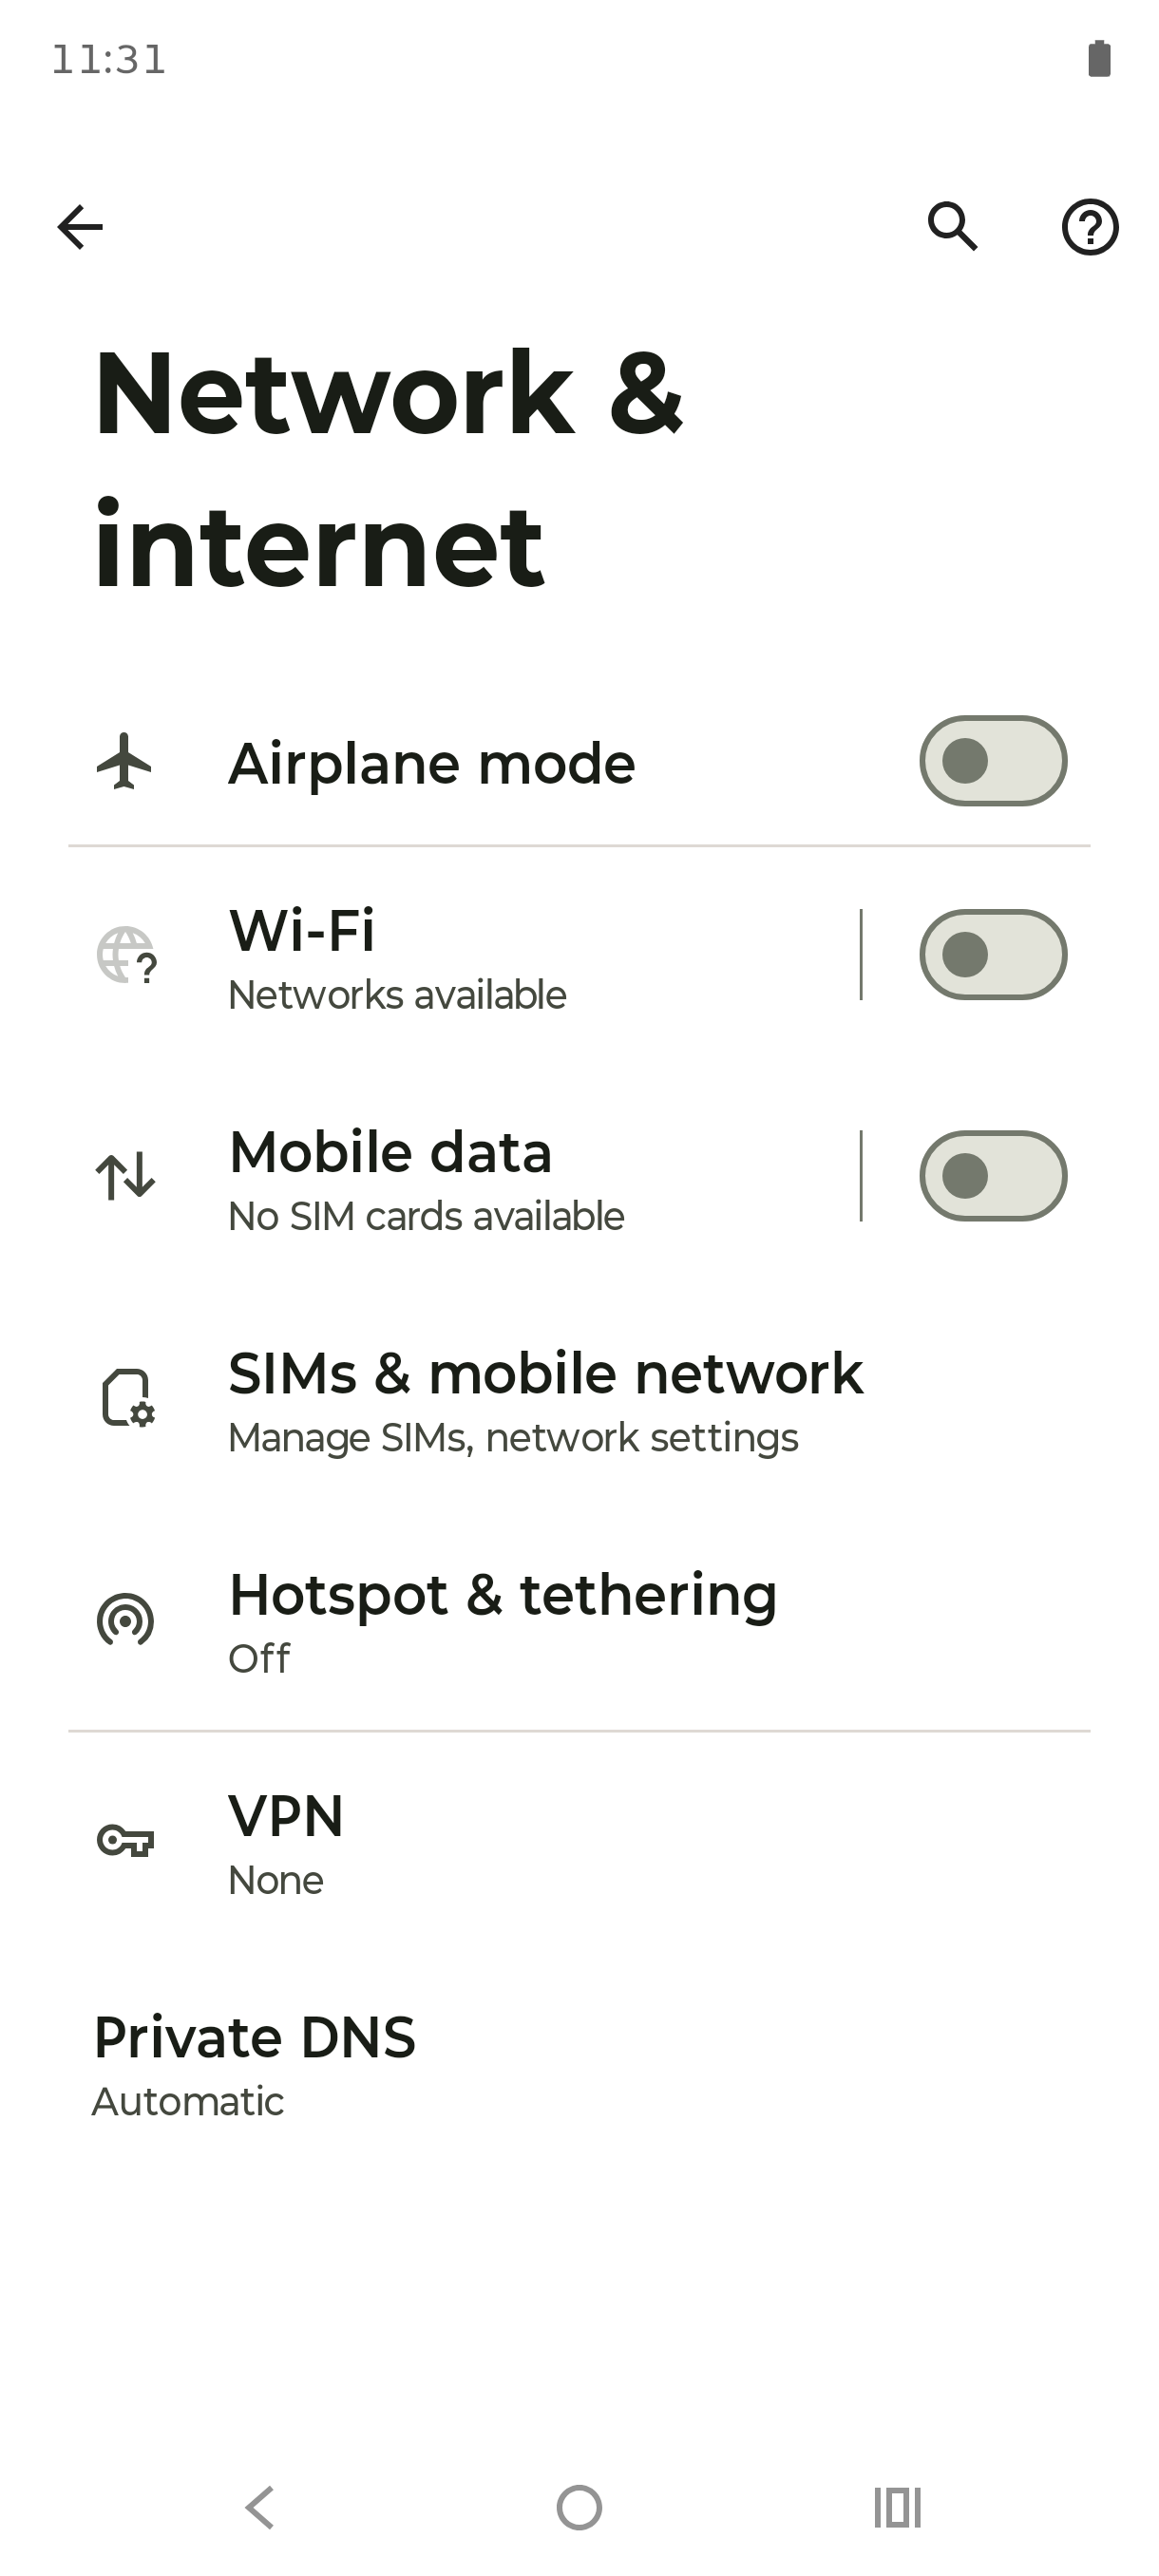
Step 2
Tap Network & internet.
Step 3
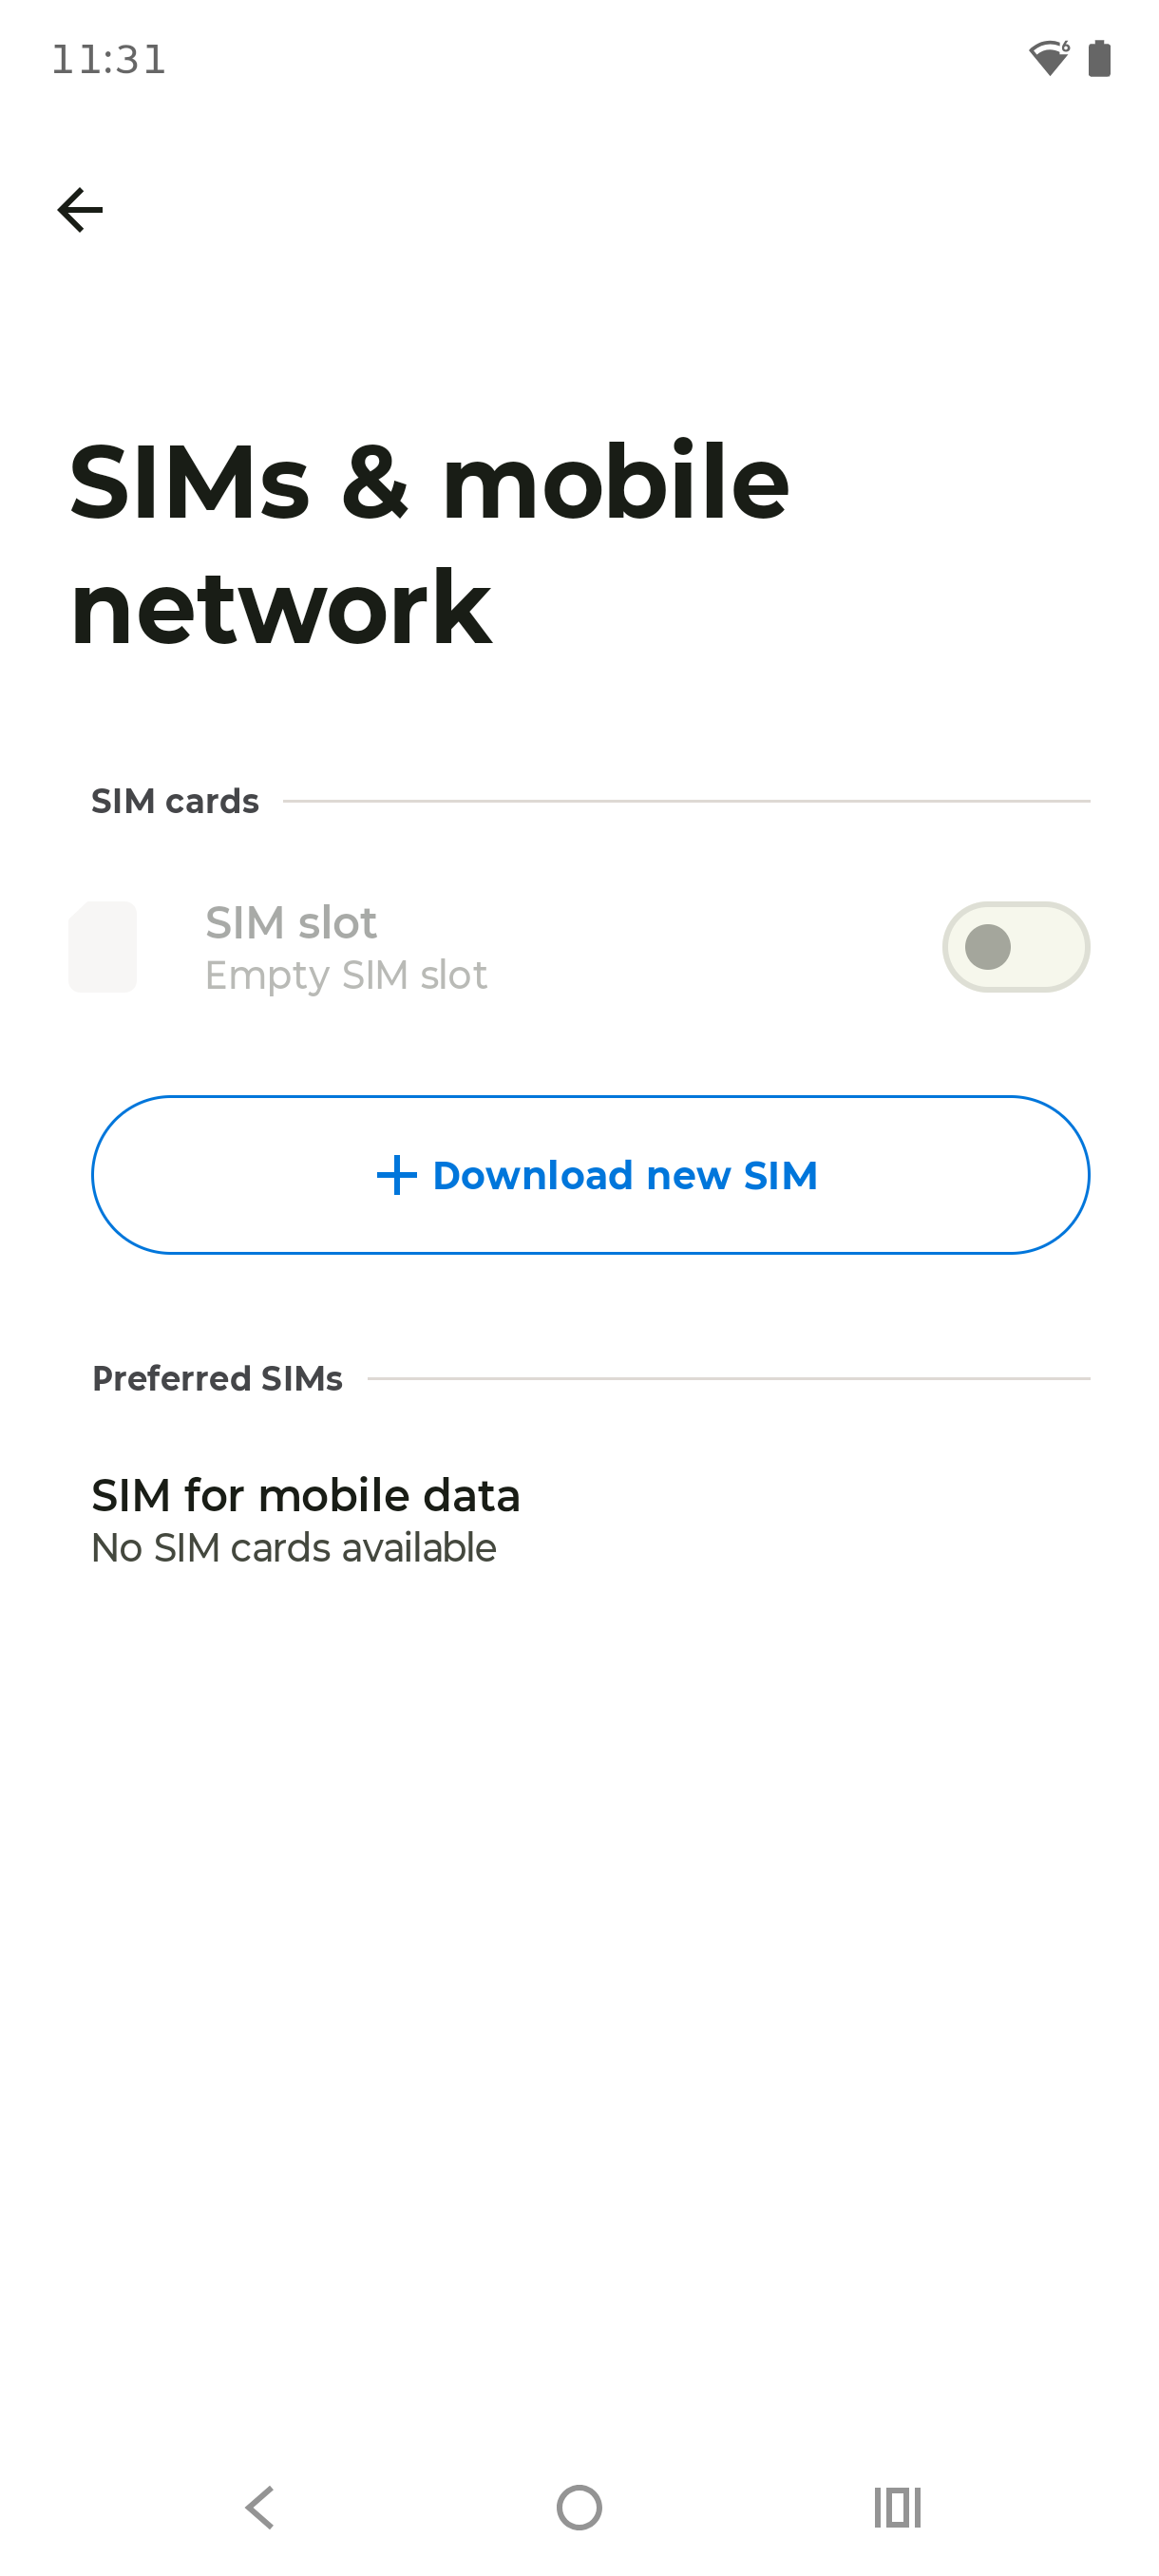
Tap SIMs & mobile network.
Step 4
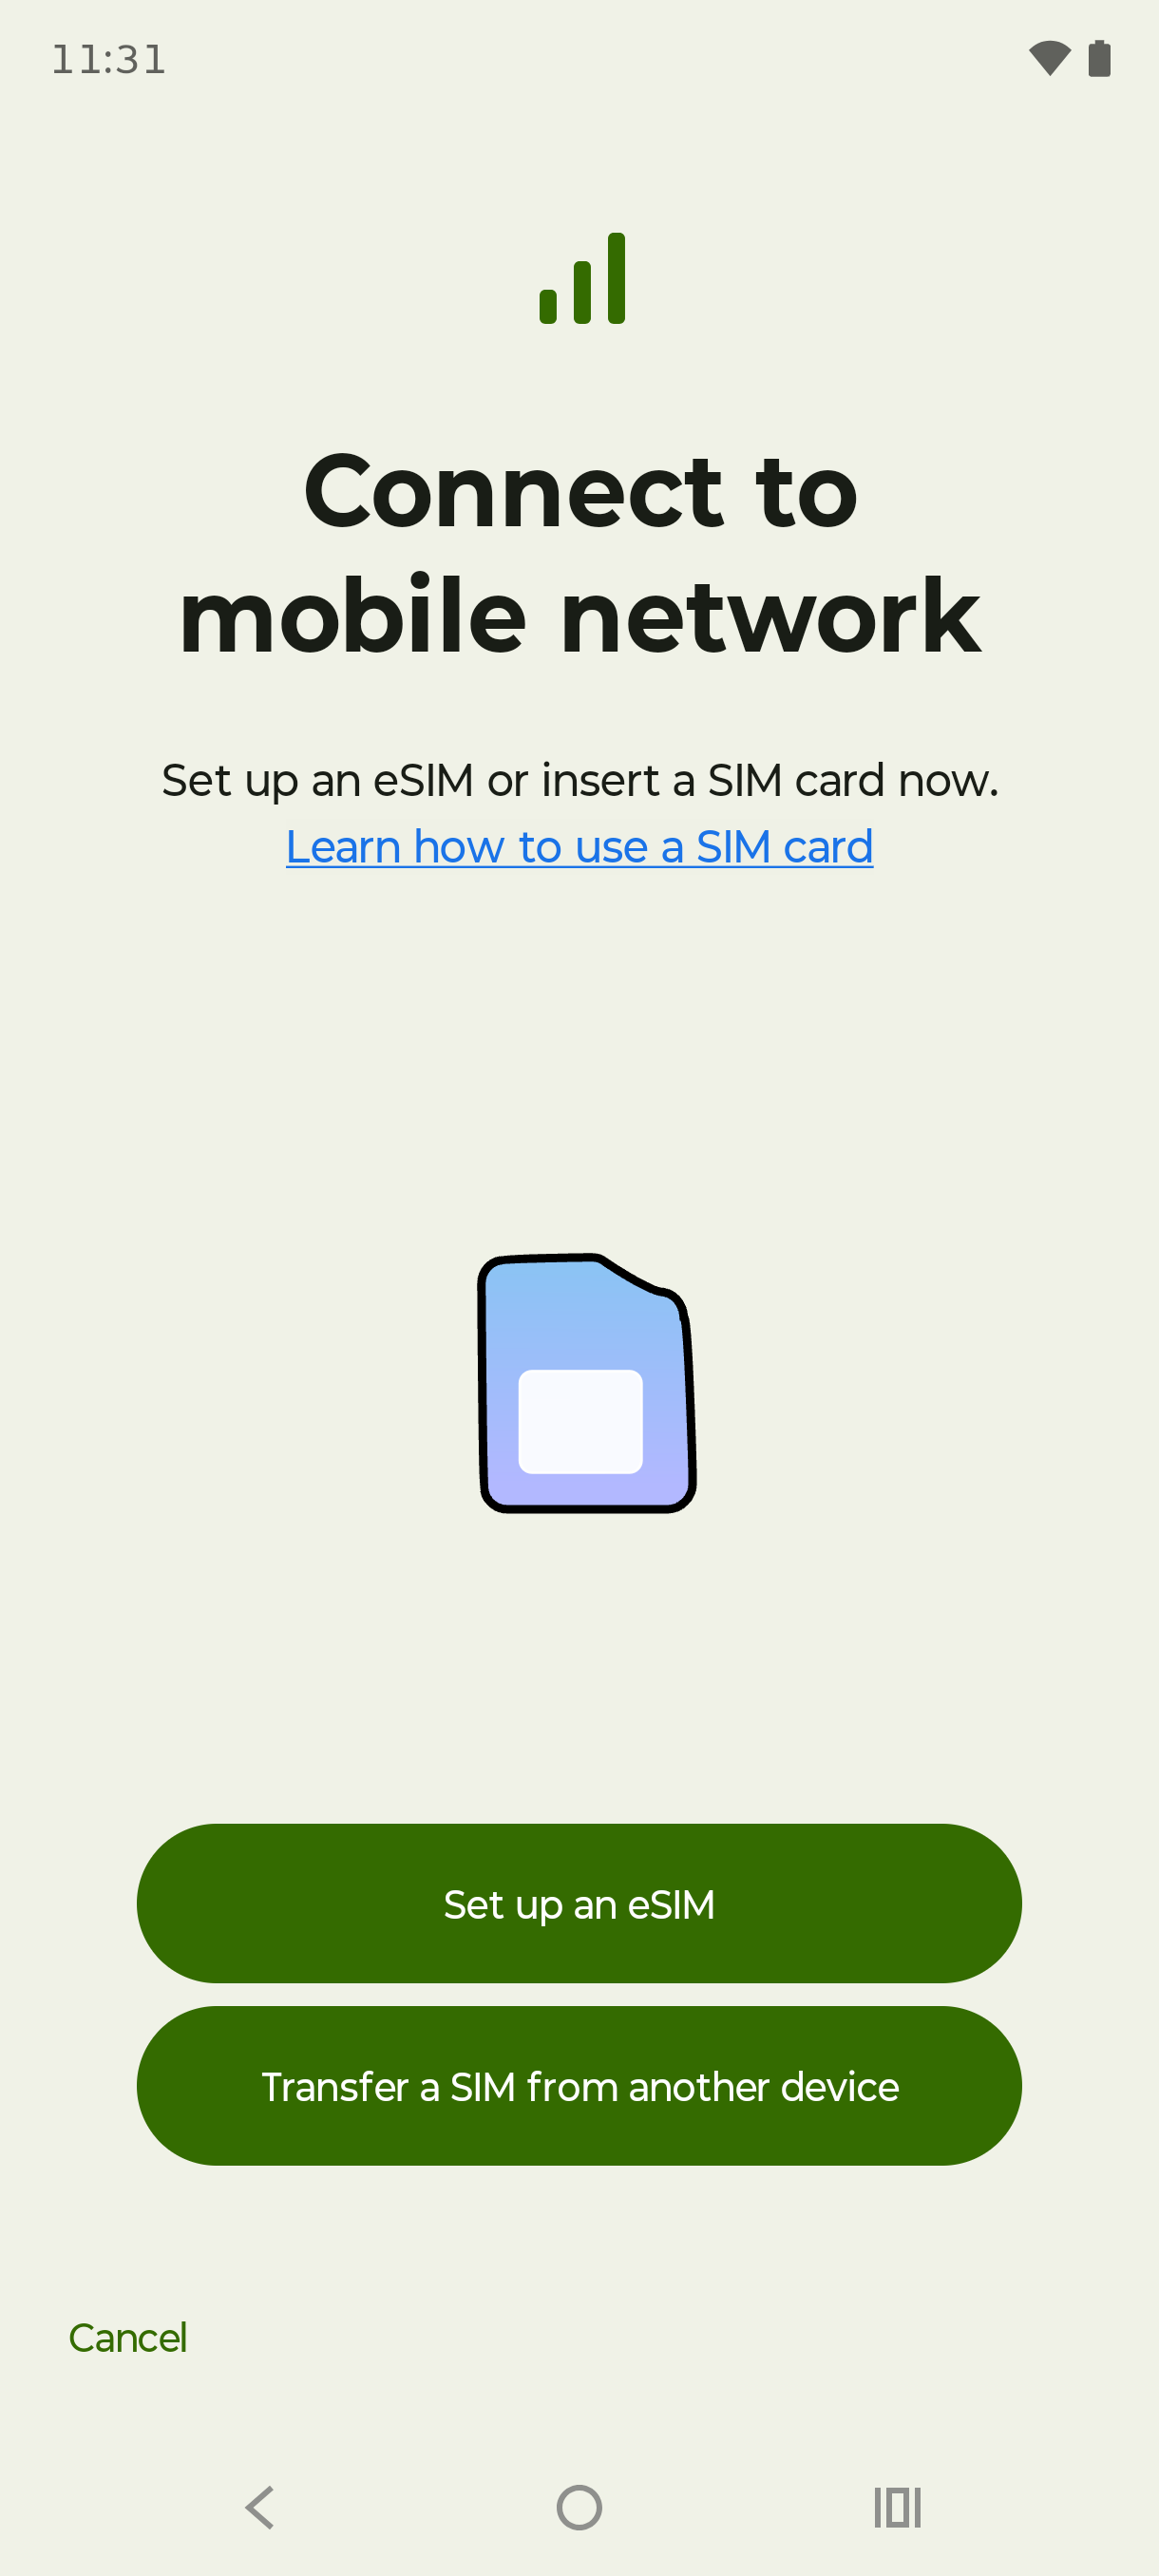
Tap Download new SIM.
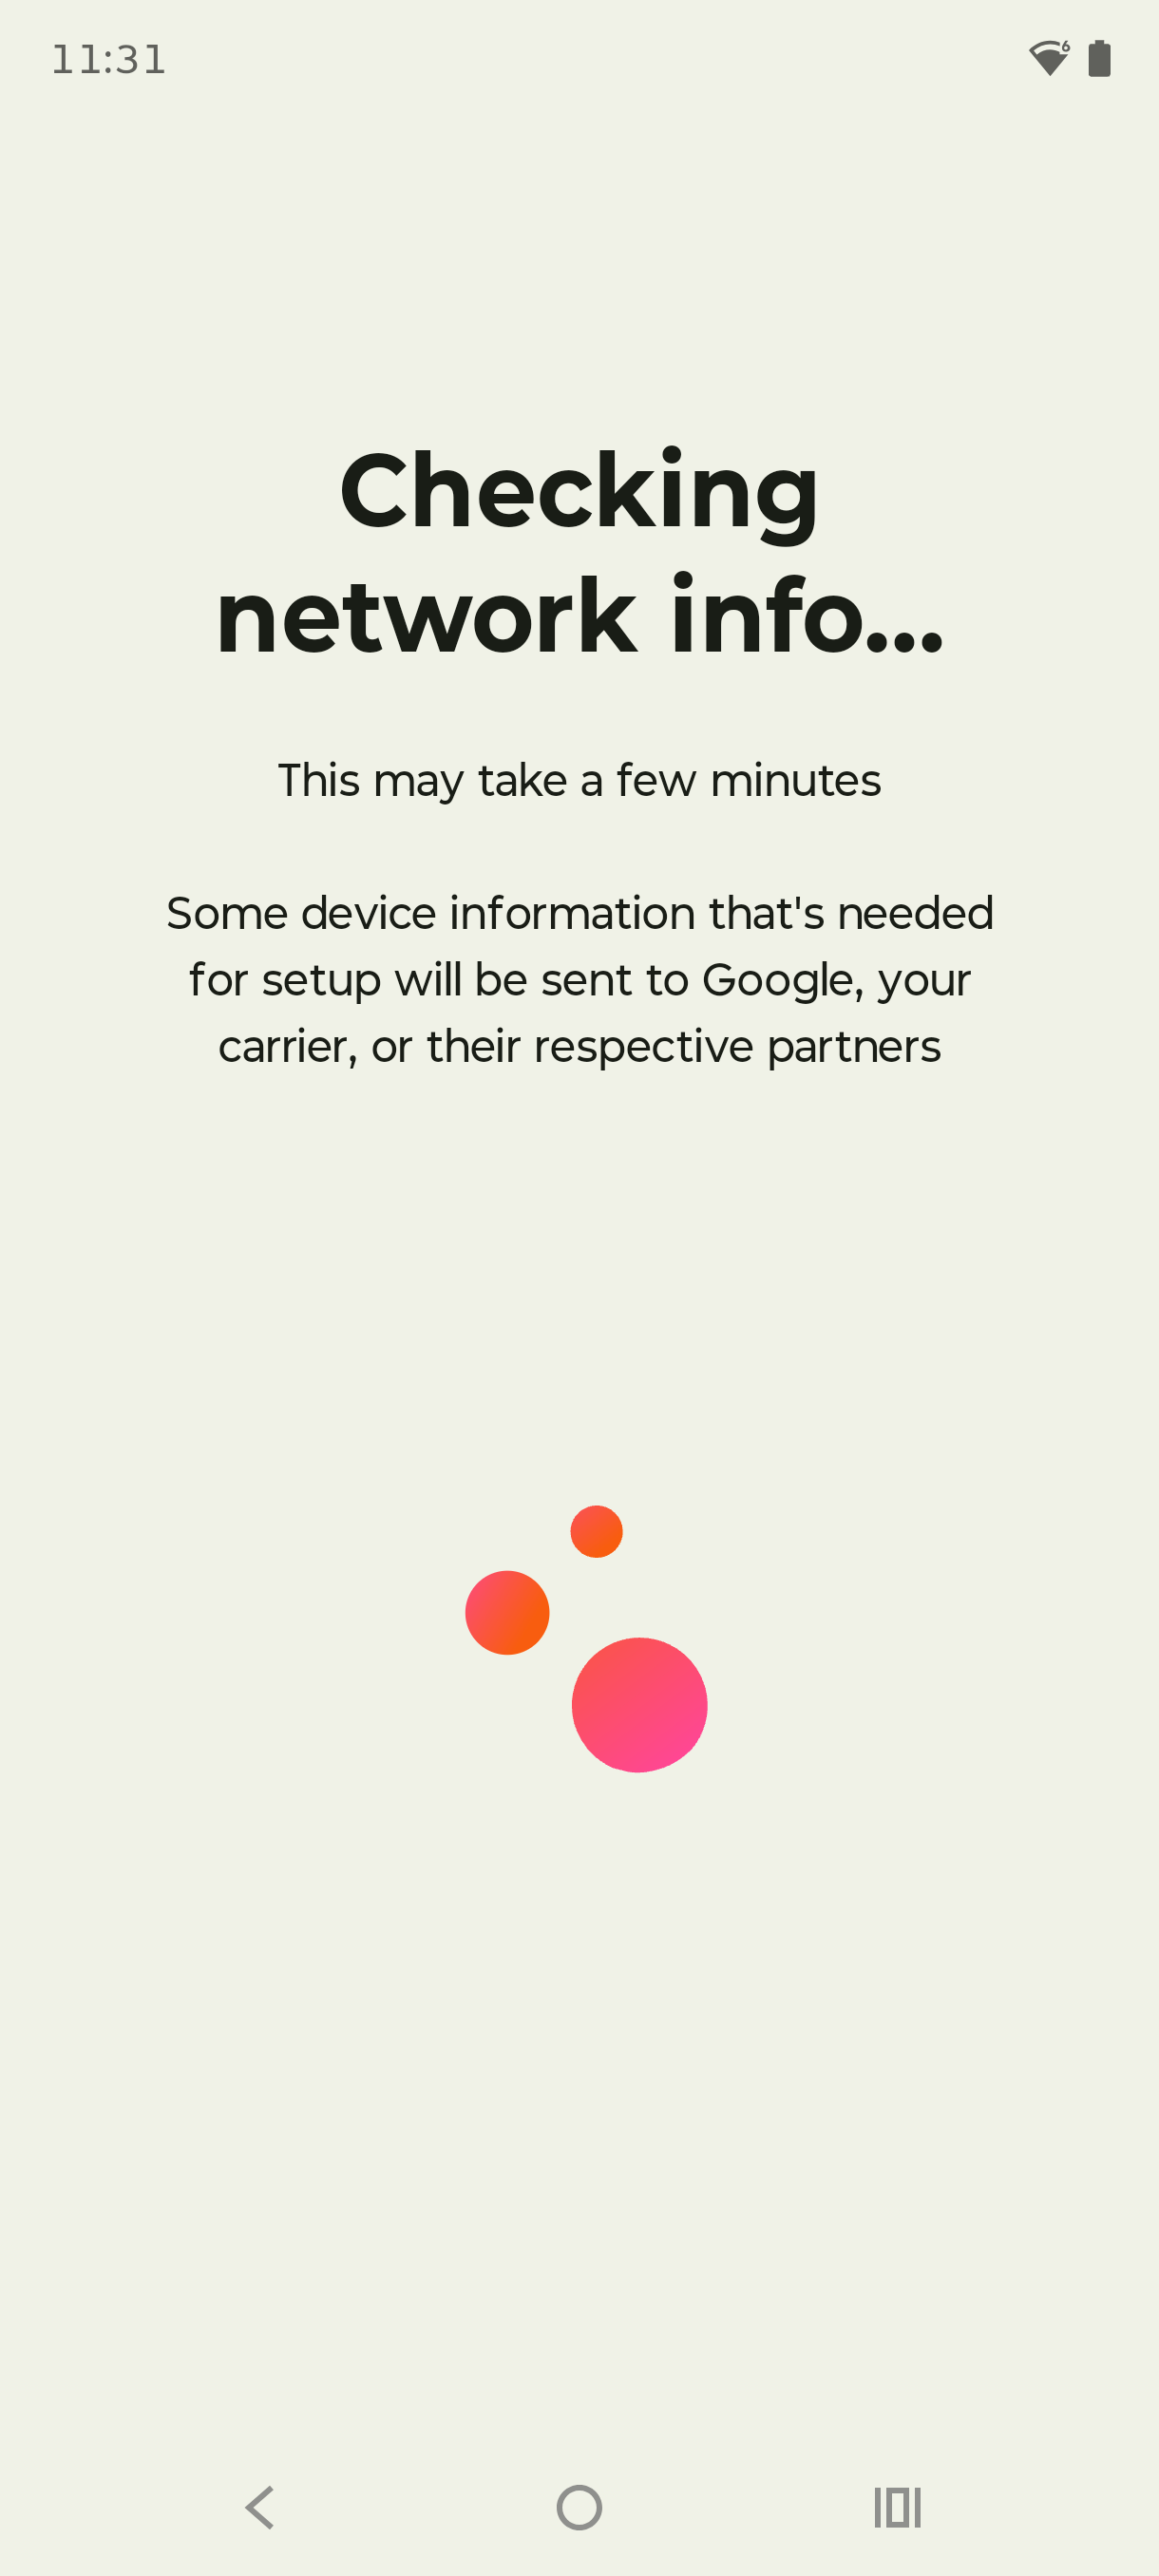
Step 5
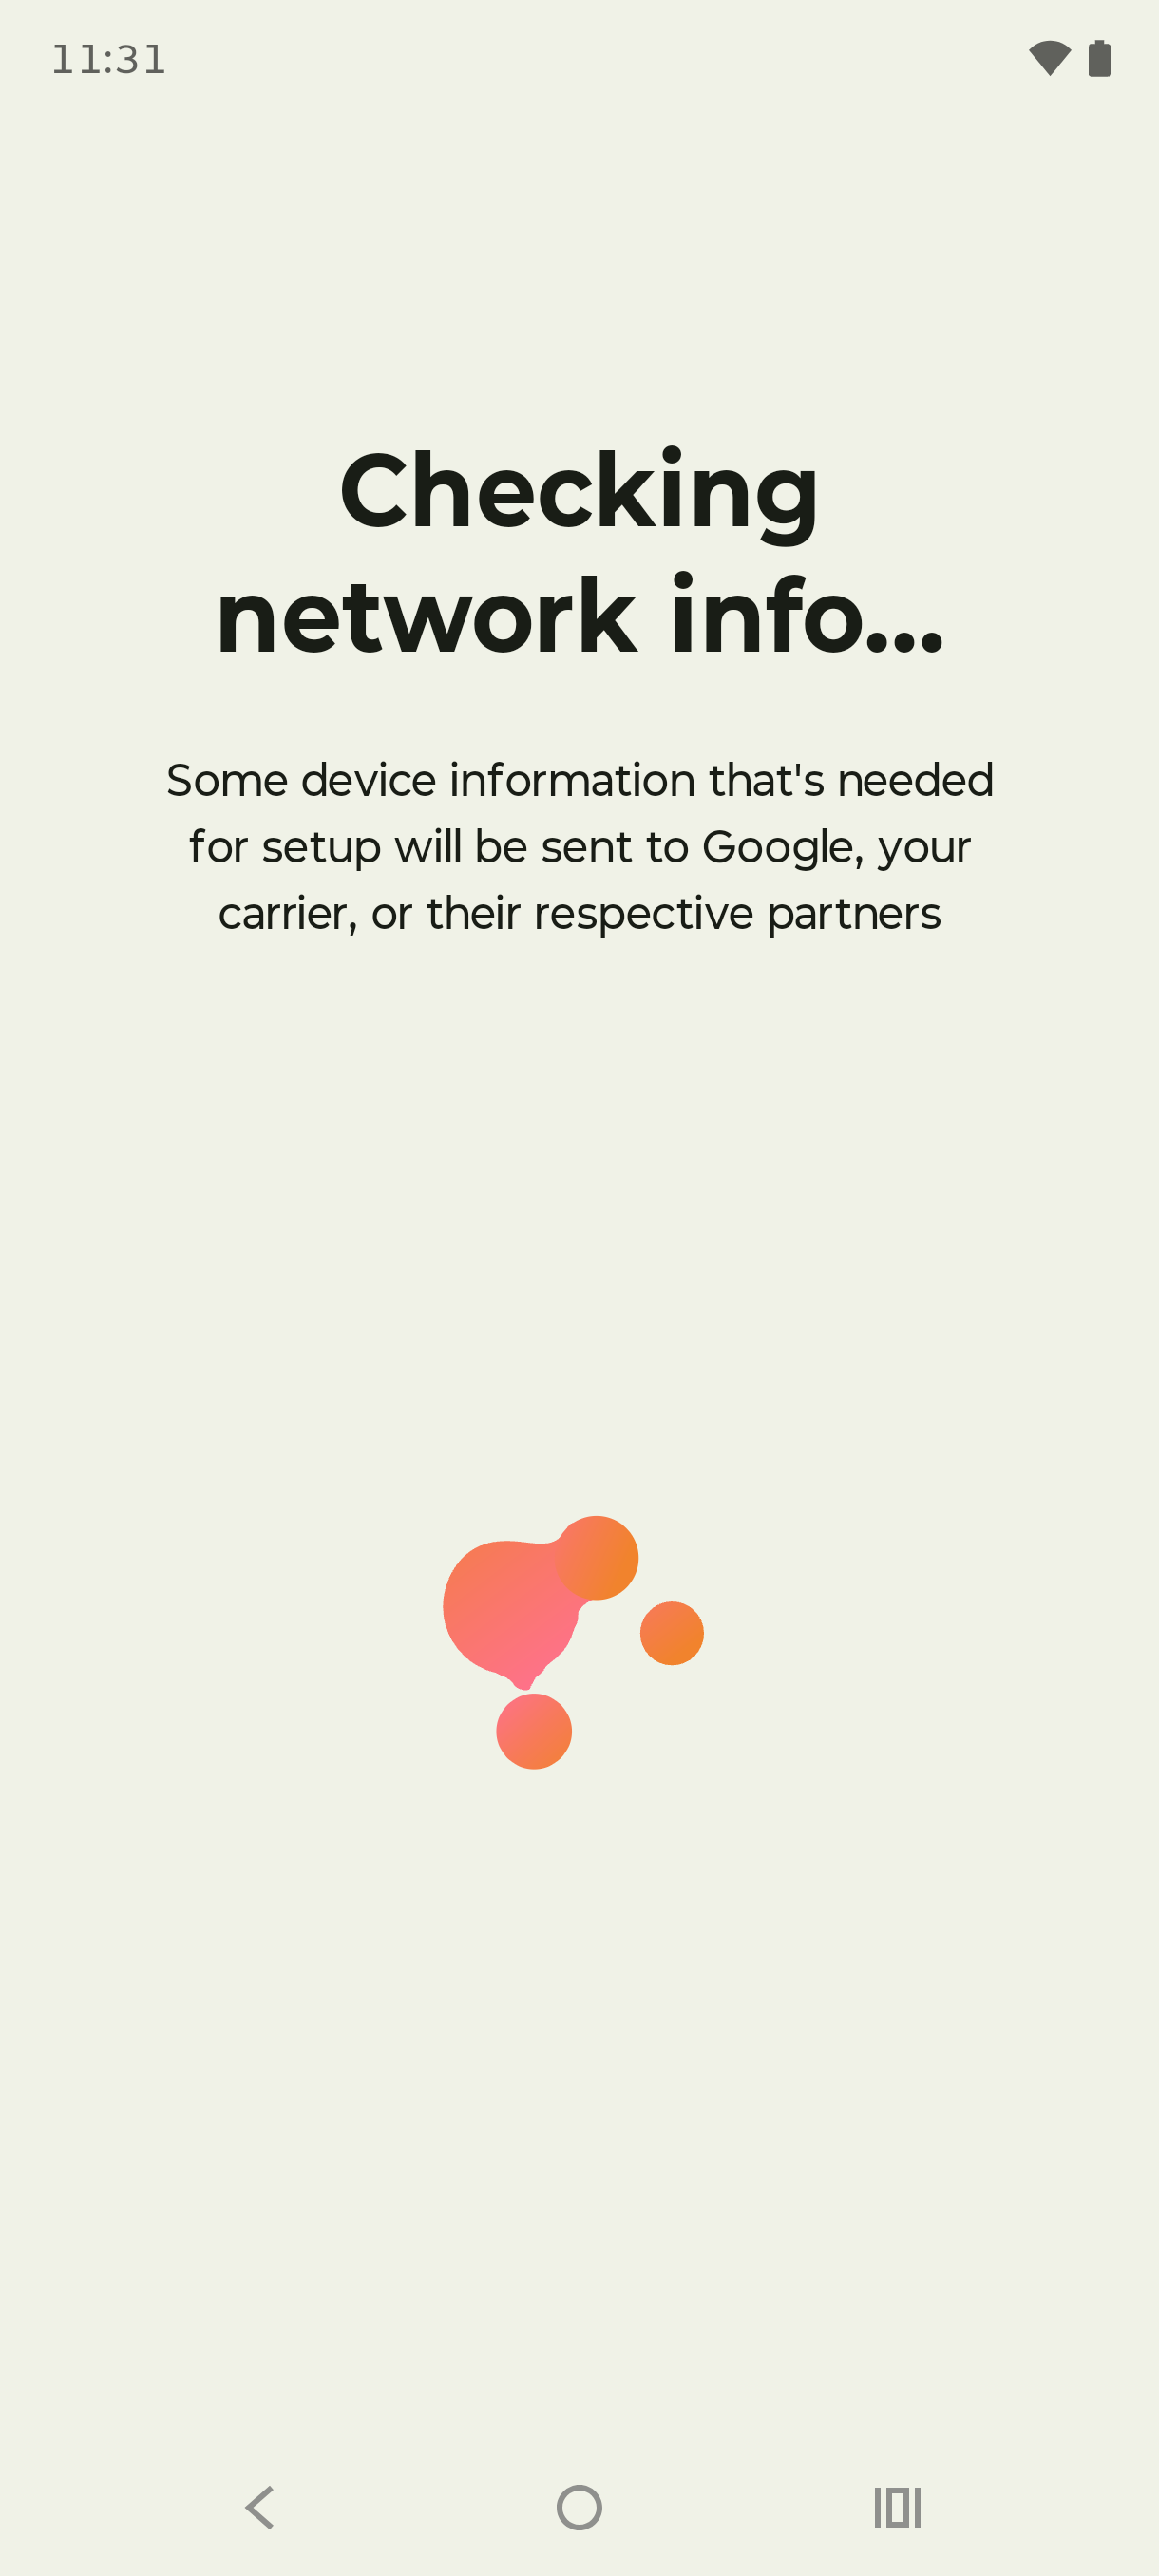
Wait while your phone checks network info. This can take a few minutes.
Step 6
Tap Set up an eSIM.
Step 7
Your phone checks network info once more. Keep the screen open and wait.
Step 8
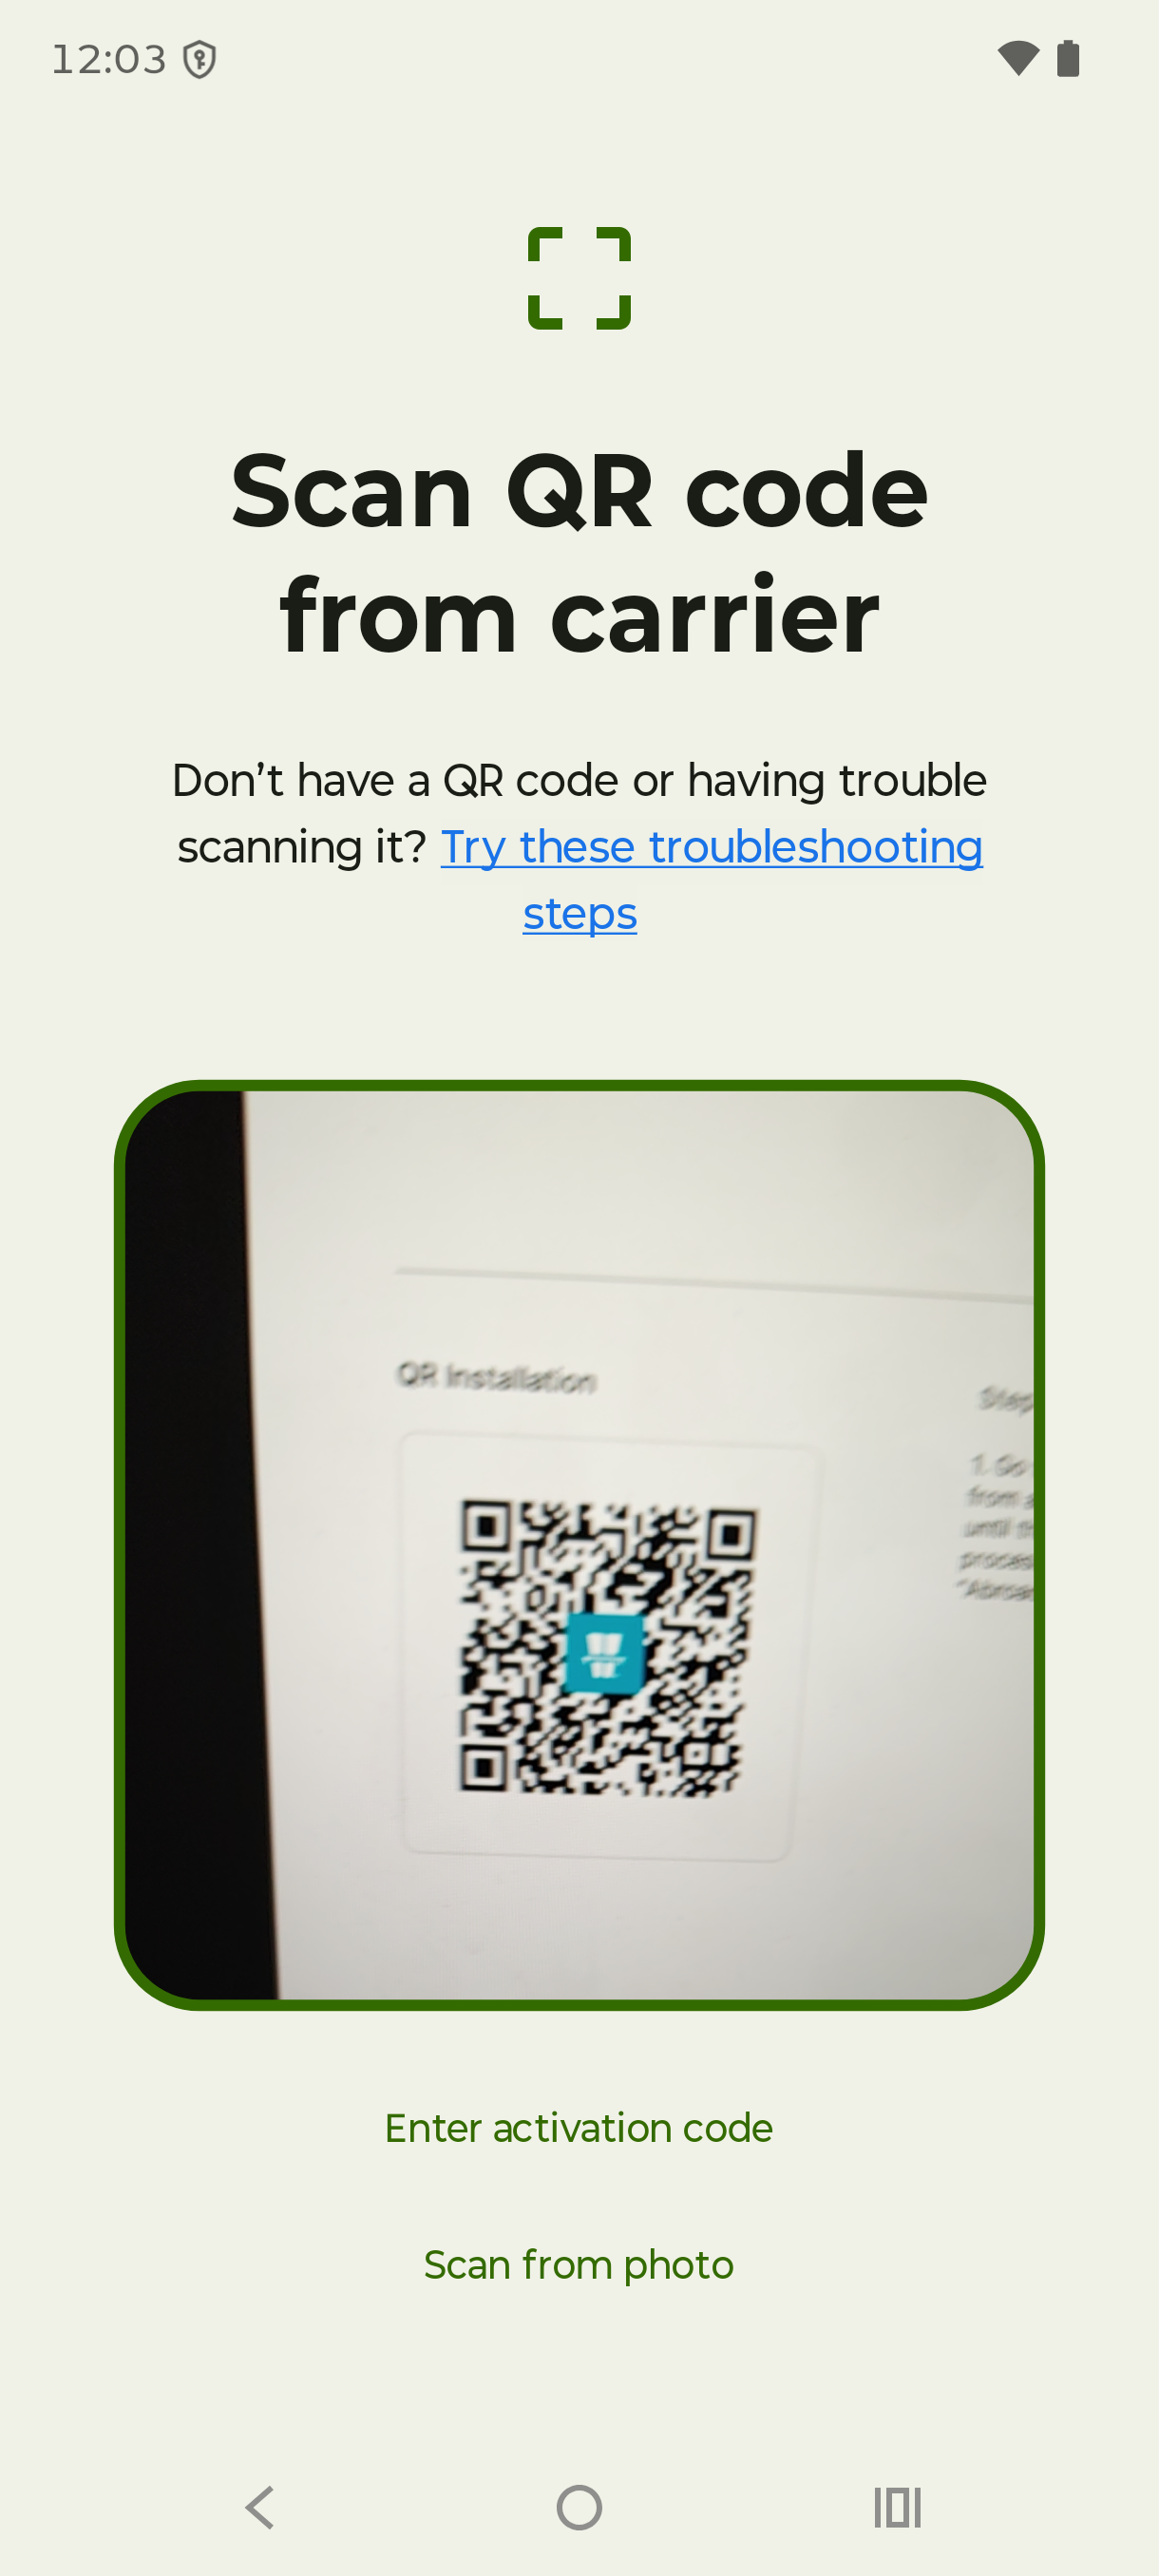
Scan the QR code from the email we sent you, or open it in the Vignetim app.
Step 9
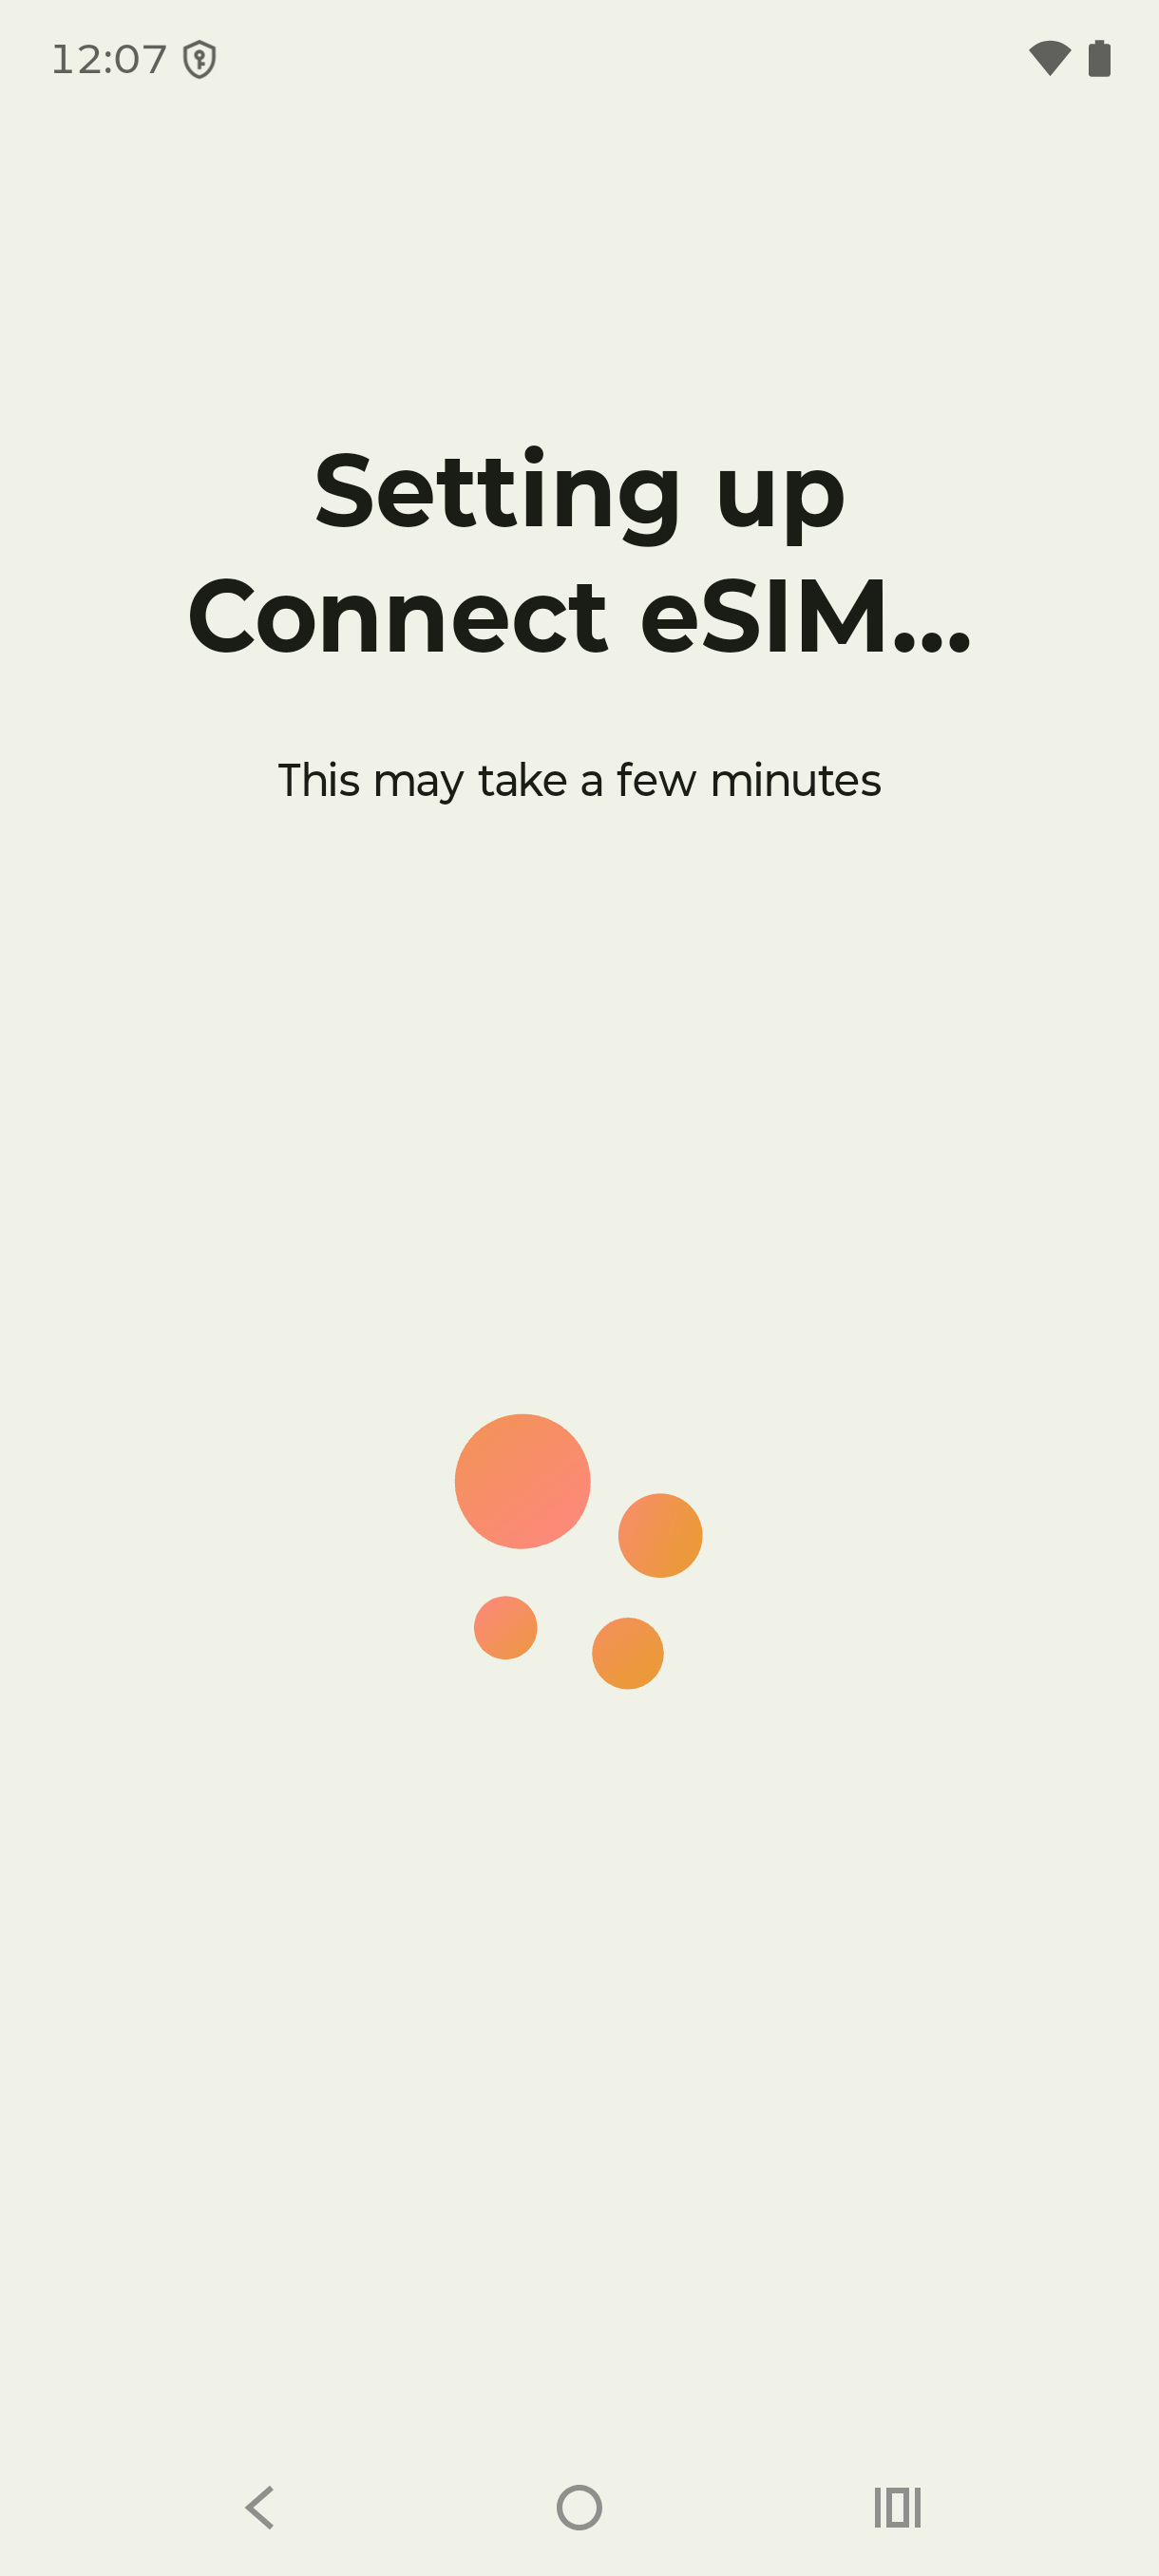
Wait while your phone downloads and sets up the eSIM.
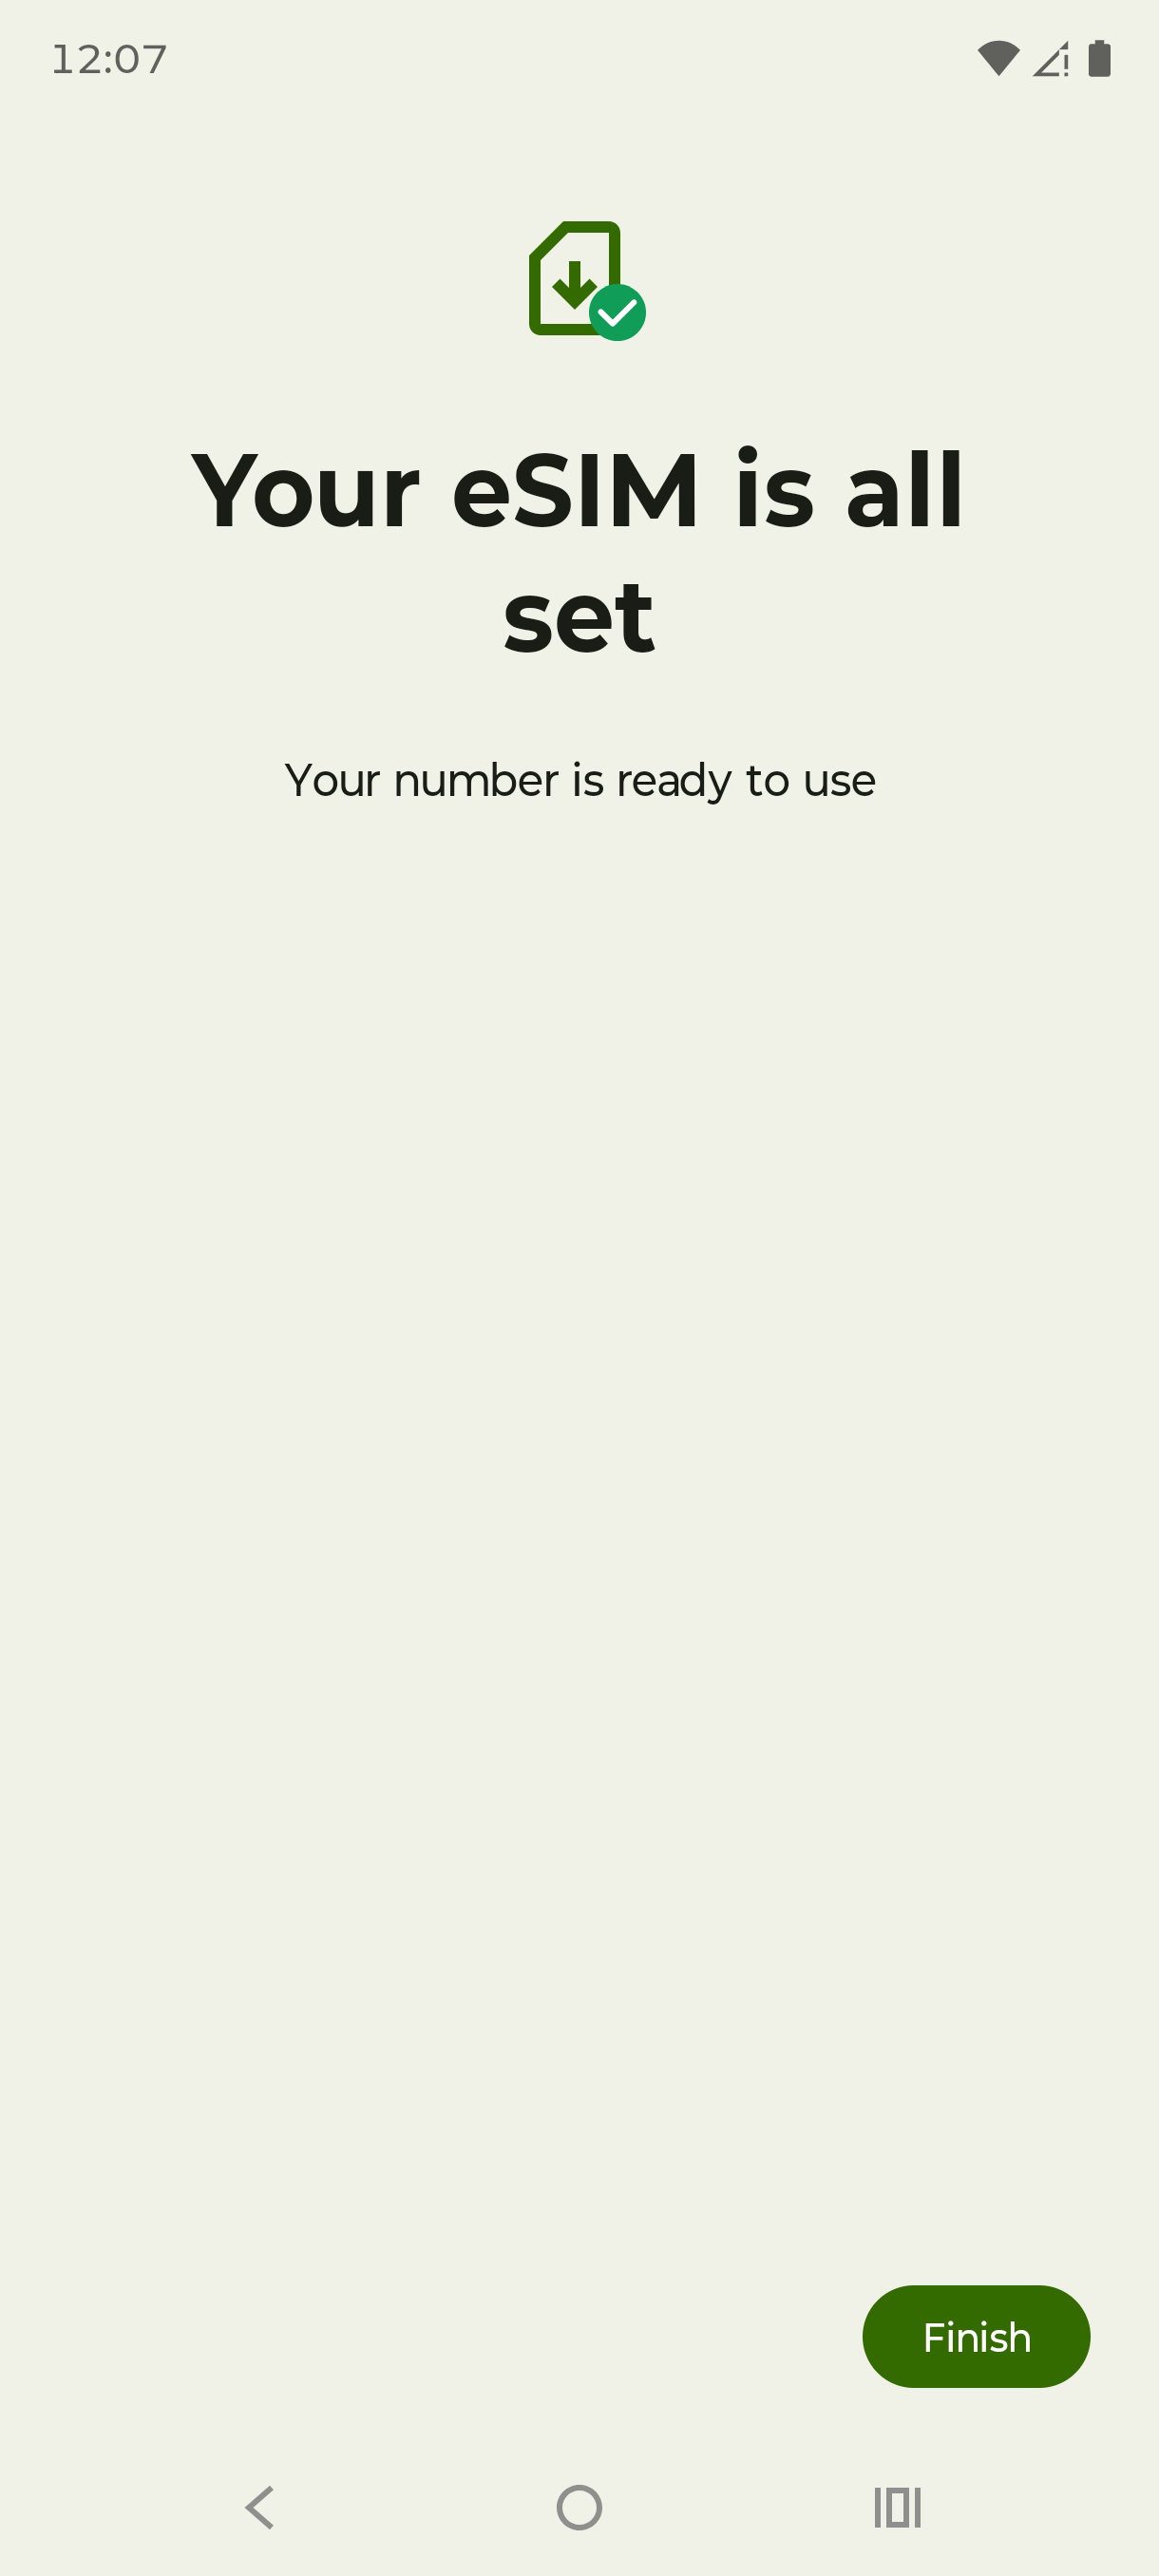
Step 10
When setup finishes, tap Finish.
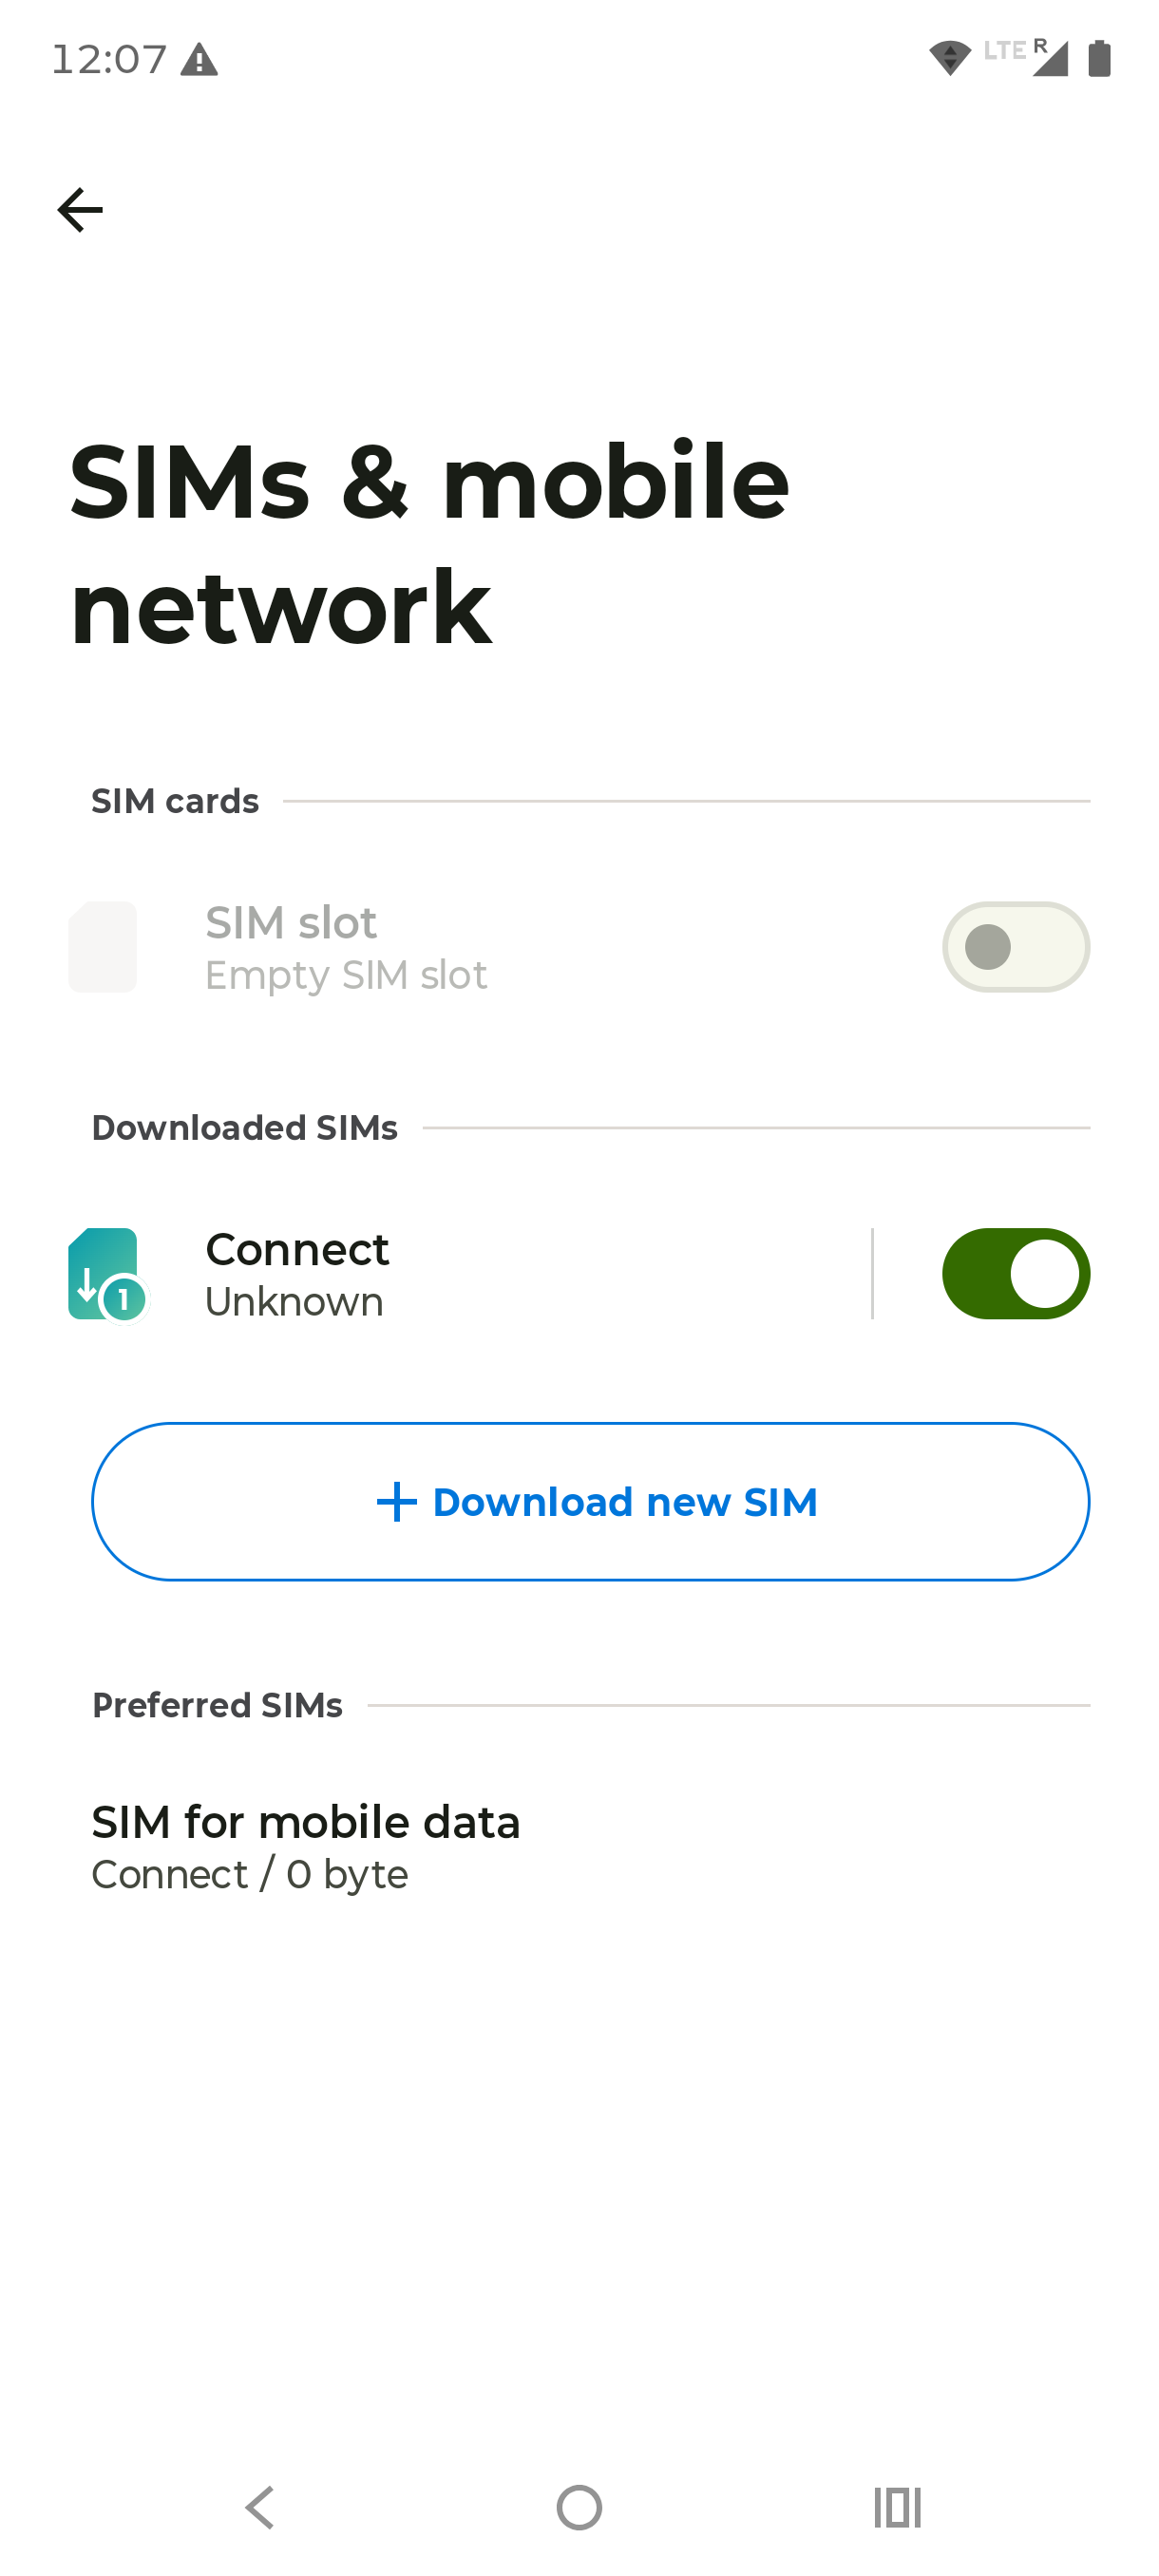
Step 11
Your new eSIM now appears under Downloaded SIMs. Make sure it is turned on and set as your SIM for mobile data.
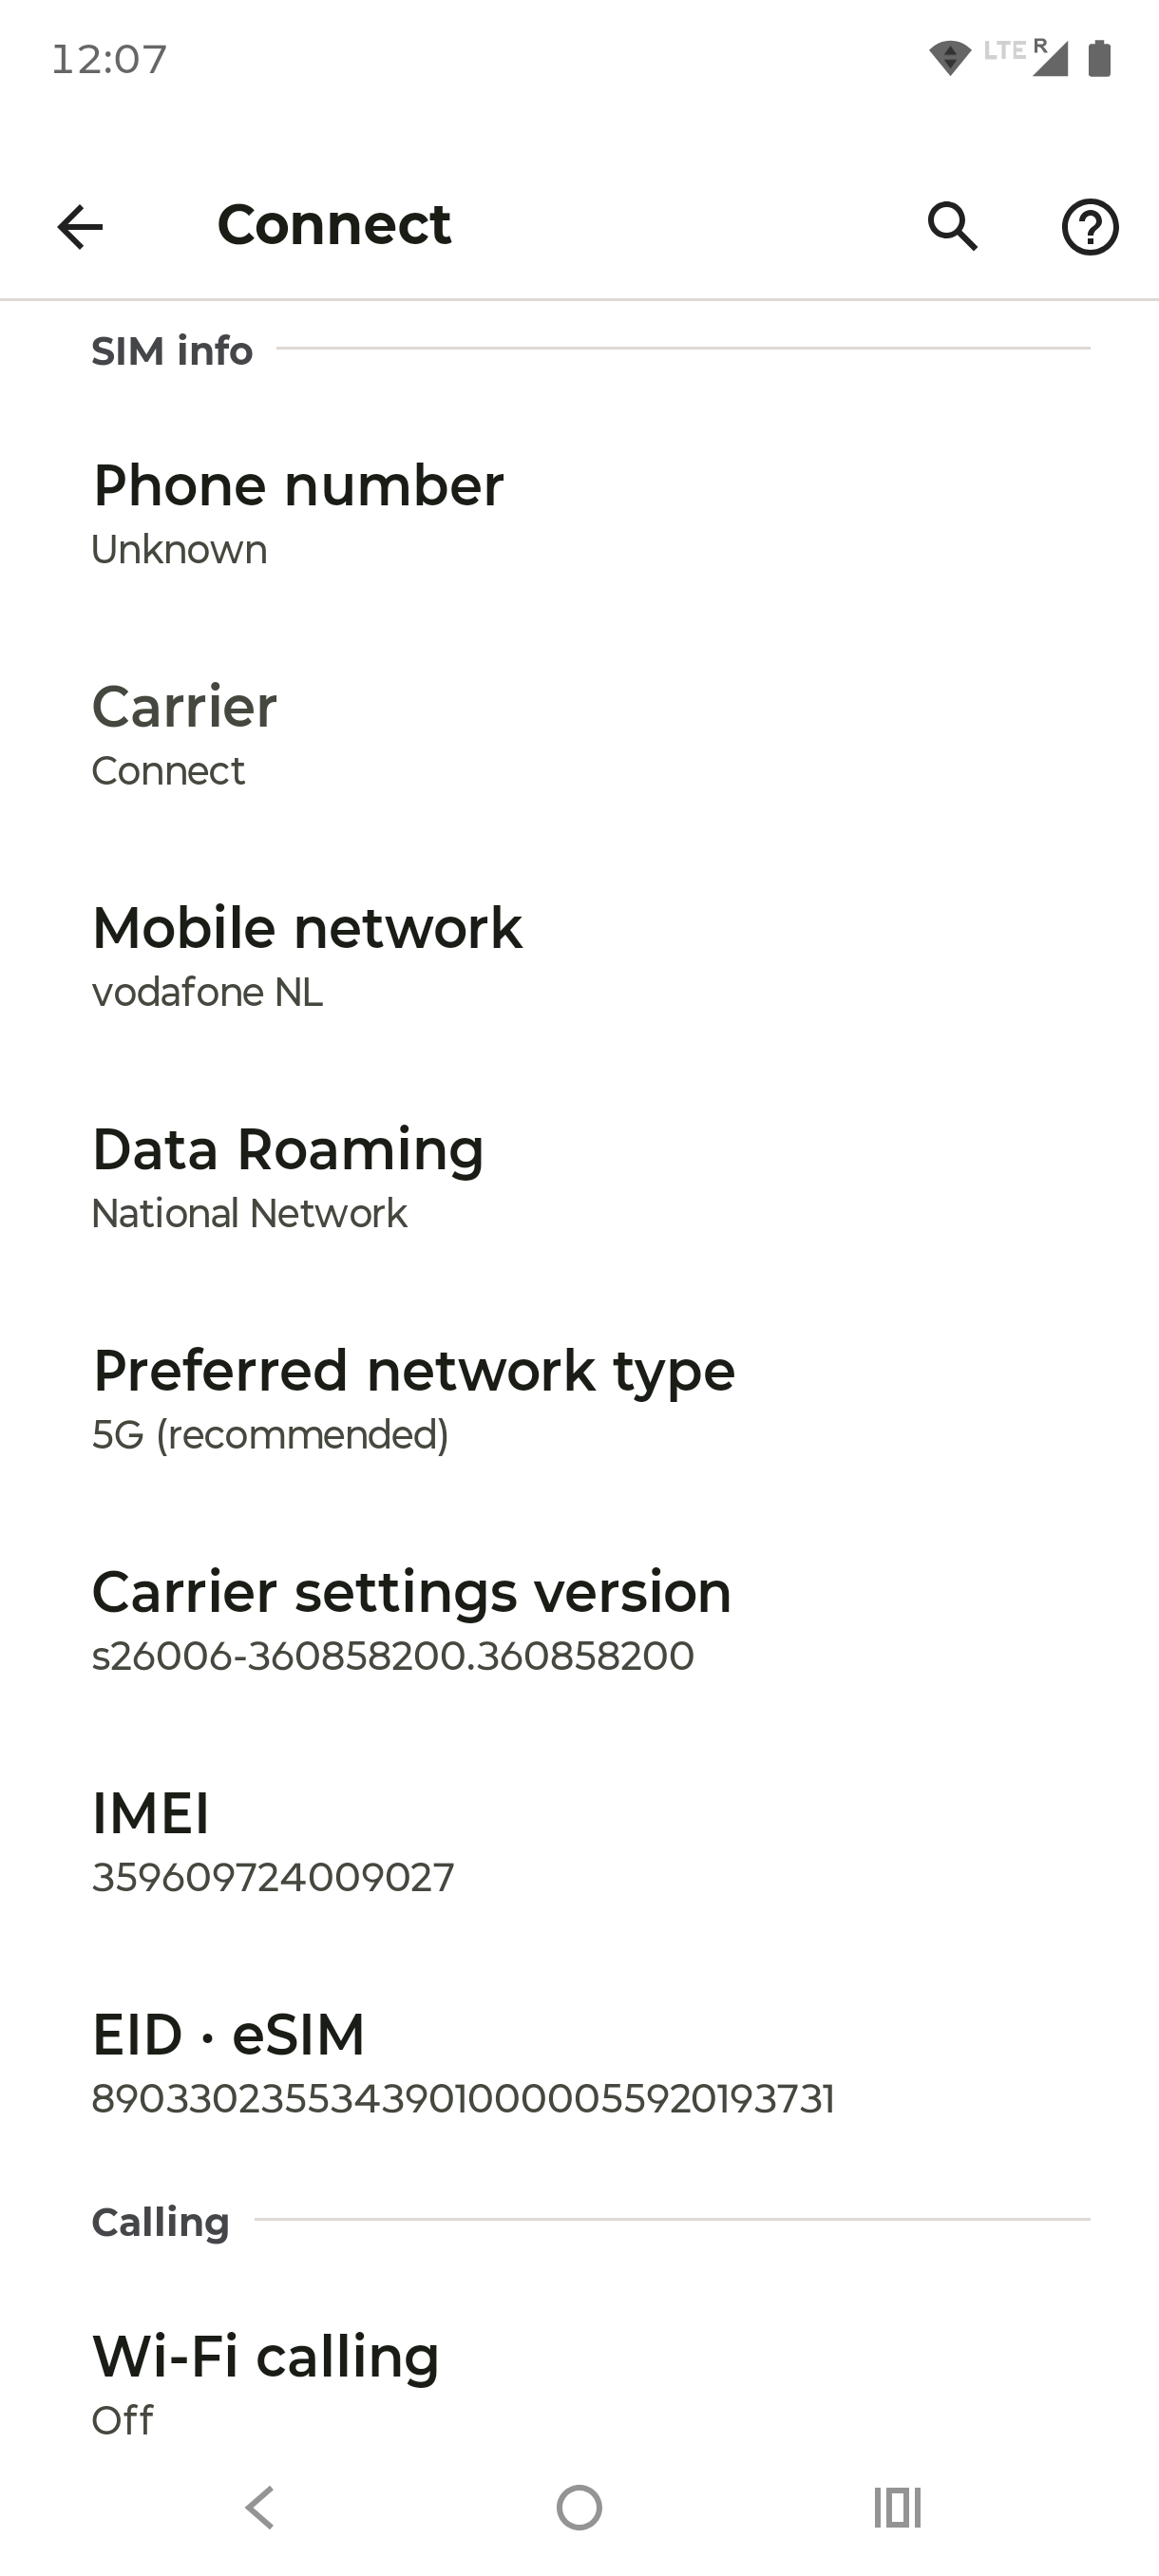
Step 12
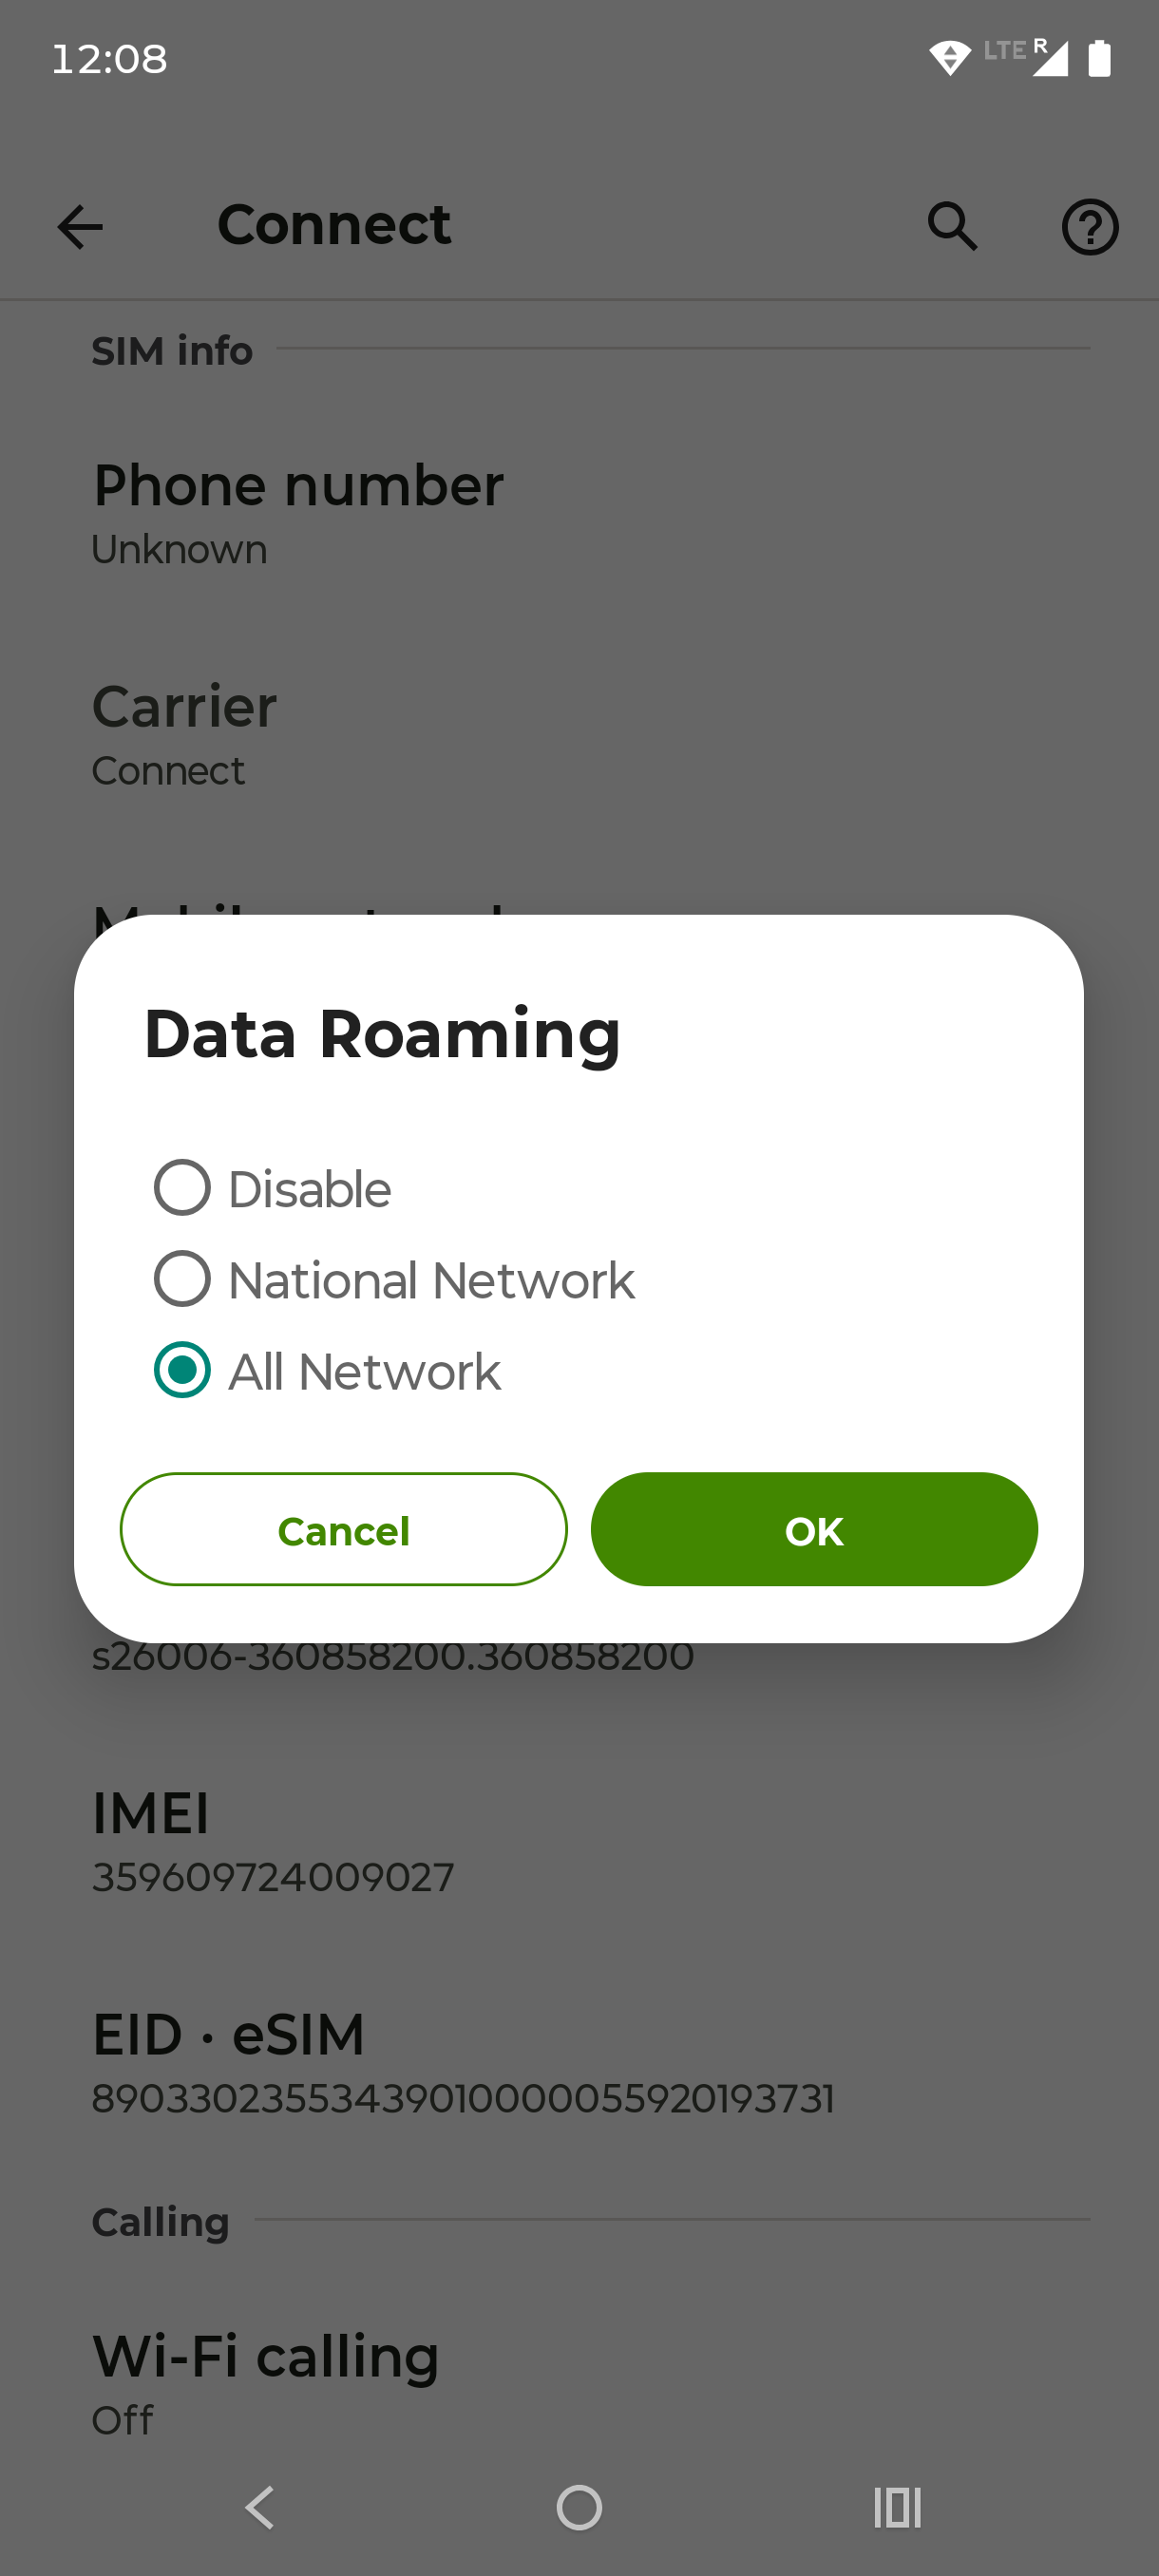
Tap your new eSIM, then tap Data Roaming.
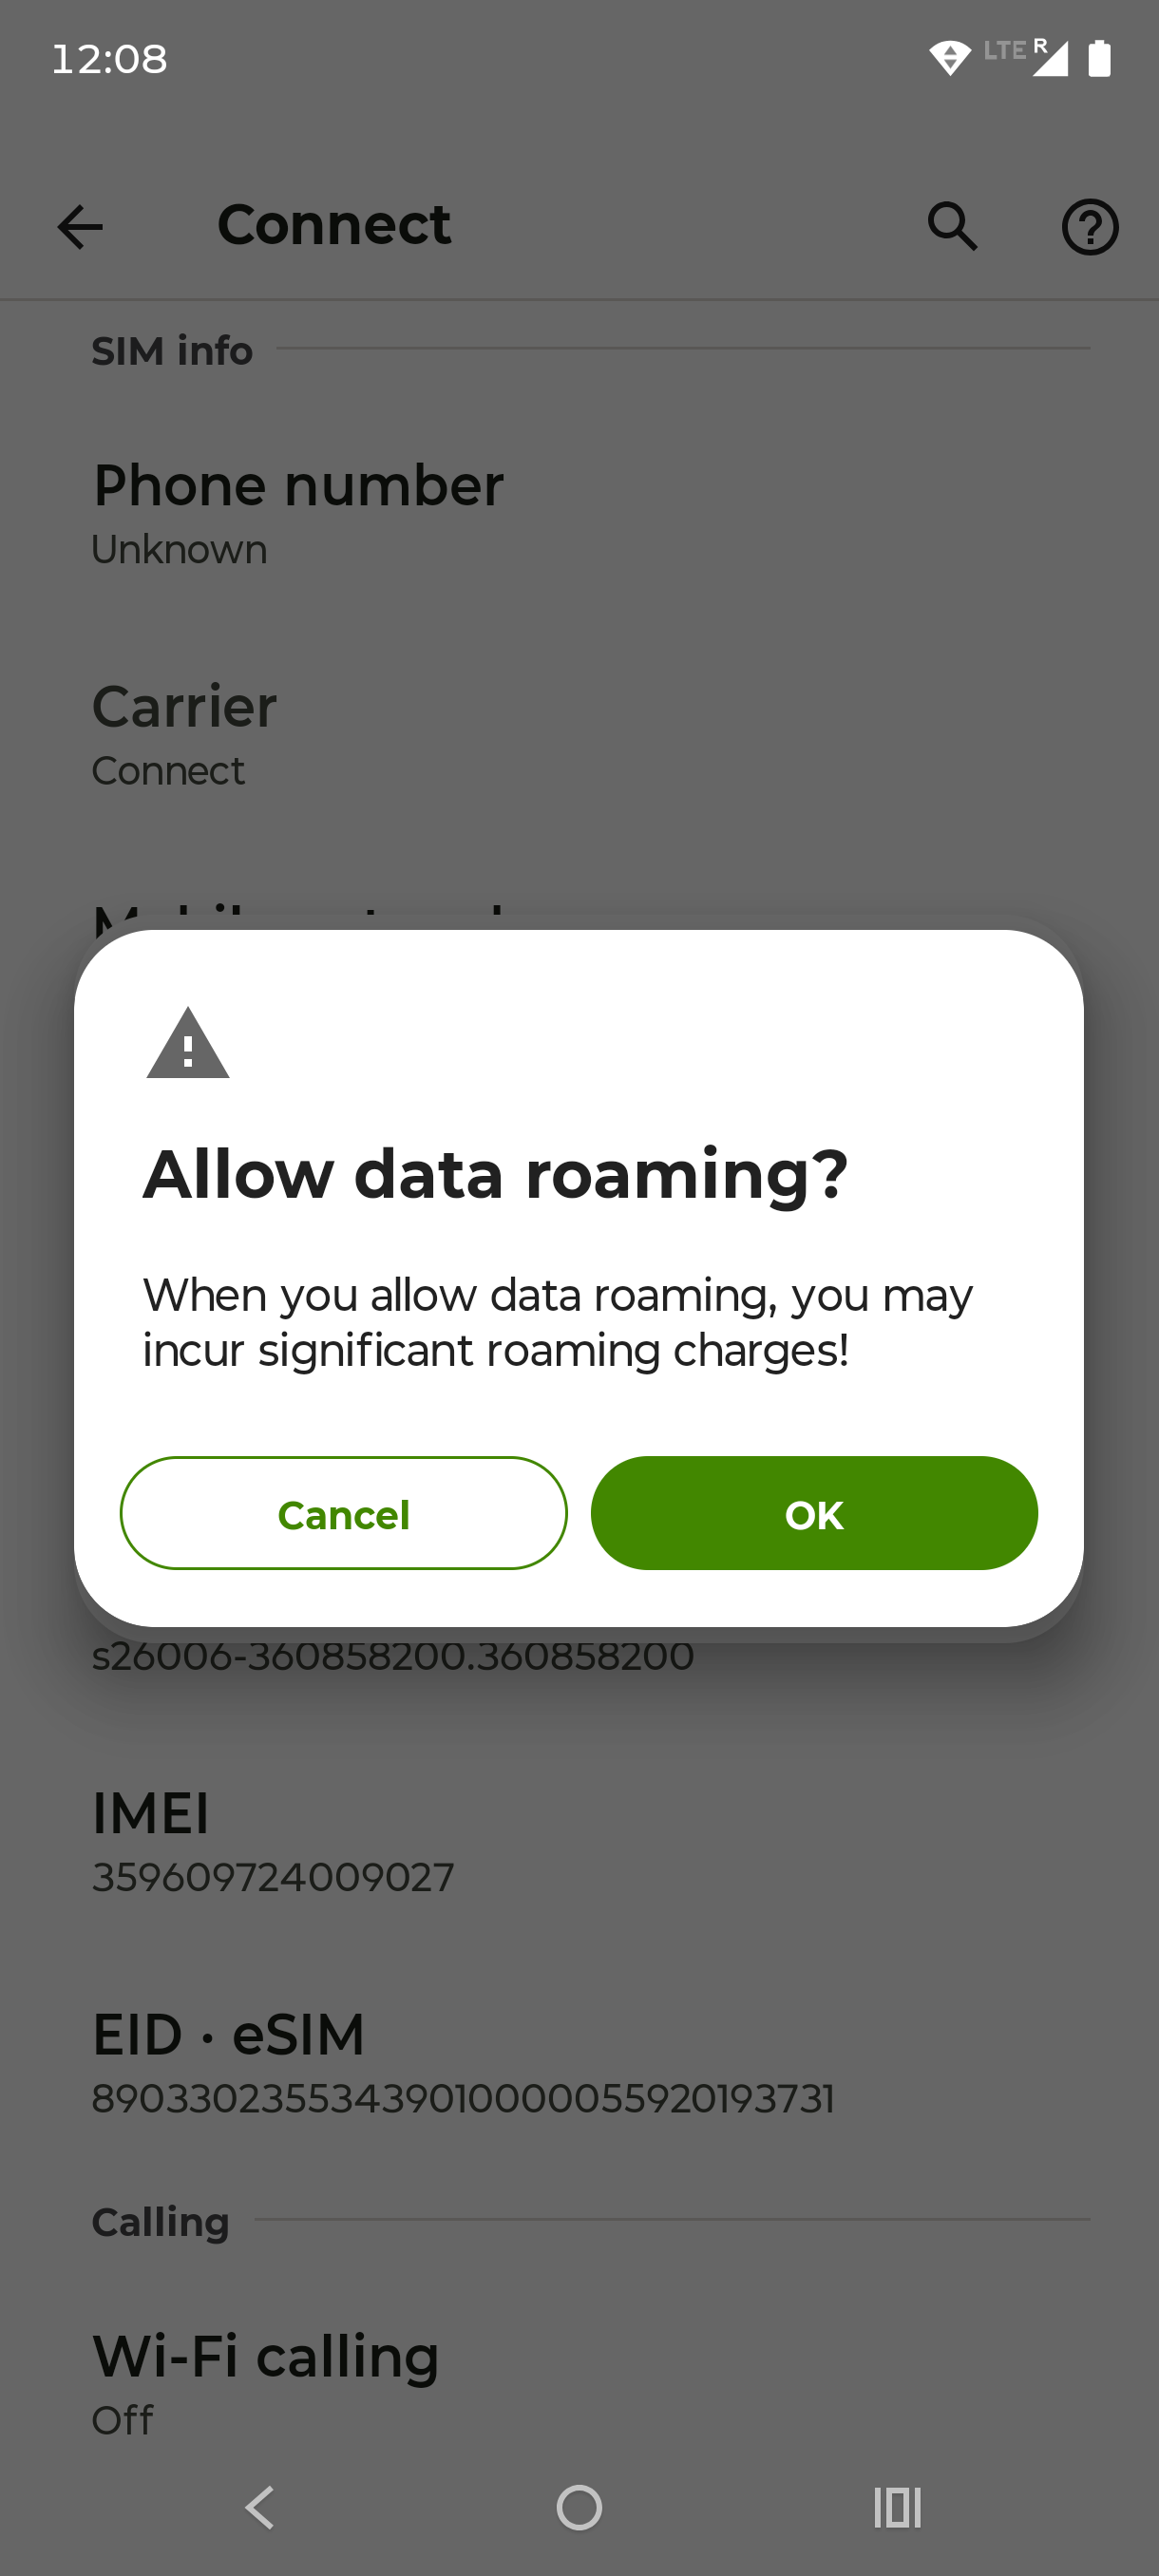
Step 13
Tap OK to allow data roaming.
Step 14
Select All Network and tap OK. Your eSIM is ready to use.
1 / 14
Before You Start
Two minutes of prep prevents almost every activation problem. Check these first:
Your phone supports eSIM
Dial *#06#; if an EID number appears, you are ready. Most phones released since around 2018 qualify (iPhone XS and newer, recent Samsung Galaxy, Google Pixel 3 and newer). If you are unsure, our guide to what an eSIM is explains the compatibility check in more detail.
Your phone is carrier-unlocked
A phone locked to one operator cannot use a travel eSIM. A quick call to your operator confirms it.
You are on stable Wi-Fi
Installing an eSIM downloads a profile to your phone, so a solid connection matters. Install at home before you travel.
You have your QR code
After you buy a plan, the QR code and details arrive by email and appear in the Vignetim app.
One thing to know before you scan: A travel eSIM's data allowance usually starts when you first connect to a network at your destination, not the moment you install it. So it is safe to set everything up at home and simply switch it on when you land. Check your plan's terms if timing matters for your trip.
How to Activate an eSIM on iPhone (iOS)
The fastest route is the Camera. Open the Camera app, point it at your QR code, and tap the Cellular Plan Detected banner that appears. If you prefer to do it from Settings, follow these steps:
1
Open Settings
Open Settings and tap Cellular (or Mobile Service).
2
Add eSIM
Tap Add eSIM (older versions say Set Up Cellular).
3
Scan your QR code
Tap Use QR Code, then scan the QR code from your email or the Vignetim app. No QR to hand? Tap Enter Details Manually and type the SM-DP+ address and activation code from your confirmation email.
4
Add the plan
Tap Continue, then Add Cellular Plan.
5
Confirm if asked
If you are asked for a confirmation code, enter the one your provider gave you.
6
Label your lines
Name the new line something like "Travel" and your home line "Personal" so you can tell them apart.
7
Choose your data line
Choose which line to use for mobile data. Pick the new travel eSIM. Keep your home line for calls and texts so your number stays reachable.
To confirm it worked, go to Settings › Cellular and make sure the new line, listed under eSIMs, is switched on.
How to Activate an eSIM on Android
Android menus vary a little by brand, but the flow is the same: open the SIM settings, download the eSIM, and scan your QR code. Make sure you are on Wi-Fi first.
1
Open Settings
Open Settings and go to Network & internet (on Samsung, Connections).
2
Download a SIM
Tap SIMs, then Download a SIM instead. On Samsung, tap SIM manager, then Add eSIM.
3
Scan your QR code
Tap Next, then scan the QR code from your email or the Vignetim app. If scanning is not available, choose to enter the code manually and paste the details from your email.
4
Download the profile
Tap Download and wait a few seconds while the profile installs. Stay on Wi-Fi and do not close the screen until it finishes.
5
Name the eSIM
When prompted, name the eSIM (for example "Travel") and confirm.
To check it installed, return to Settings › Network & internet › SIMs (or SIM manager). Your travel eSIM should now sit alongside your normal SIM.
Common device paths:
Google Pixel: Settings › Network & internet › SIMs › Download a SIM instead
This is the single most common reason a new eSIM shows no data abroad. A travel eSIM uses partner networks in your destination, so it needs data roaming switched on for that line.
Turning it on for your travel eSIM does not affect your home SIM, and it will not trigger your home operator's roaming charges as long as your home line's roaming stays off.
iPhone
Settings › Cellular › tap your travel eSIM line › turn on Data Roaming
Samsung
Settings › Connections › Mobile networks › turn on Data roaming (with the eSIM selected)
Google Pixel
Settings › Network & internet › SIMs › tap your eSIM › turn on Roaming
Then set your travel eSIM as the line for mobile data, and you are connected.
eSIM Not Working? Quick Fixes
If your eSIM is installed but you have no data once you arrive, work through these in order:
1
Turn on data roaming
For the eSIM line (see above). This solves most no-data cases.
2
Check the eSIM is your data line
In your cellular or SIM settings, set mobile data to the travel eSIM.
3
Toggle Airplane mode
Switch it on and off to force the phone to find a local network.
4
Restart the phone
A restart after landing helps the phone register with a partner network.
5
Select a network manually
If your phone has not connected automatically, pick a network in the mobile network settings.
6
Still stuck?
Message 24/7 support in the Vignetim app, and we will walk you through it.
One note on QR codes: An eSIM QR can usually be installed only once. If you delete the profile, you may need a fresh QR code rather than rescanning the old one.
Frequently Asked Questions
How do I activate my eSIM?
Install it, then switch it on. Scan the QR code from your confirmation email (Settings › Cellular › Add eSIM on iPhone, or Settings › SIMs › Download a SIM on Android), set the eSIM as your data line, and turn on data roaming for it. The whole process takes a few minutes.
Do I scan the QR code with my camera?
On iPhone, yes: the Camera app detects the QR code and offers to add the plan. On Android, you scan the QR from inside the SIM settings after tapping "Download a SIM" or "Add eSIM". If you cannot scan, both systems let you enter the activation details manually instead.
Why is my eSIM not showing any data abroad?
The usual cause is data roaming being switched off for the eSIM line. Turn on Data Roaming for your travel eSIM (not your home SIM), make sure the eSIM is set as your mobile data line, then toggle Airplane mode or restart the phone. This fixes the large majority of no-data cases.
Can I install an eSIM without a QR code?
Yes. Both iPhone and Android let you enter the details manually. Choose "Enter Details Manually" (iPhone) or the manual option (Android) and type the SM-DP+ address and activation code from your confirmation email.
Will activating an eSIM affect my normal SIM and phone number?
No. Your physical SIM keeps working for calls and texts, so your number stays reachable. The eSIM simply runs your travel data alongside it. Keep your home line's data roaming off to avoid your operator's charges.
When does my travel data start counting?
For most travel plans, the allowance starts when you first connect to a network at your destination, not when you install the eSIM at home. That is why you can set everything up in advance and only switch it on when you land. Check your plan's terms to be sure.
Ready to Get Connected?
Buy your plan, scan the code, and land with data that works from the first kilometre. Setup takes a few minutes, and support is one message away if you need it.
Secure paymentQR code by email in minutesNo subscription, cancel anytime24/7 support